I live in The Netherlands after we moved as a family from South Africa in 2019. I studied Drama and Afrikaans and did my masters in Lexicography. For the longest part of my career, I was a senior publisher in non-fiction, but later on decided to do my own thing. I published 18 books of my own on crafts and crochet, freelanced for three magazines as a crochet and craft designer and gave workshops in crochet all over the country. Since we moved to The Netherlands, I had to find new ways to fill up my tank. So I started to draw and paint again!
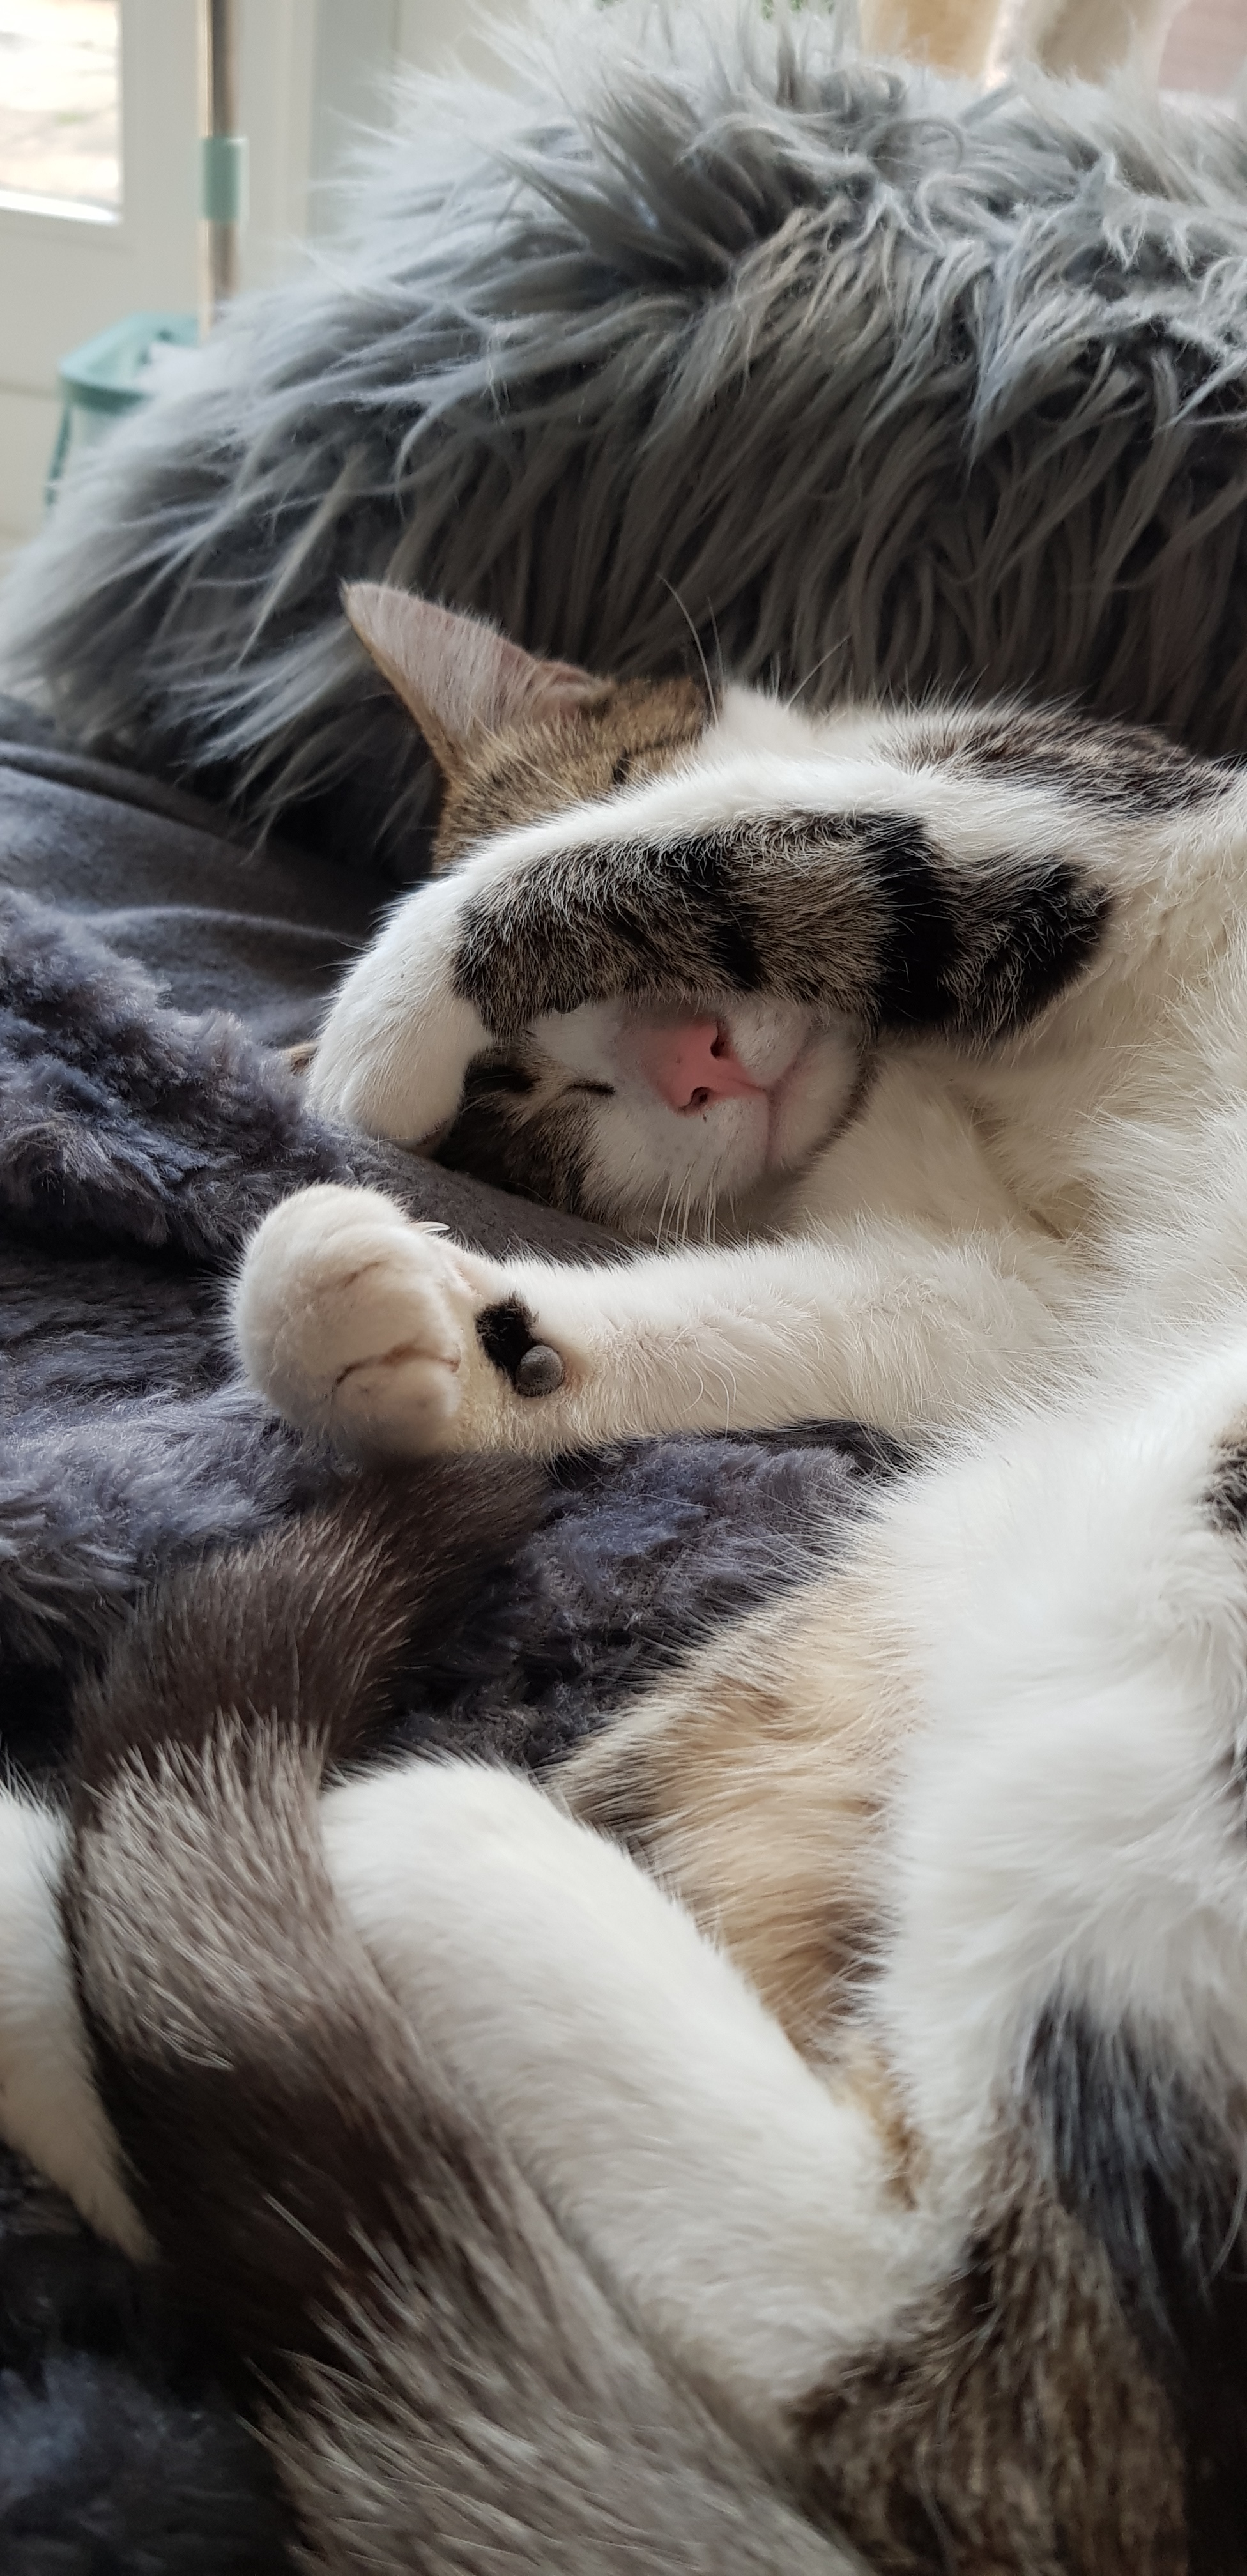
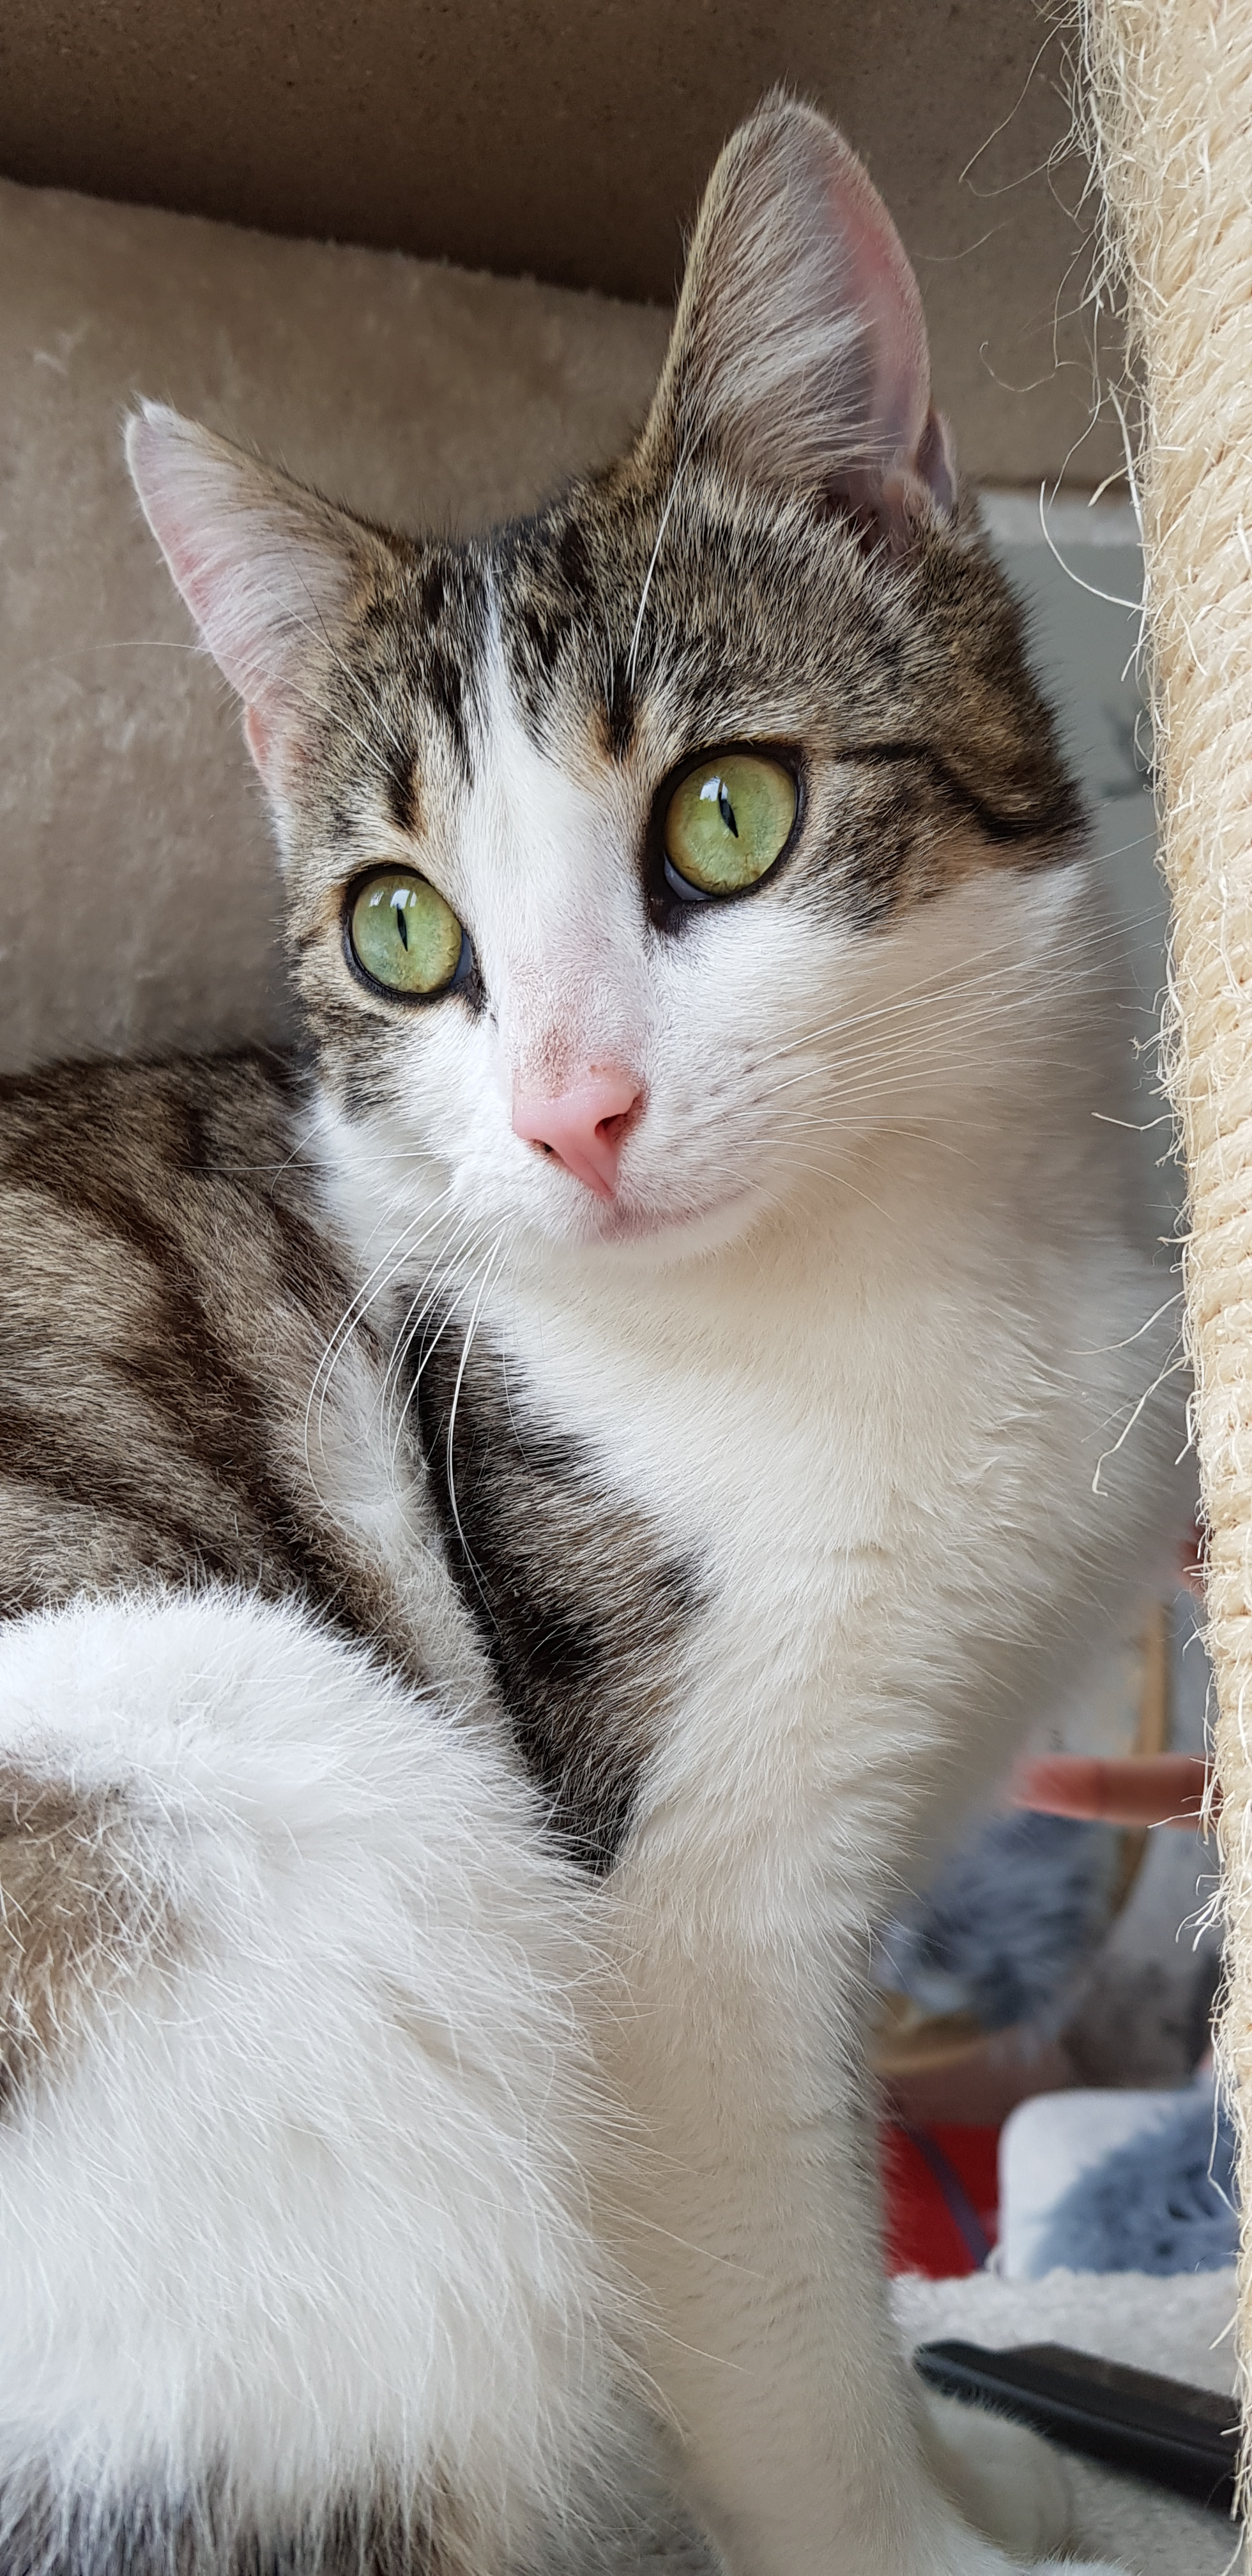
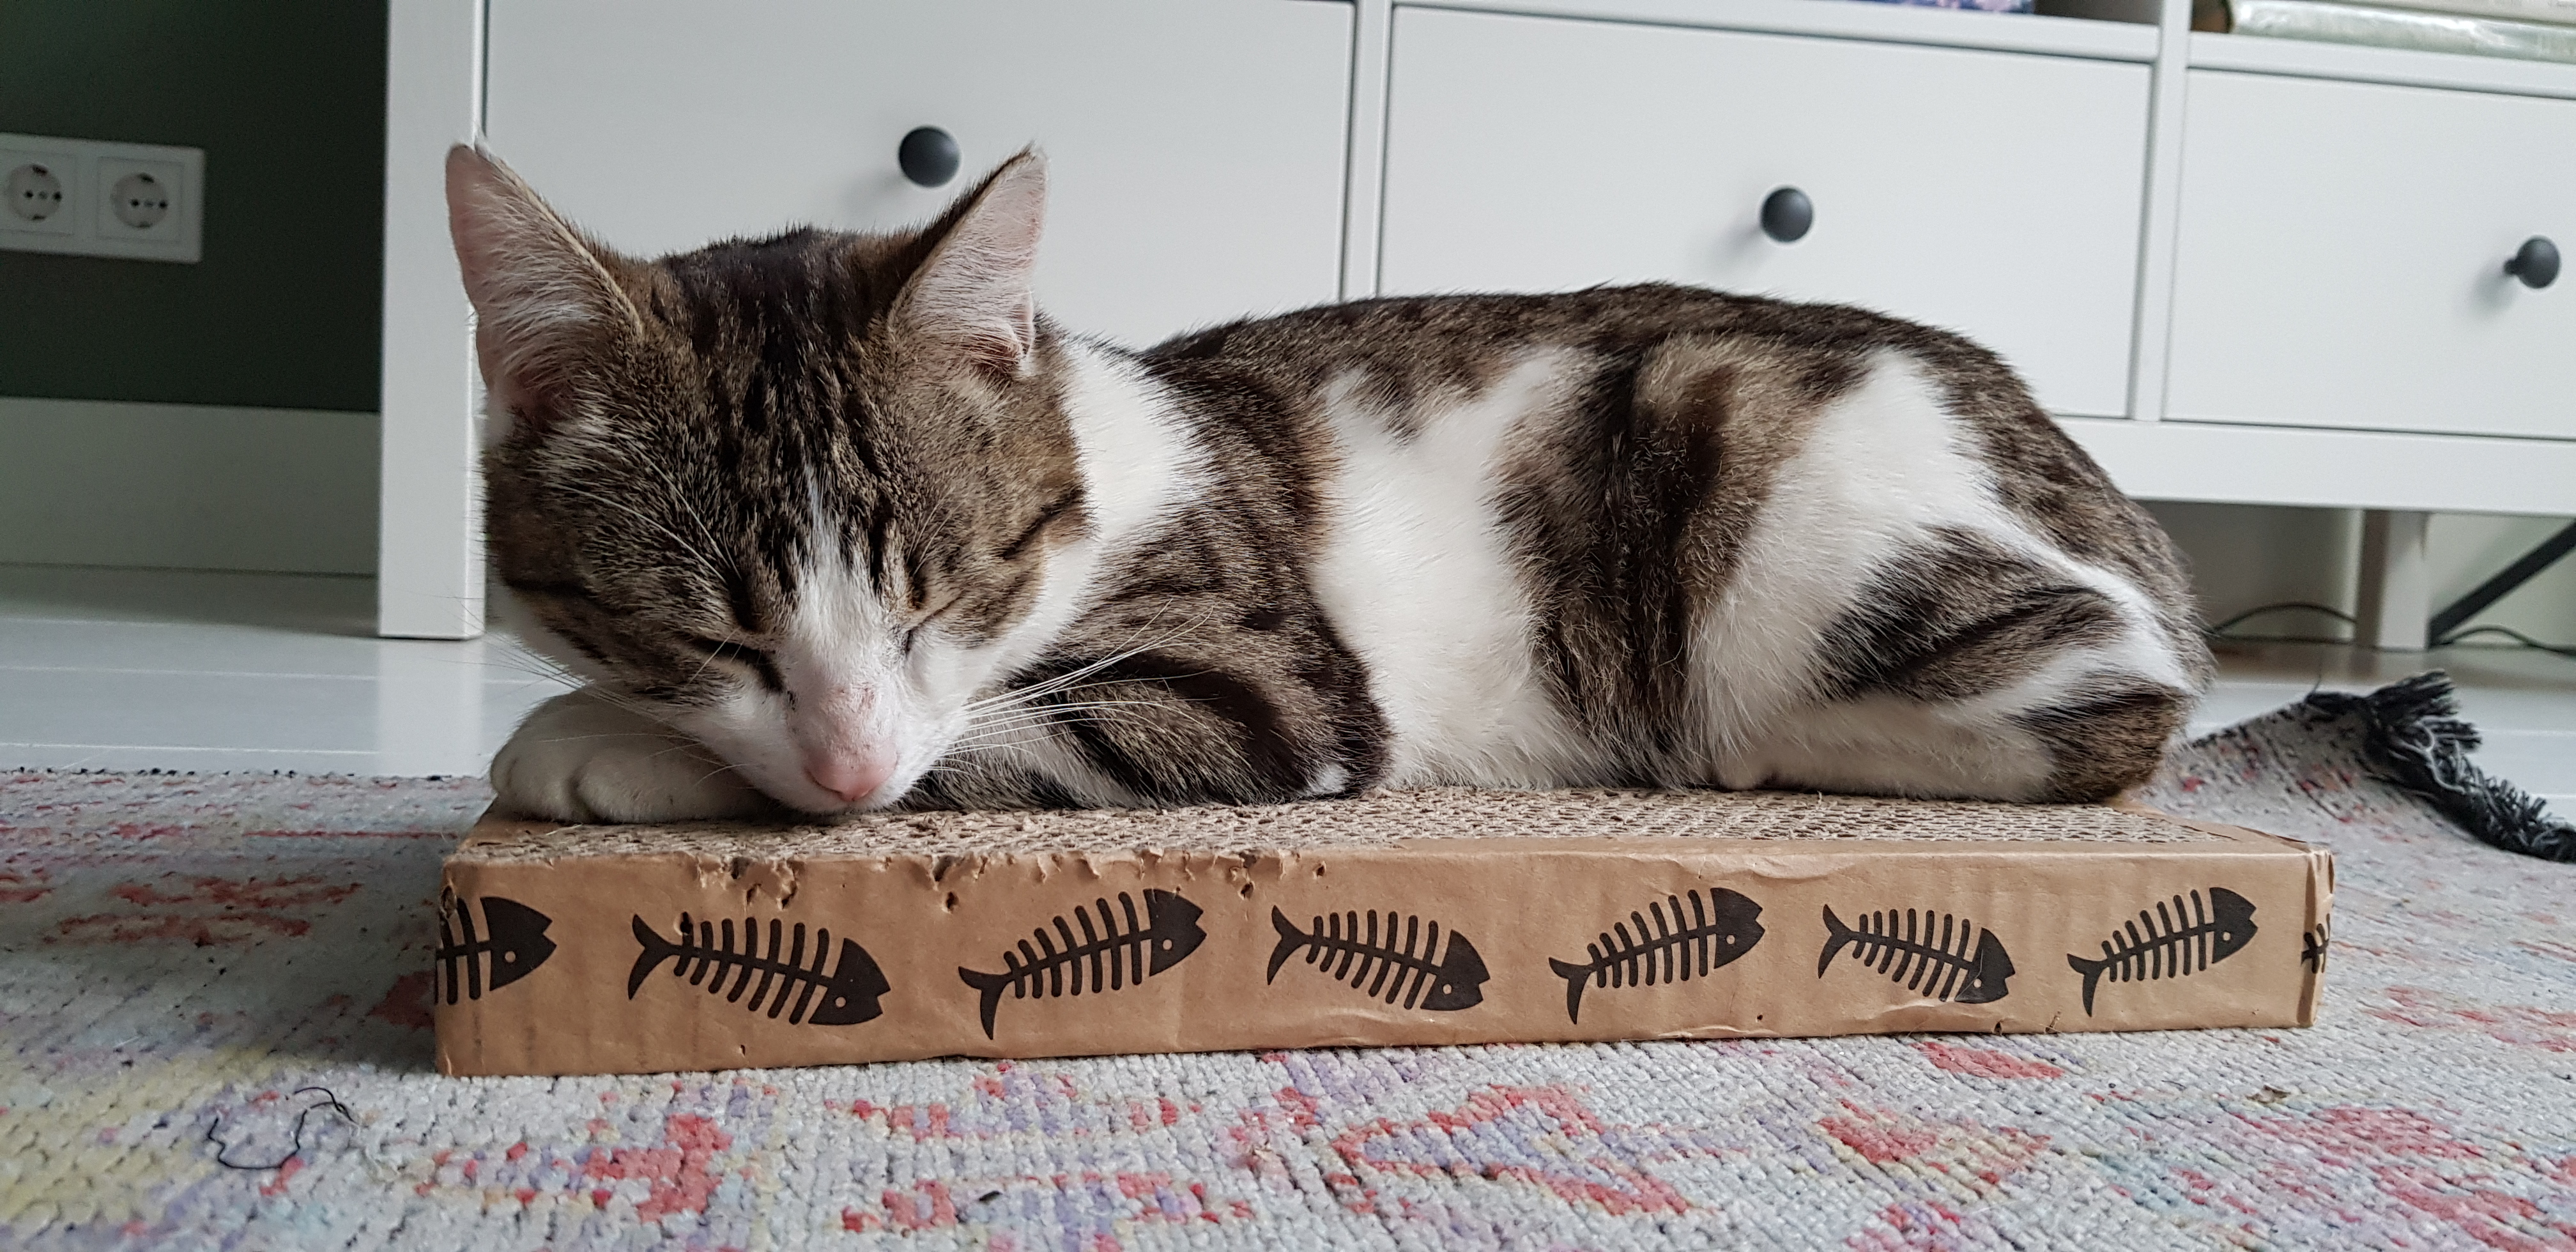
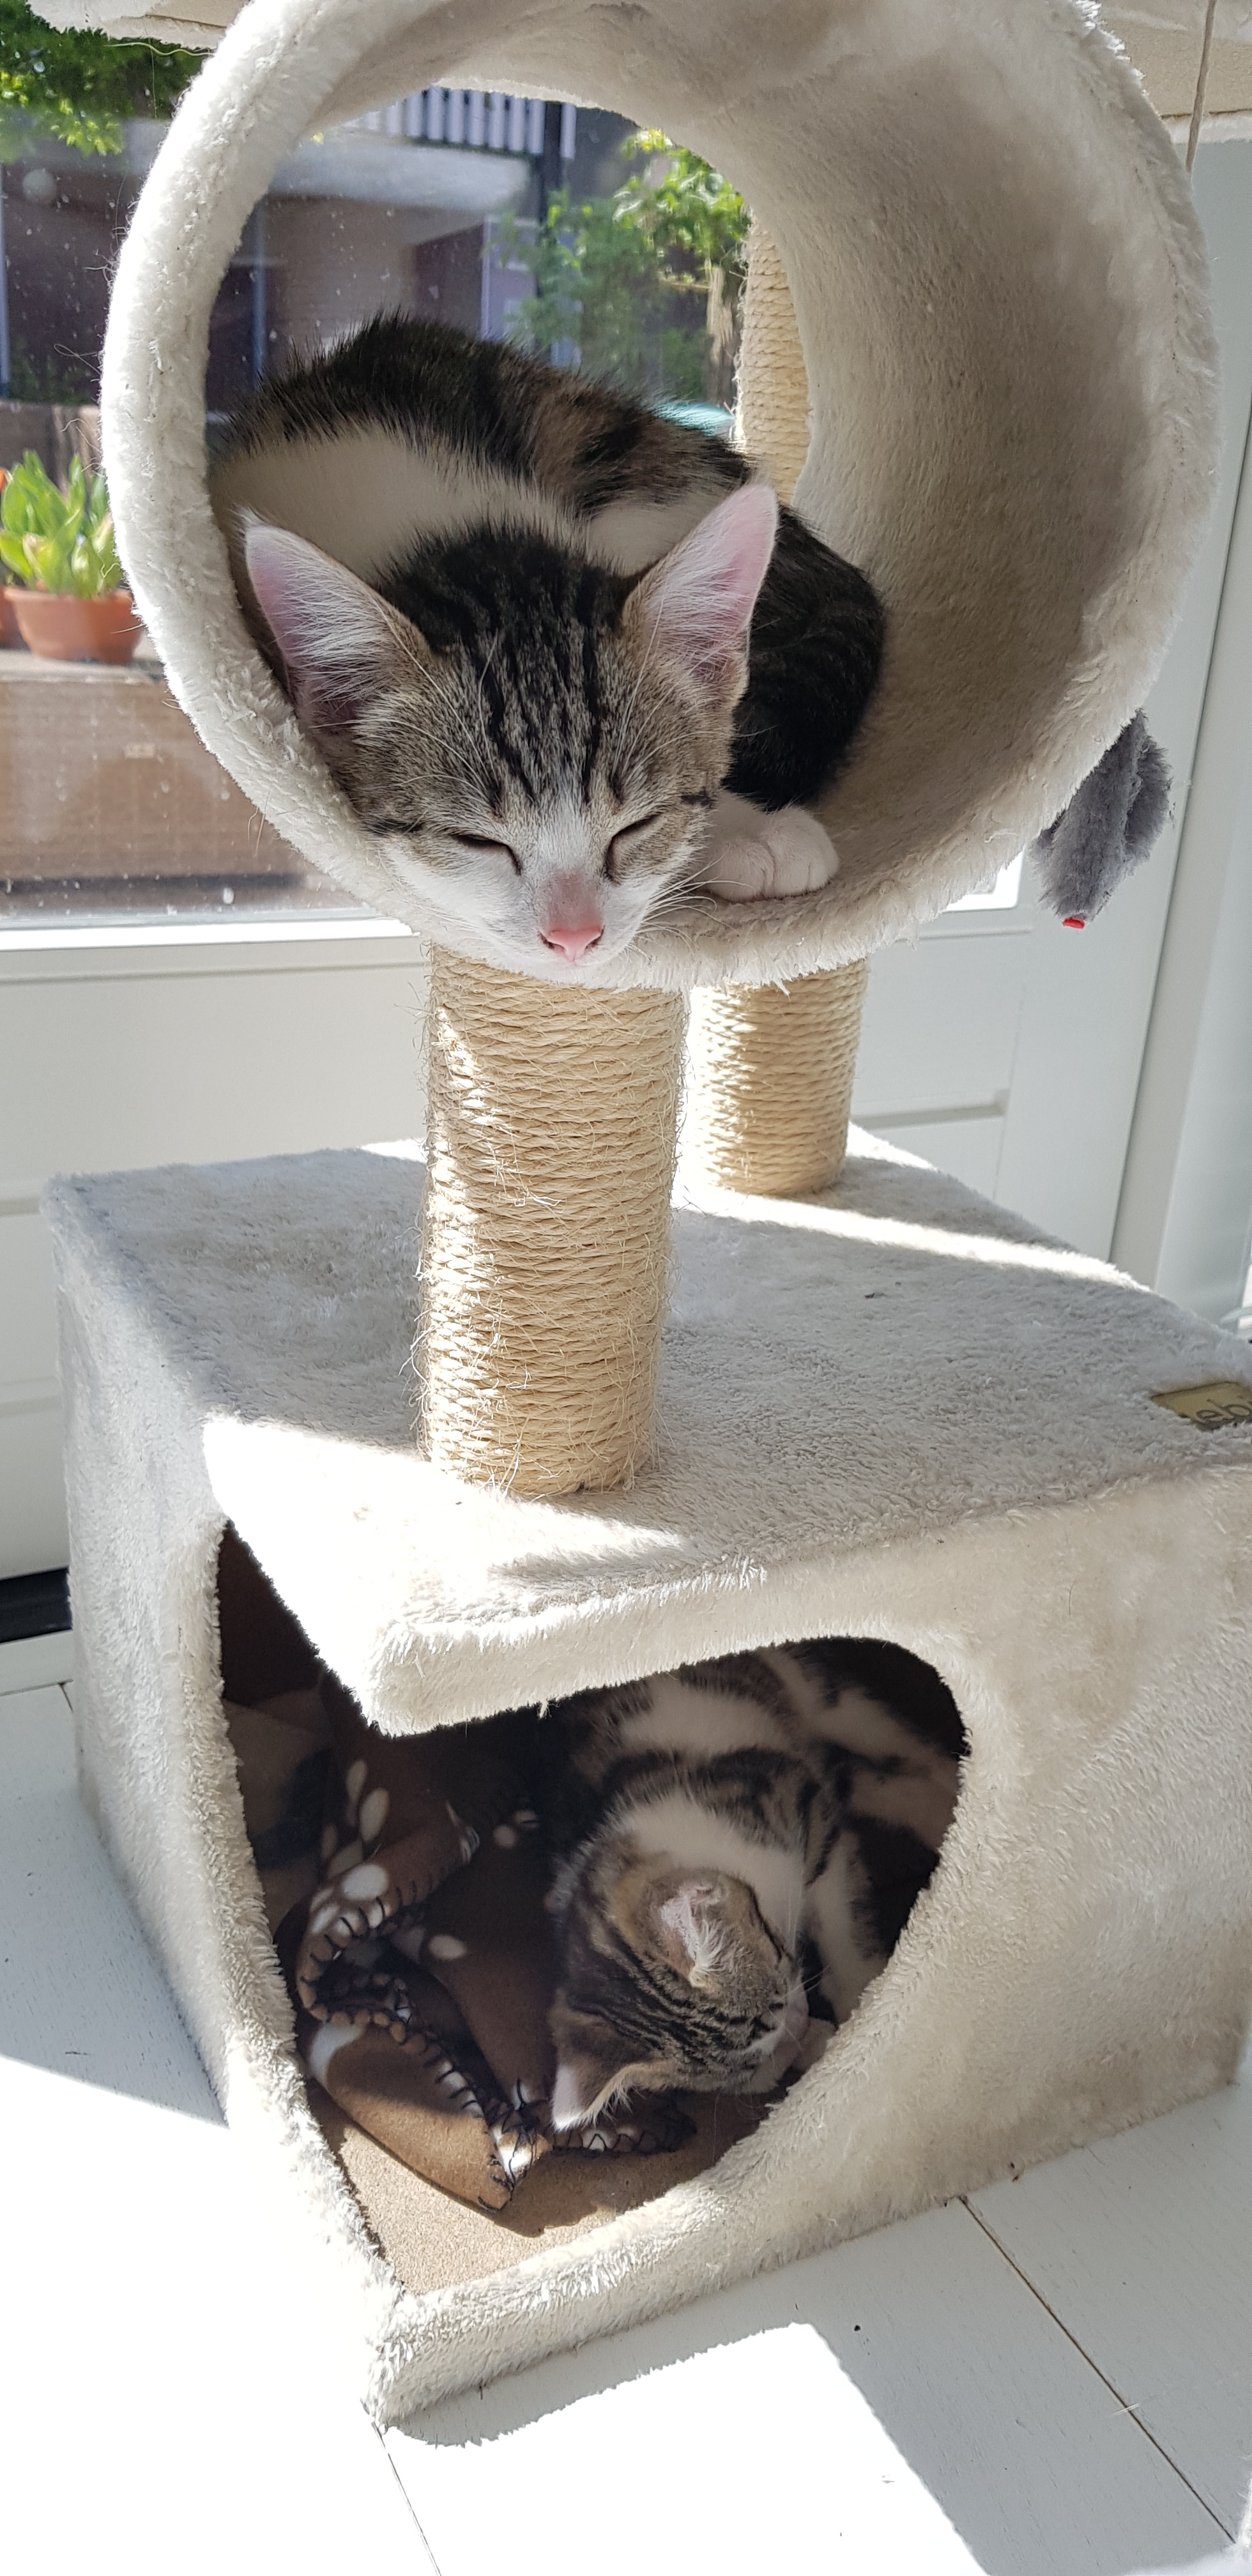
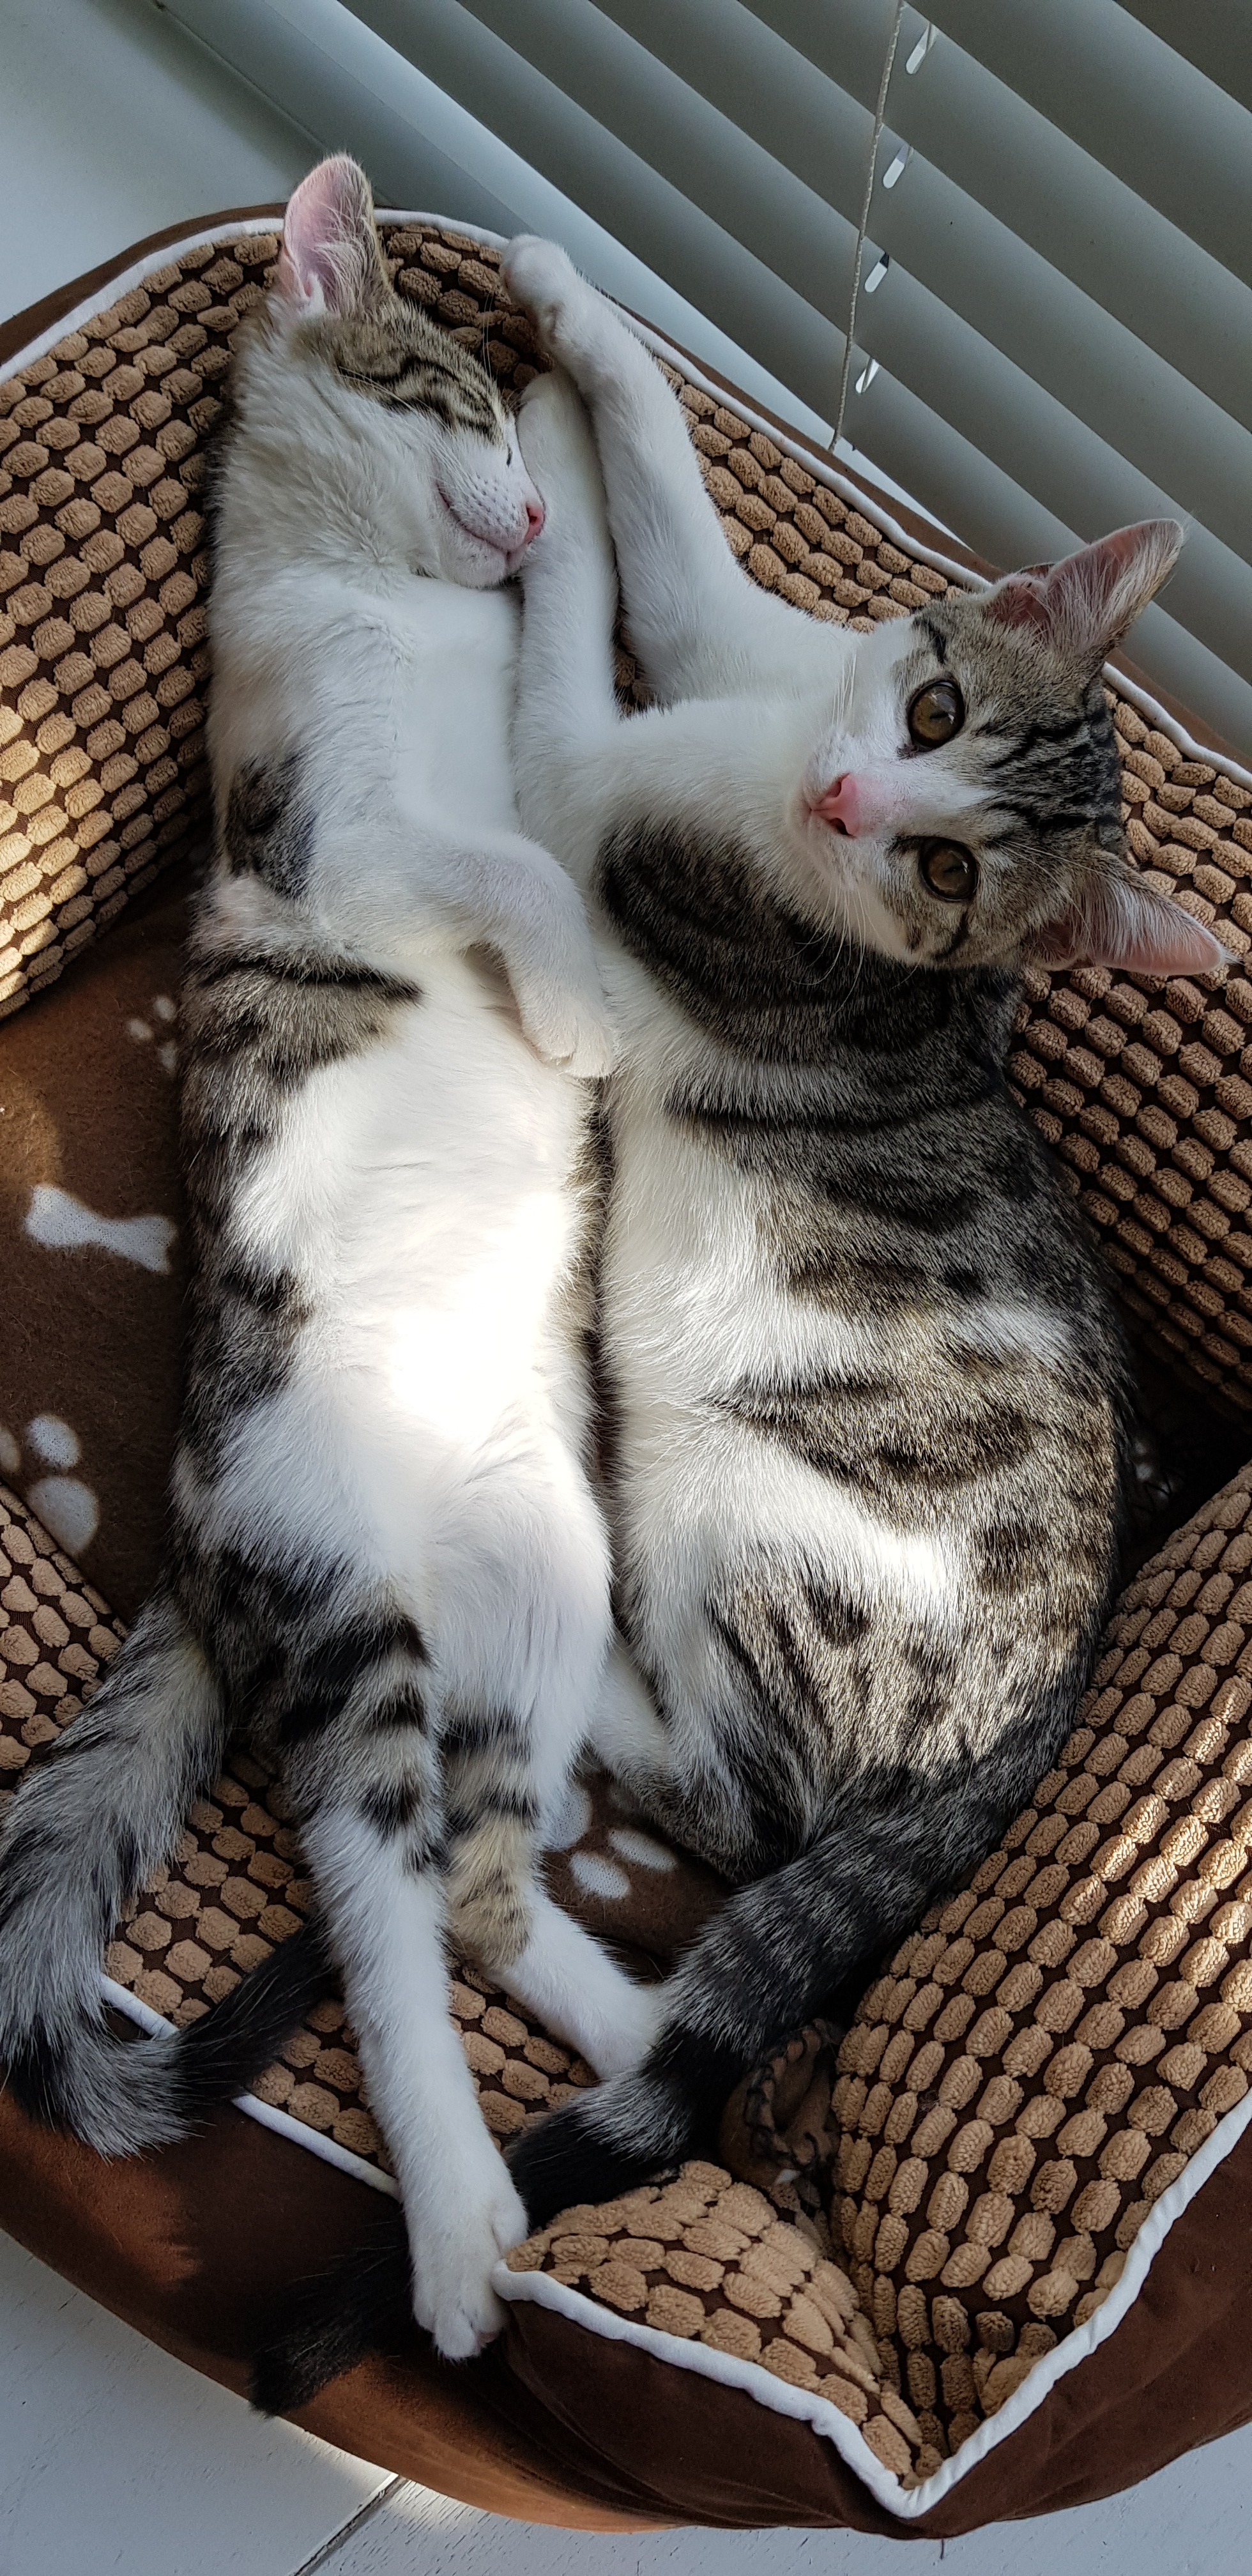
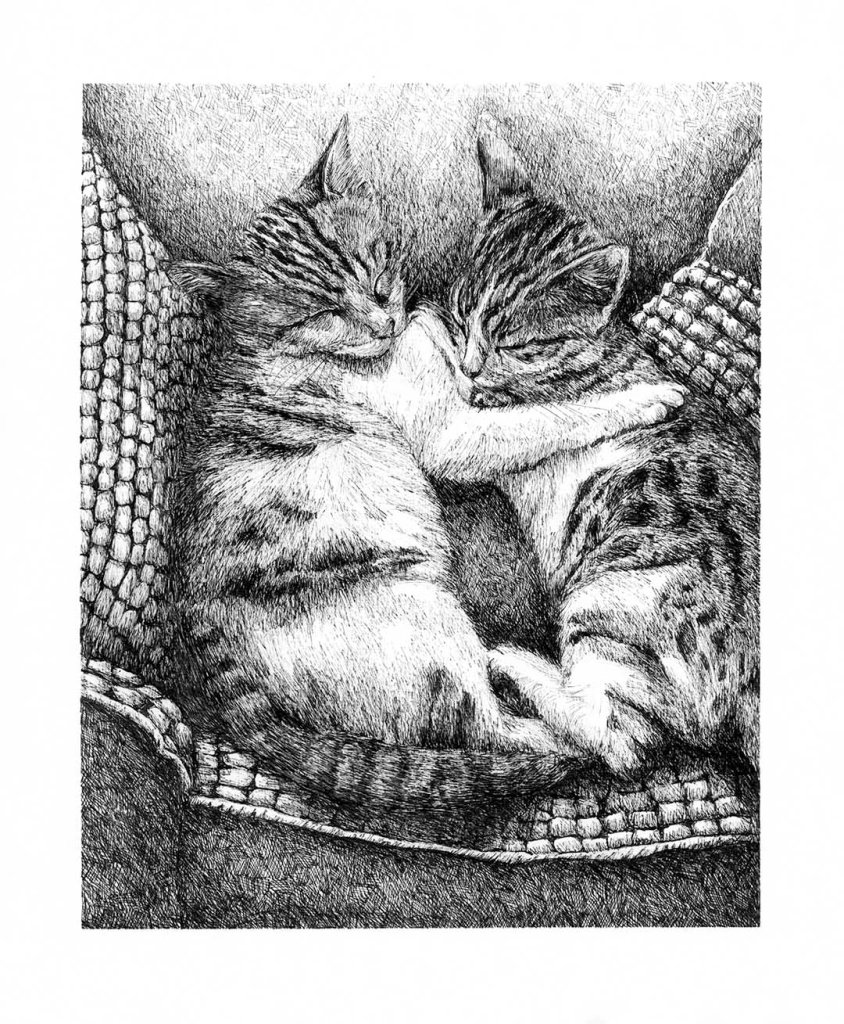
Inktober 52 had a prompt no. 26, called ‘Cuddle’ and I immediately saw a picture of my two cats, cuddling each other. They are sisters that groom each other, sleep together, play together and even give each other space to finish their food. I had so many lovely pictures of these two cuties:
I took up the challenge although I knew that this inking process will take a lot of time and ink to complete. For years I struggled to make peace with the fact that I get caught up in detail. I have tried many courses to loosen up my style, but with no success. My children (teenagers) call my art style ‘no-life’ art, because of the hours that go into it due to the detail or shading. But lately, I have decided that by embracing it and not working against it, my art is better than before and the method of repetition of the detail is extremely relaxing. The art making process becomes a meditation process. By working against my natural tendency towards detail and realism, art creates stress and deprives me of the joy it should give in the first place.
I usually work with A4 200 gsm Fabriano paper and a 0.03 Unipin Fineliner. I have a series of Unipins with worn tips at different degrees. The worn tips give me more options to work towards lighter shading without harsh marks.
This challenge was a first in a long time where I focused on detail like the fur of the cats and the patterns. I loved the process and I think the love for my two cats showed in the final artwork. Inktober also listed it as their favorite on Instagram.
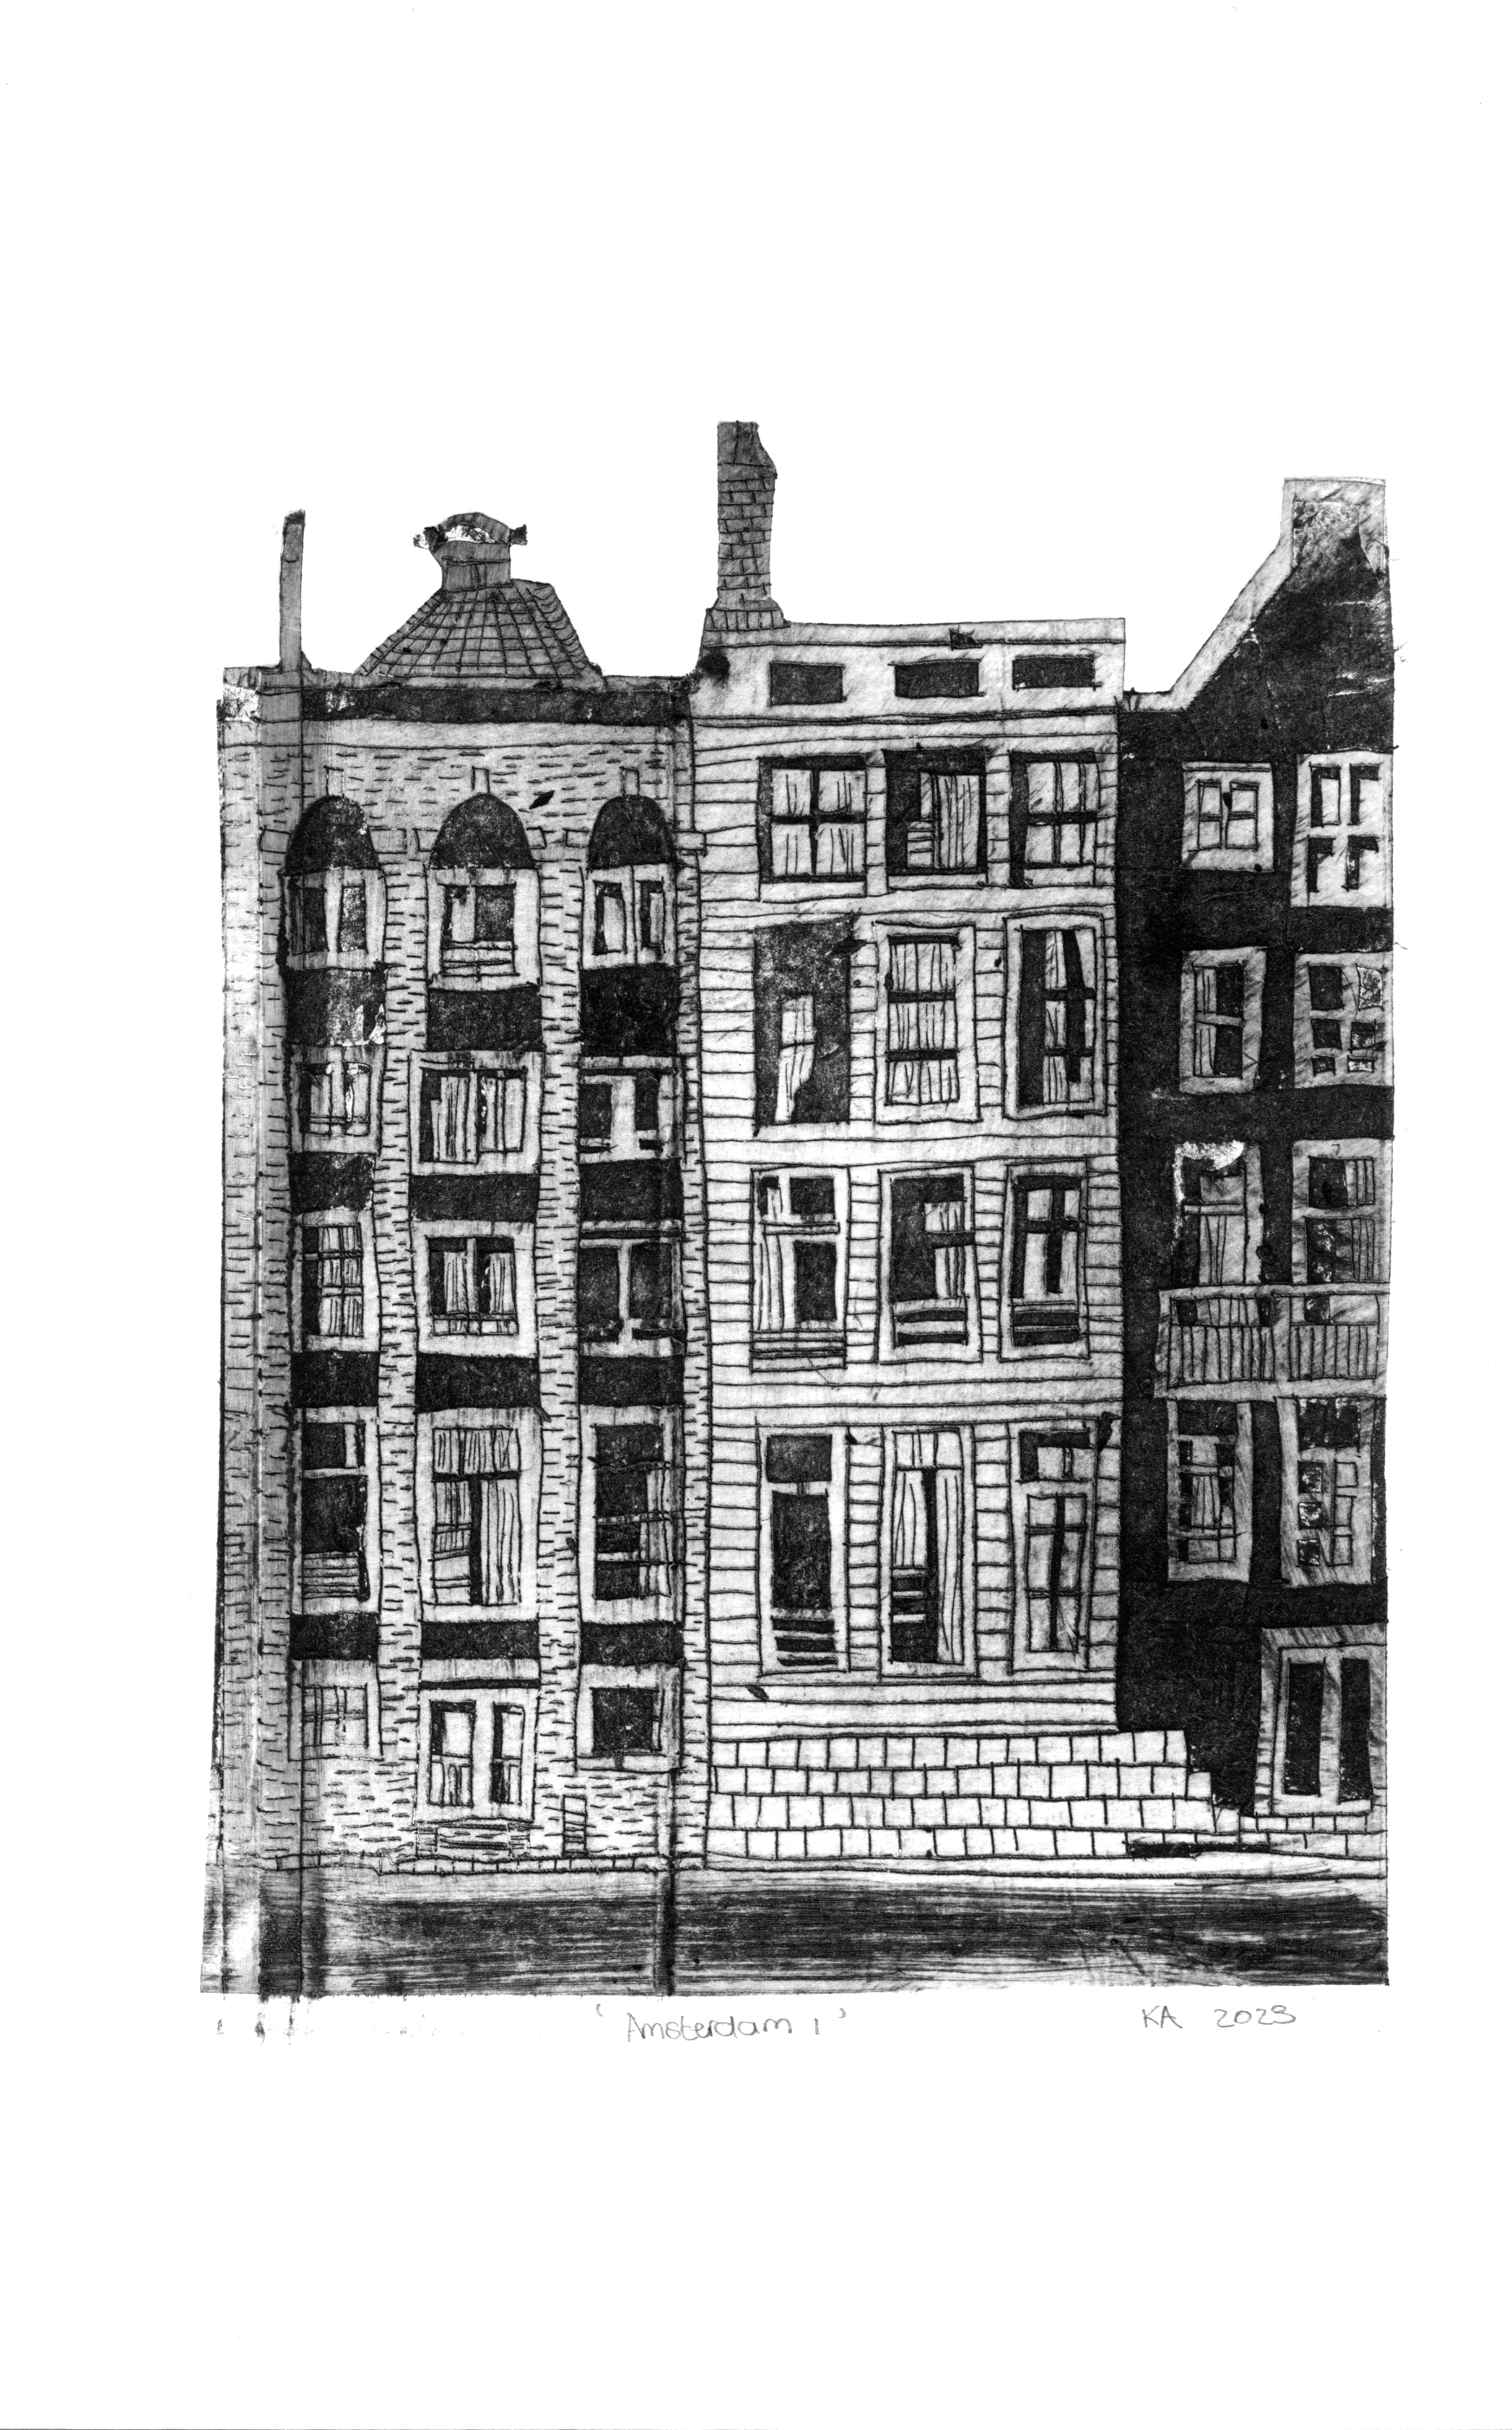
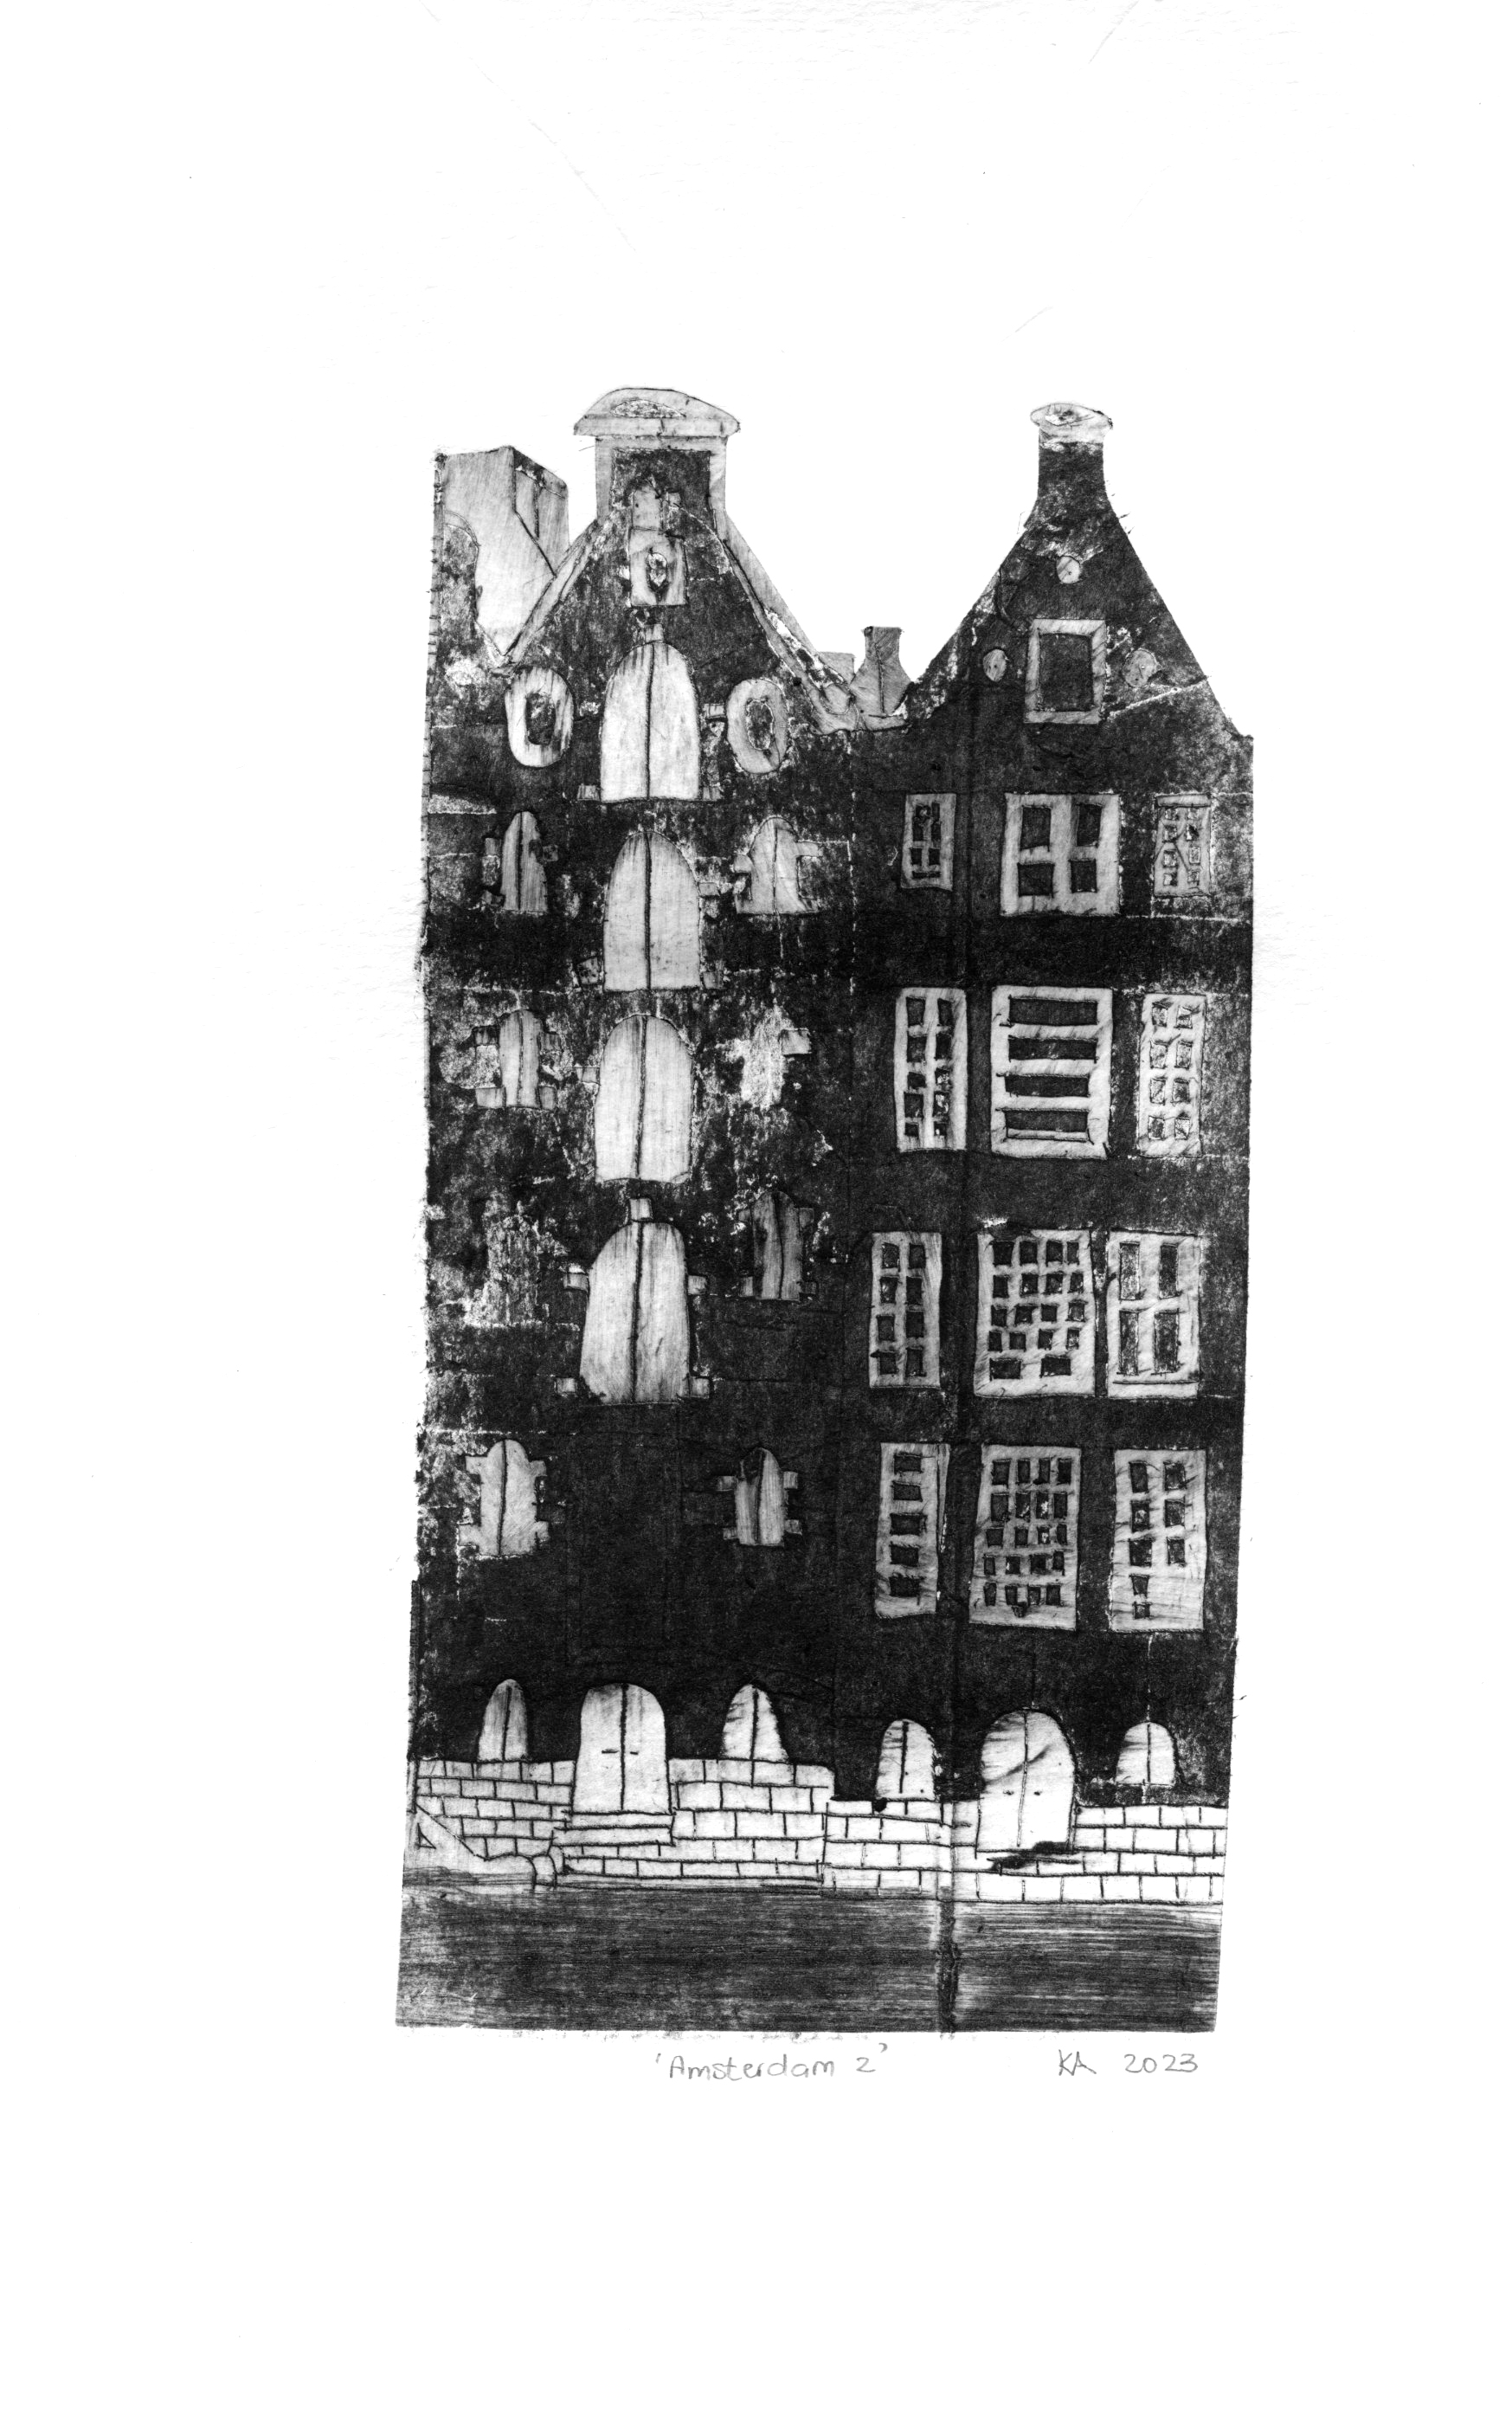
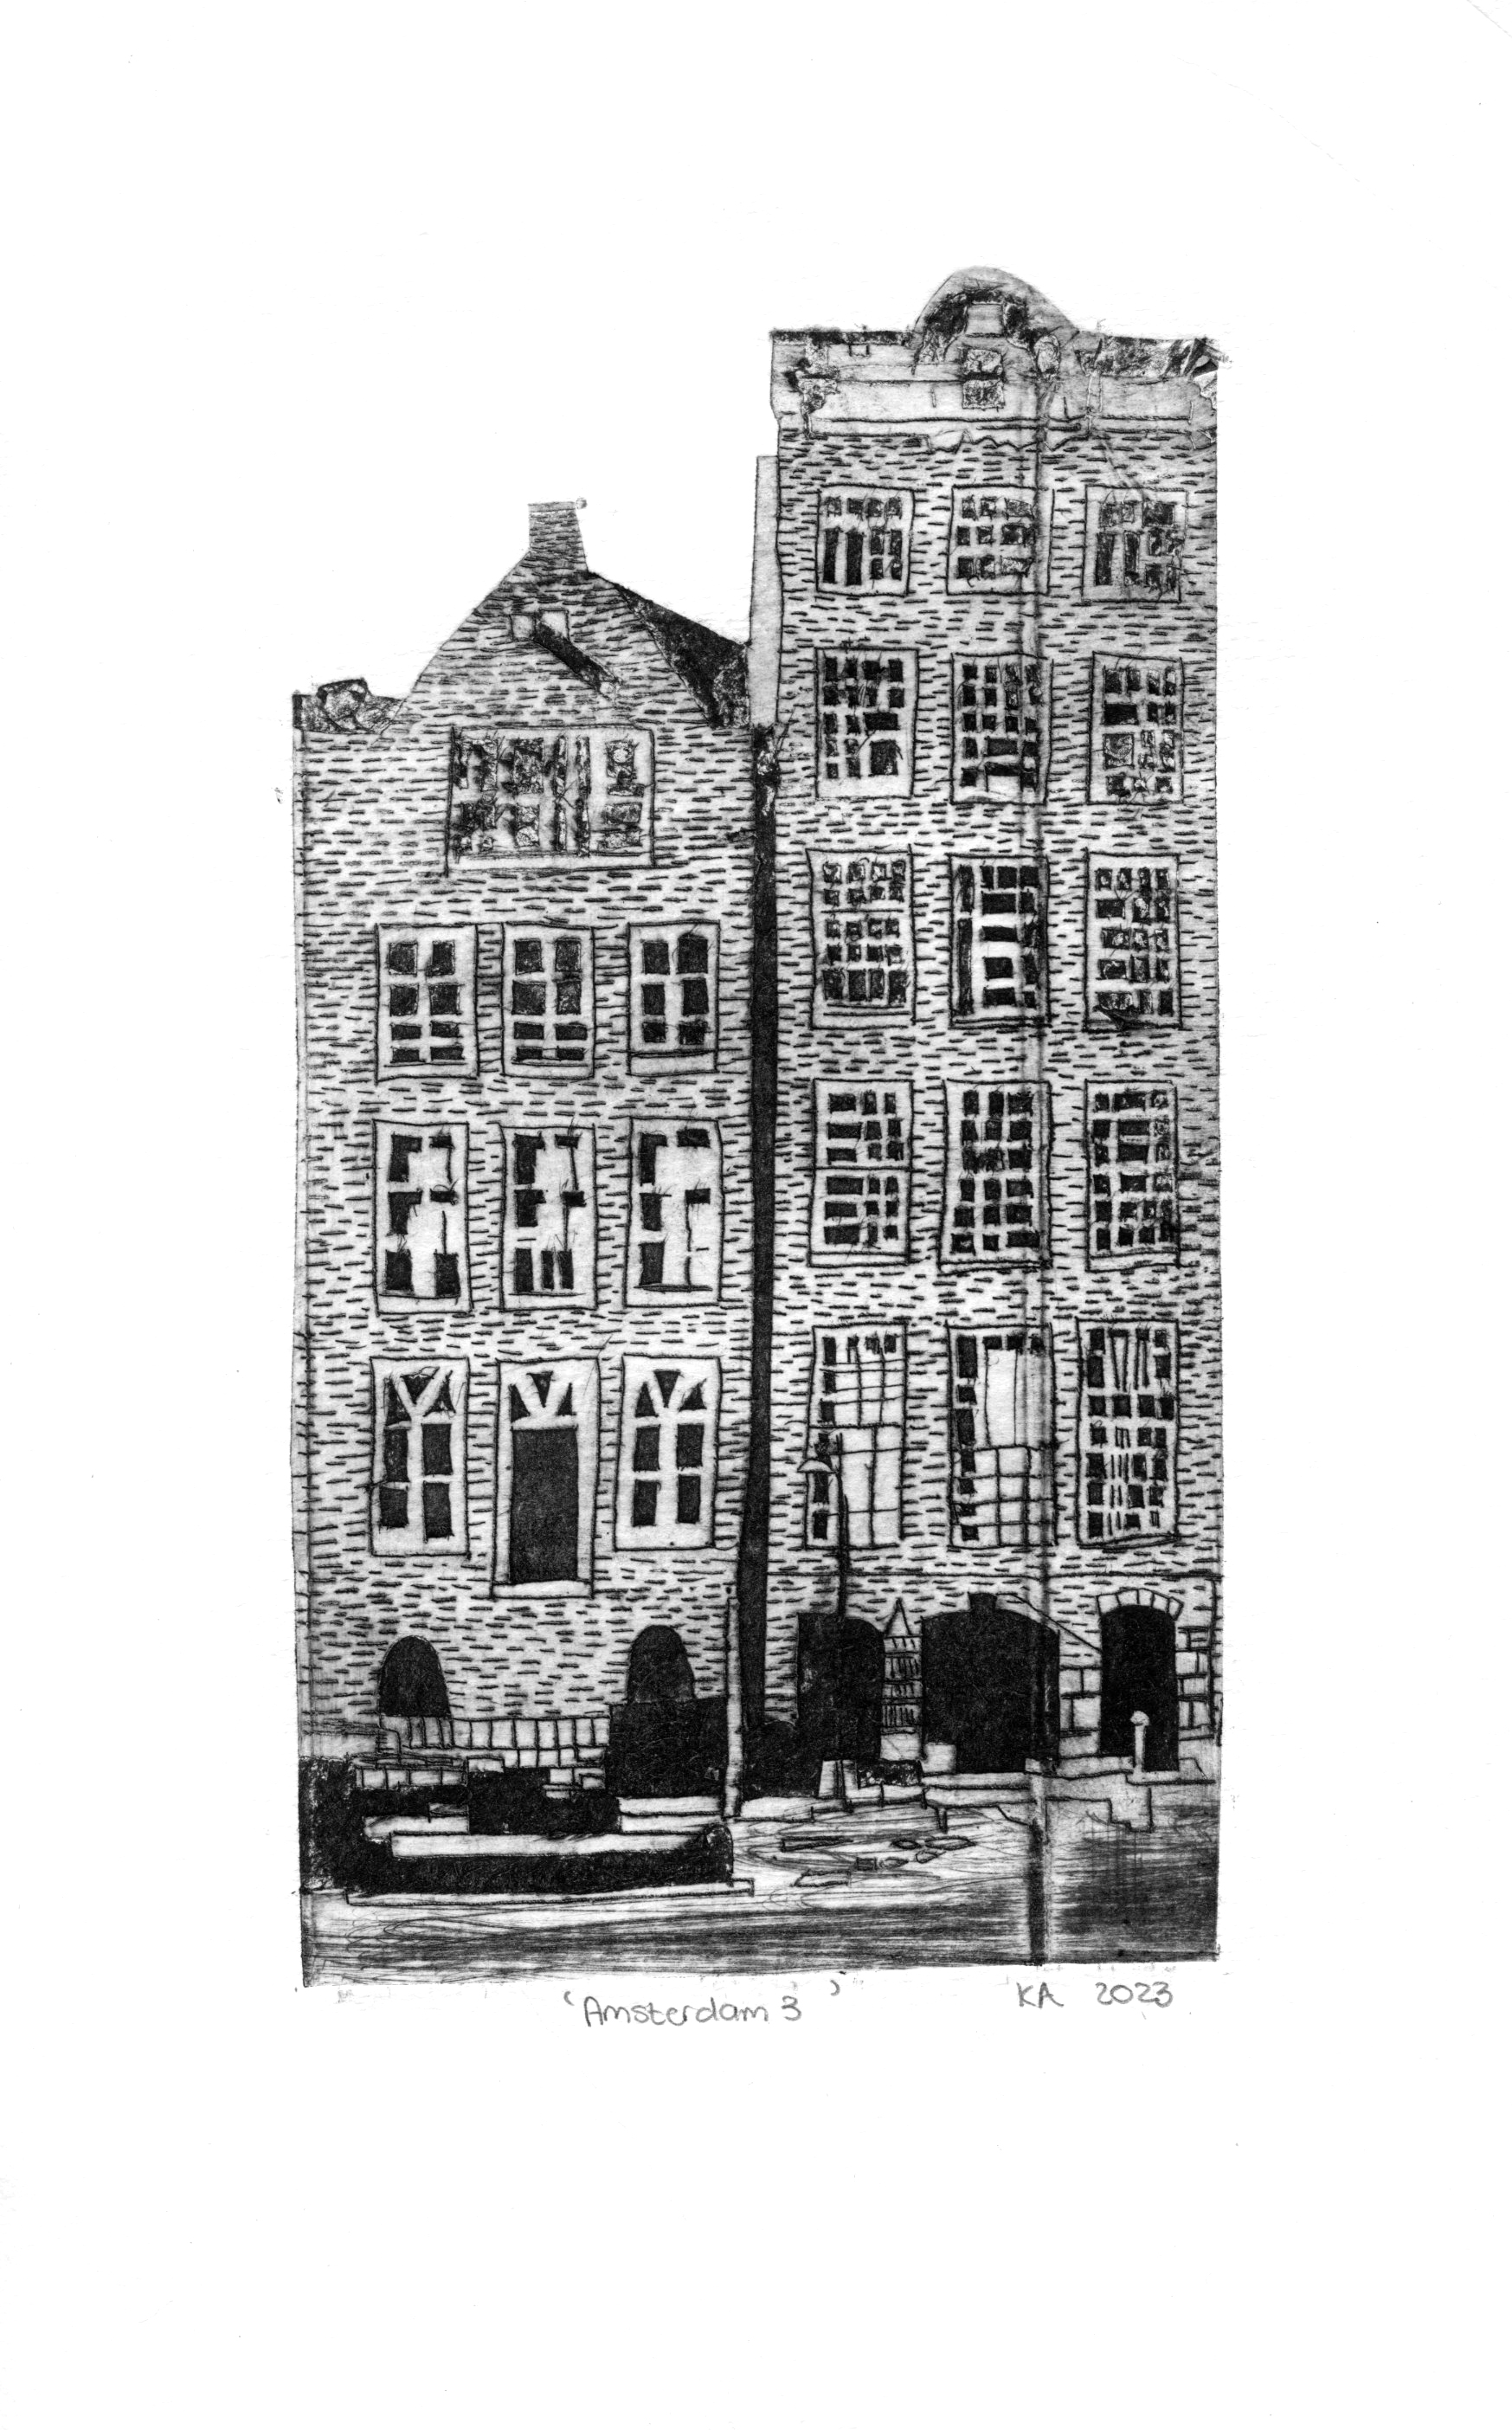
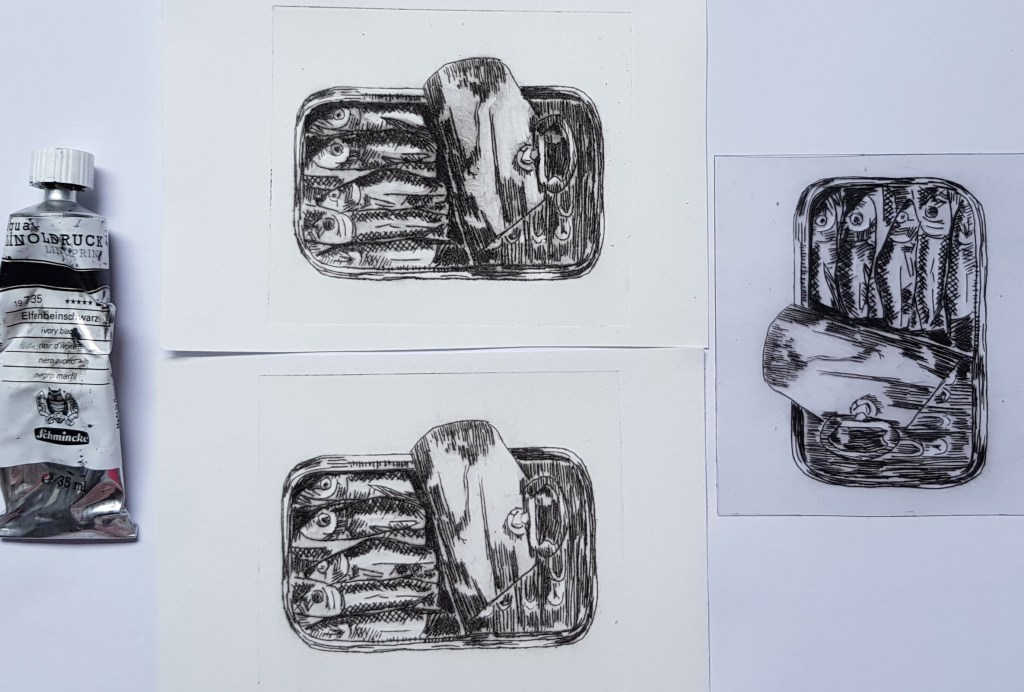
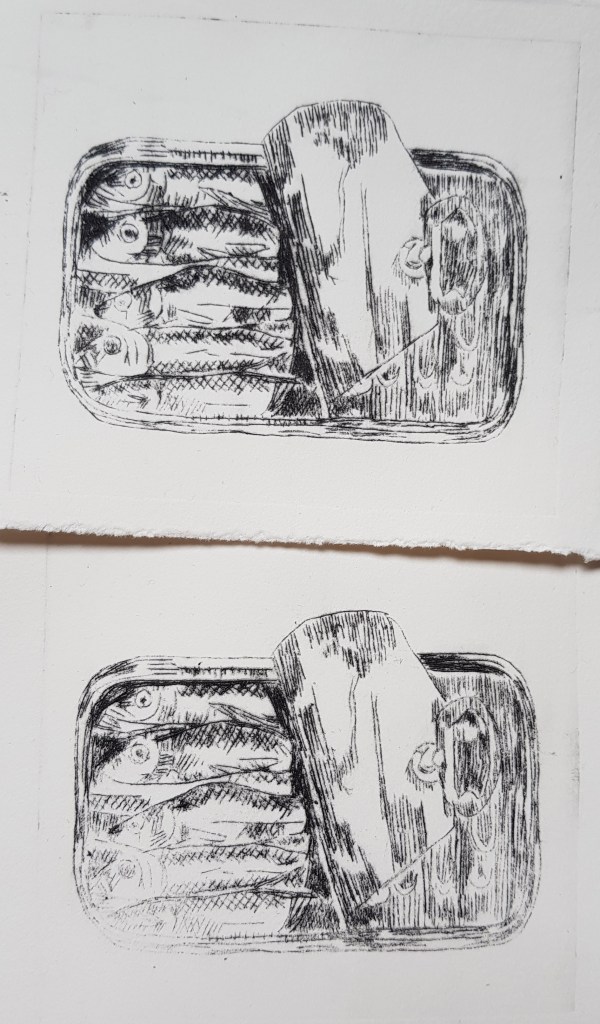
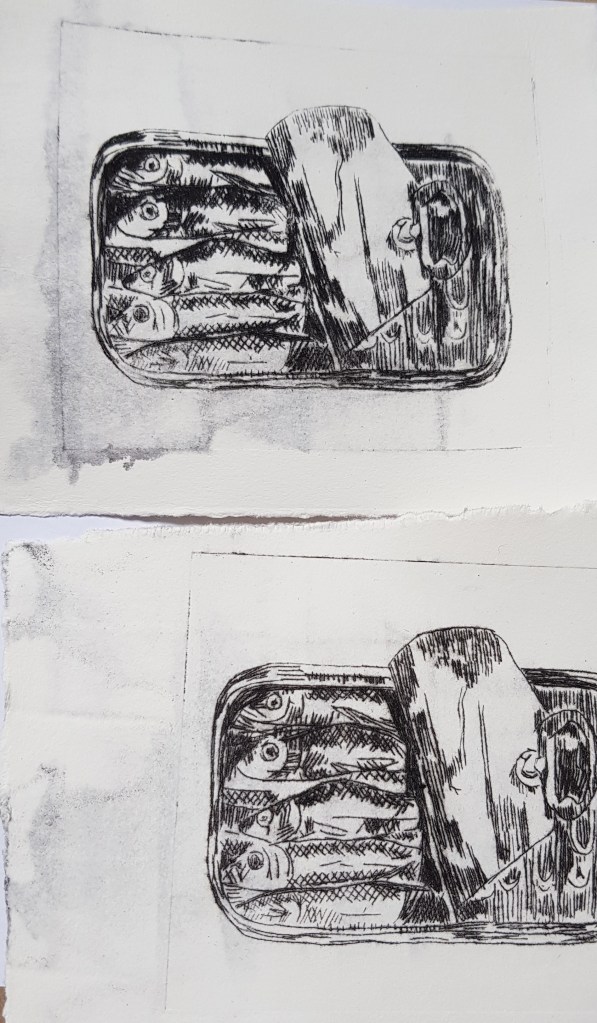
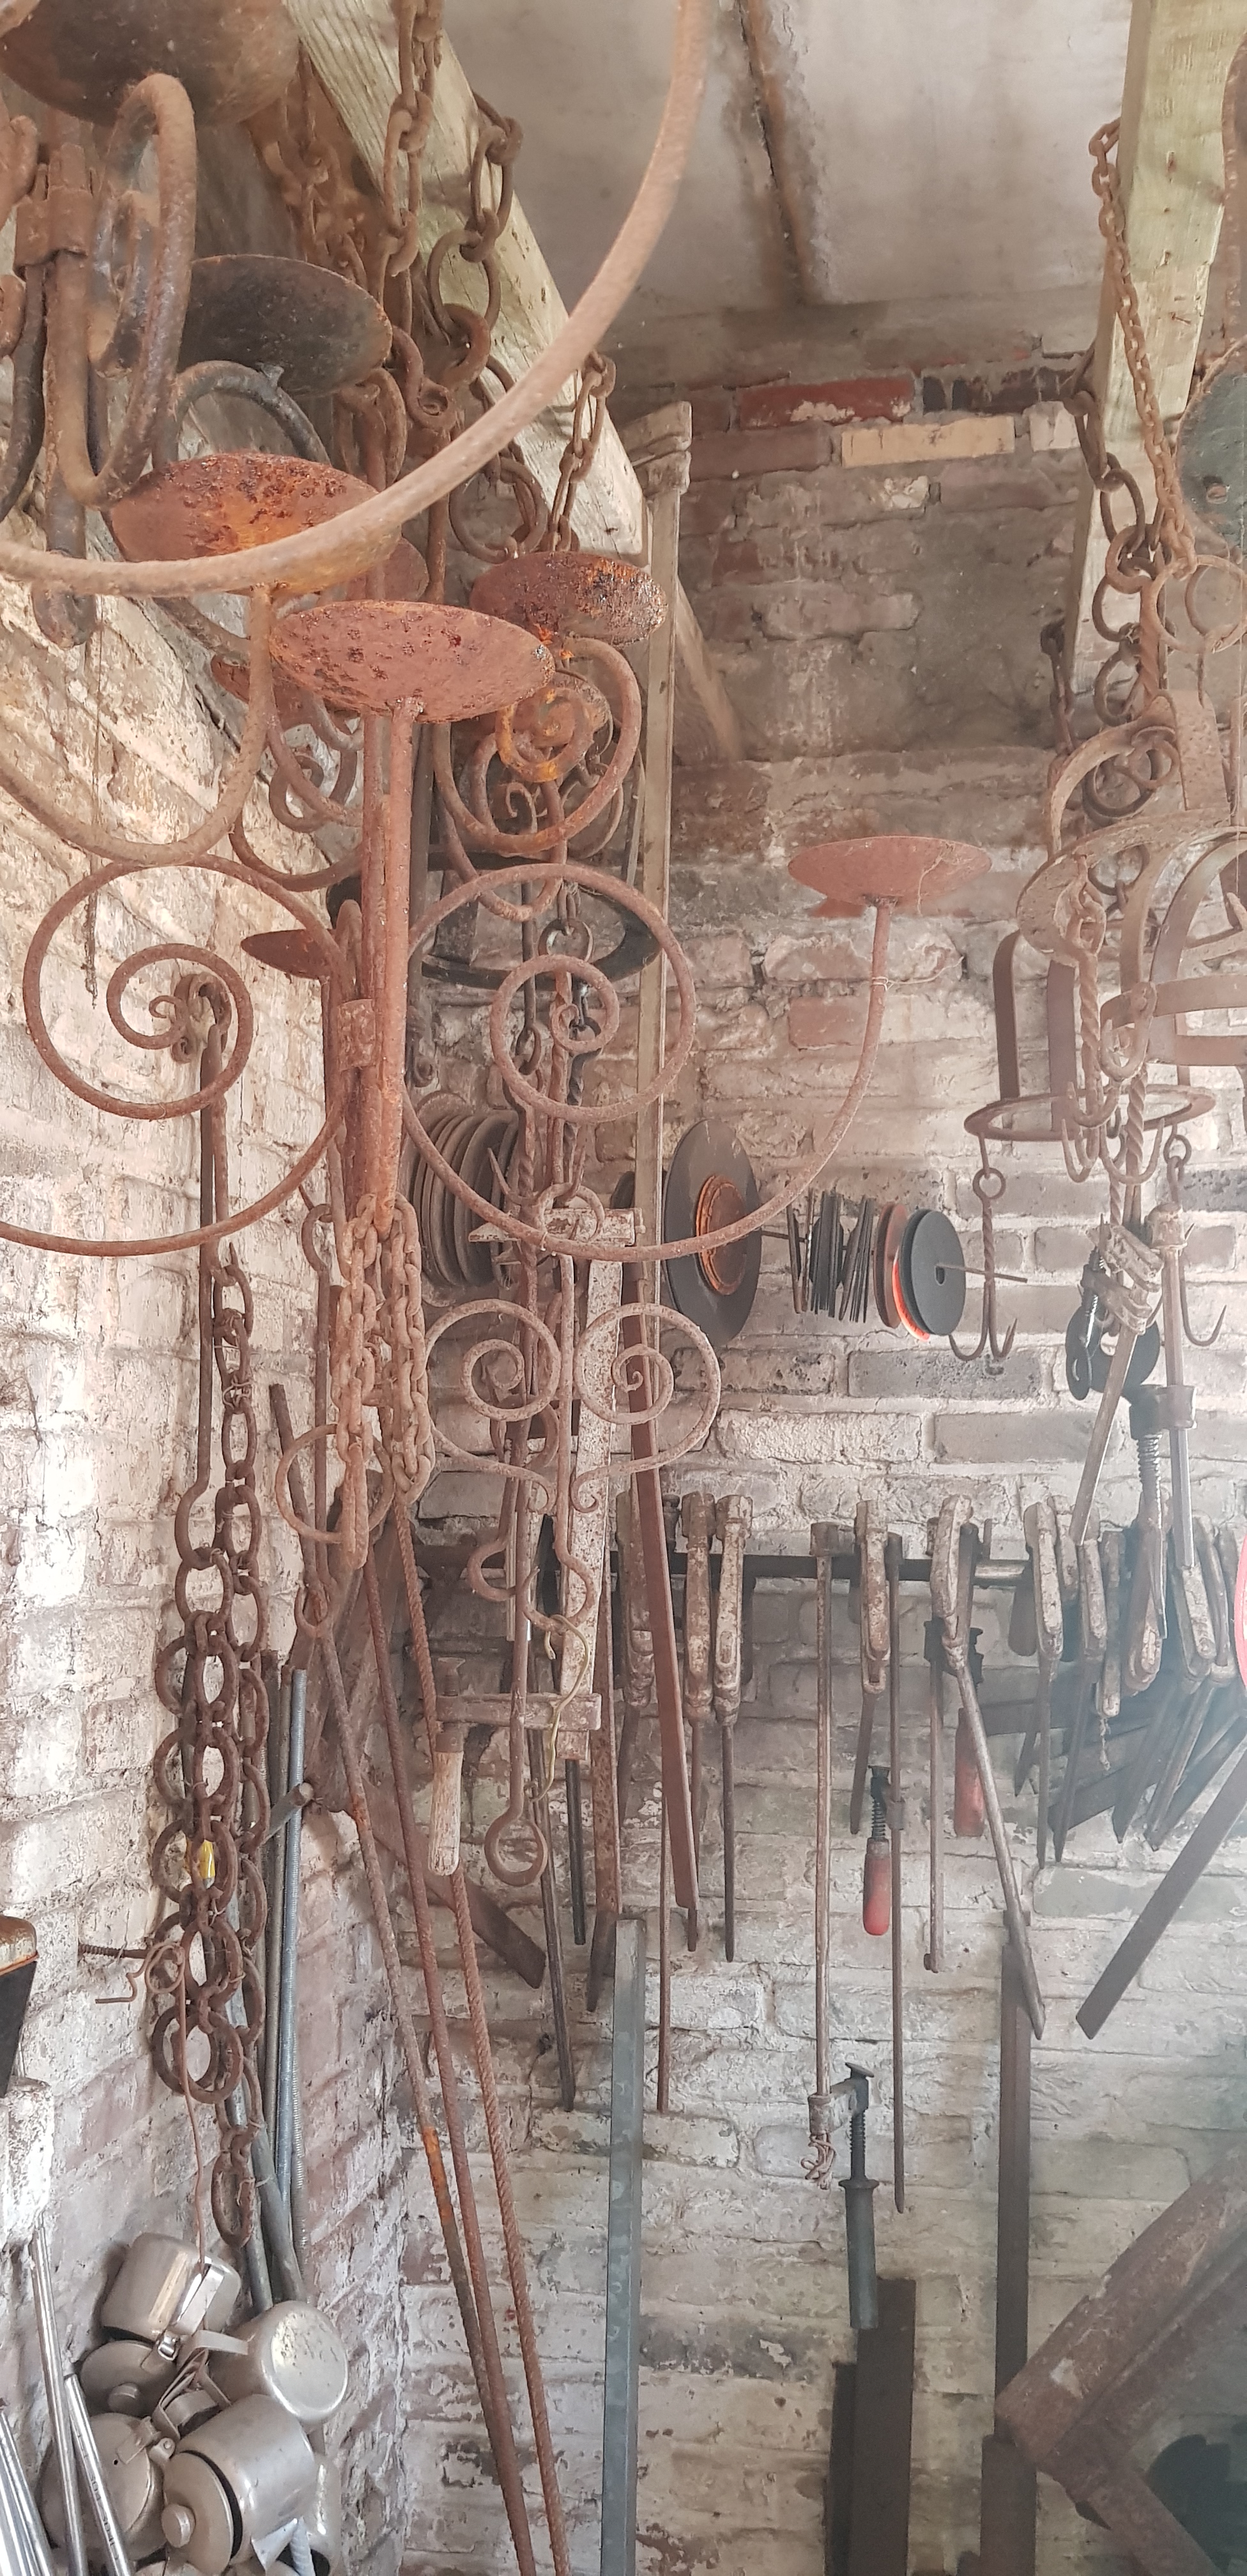
As with my previous tutorial on printing with plastic containers and a pasta machine, drypoint printing can also be done with milk cartons. It is also an exciting printing process and good for the environment.
It basically works the same way as with the plastic. Grooves are made into the silver foil of the milk cartons and the ink, when rubbed across the surface, stays in the grooves while the rest is wiped away. Once again, if you do not have an etching press, the pasta machine works just as well as the press.
What you need:
Sketch/photograph
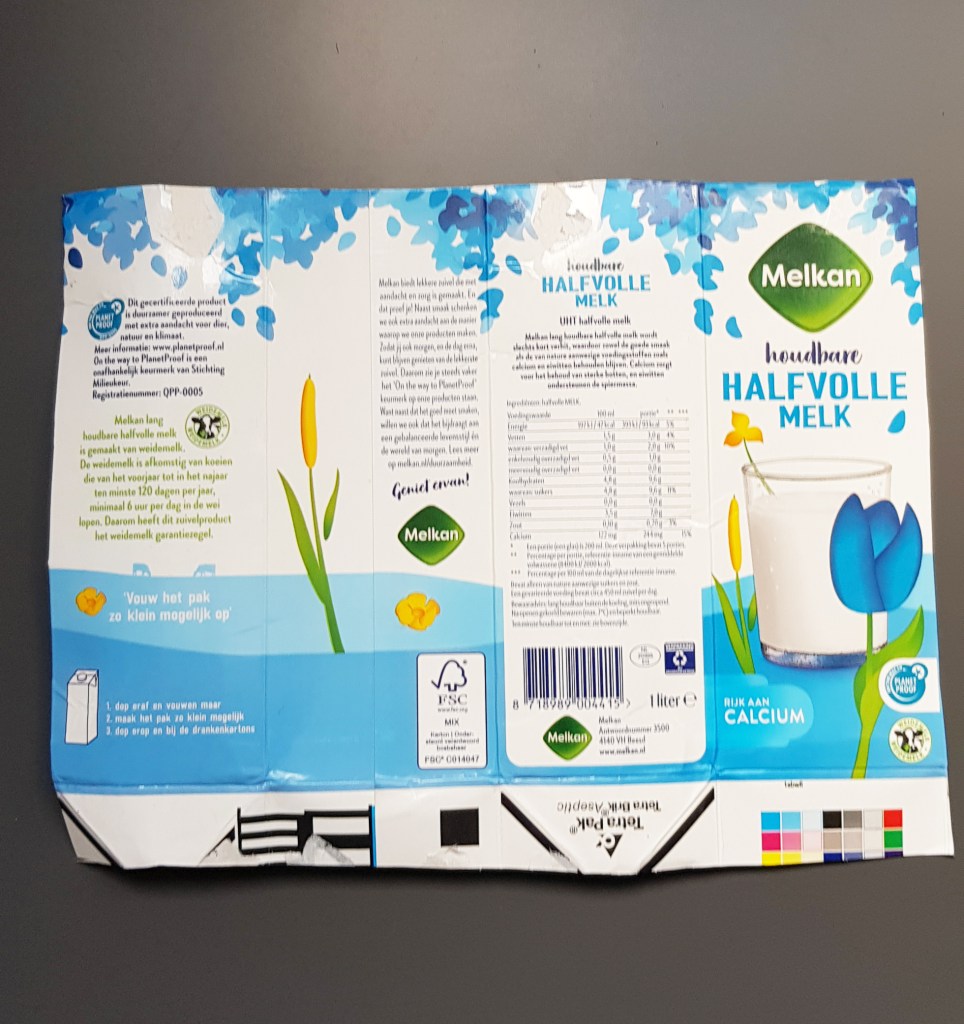
Milk carton with foil lining
Washi tape or sensitive masking tape: too strong masking tape might tear the surface of your sketch paper or image
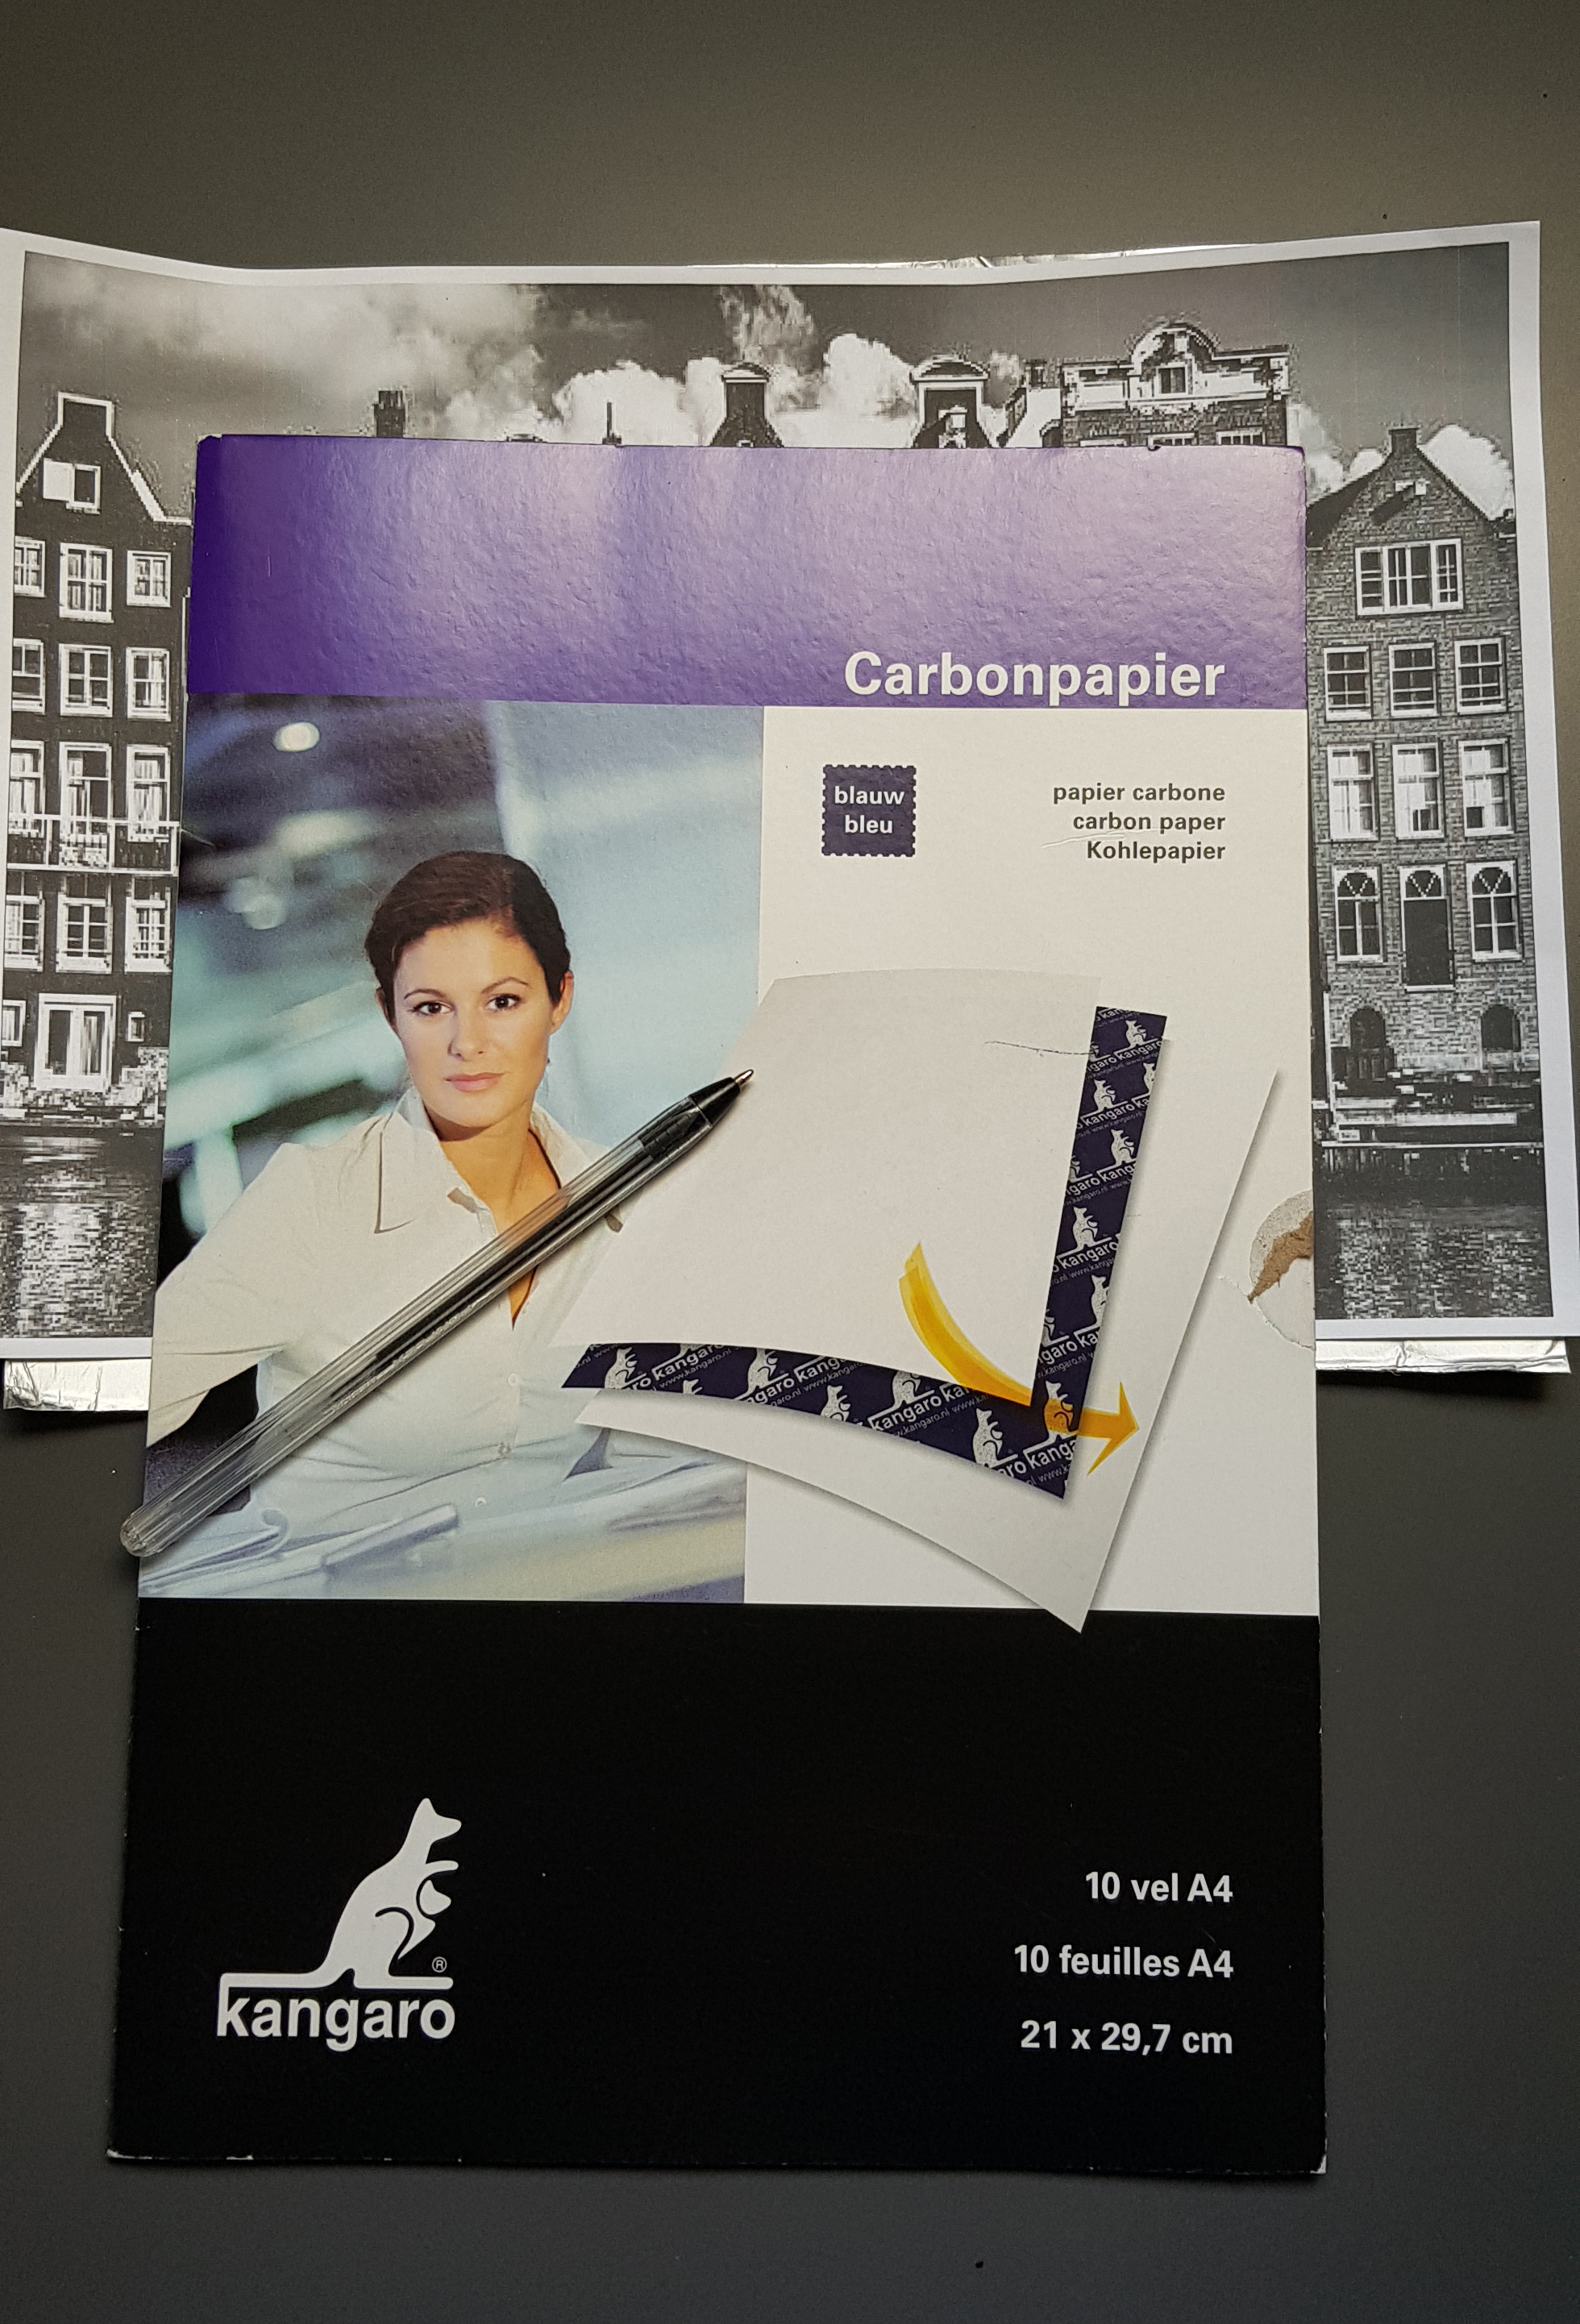
Carbon transfer paper (optional)
Etching tool or craft knife
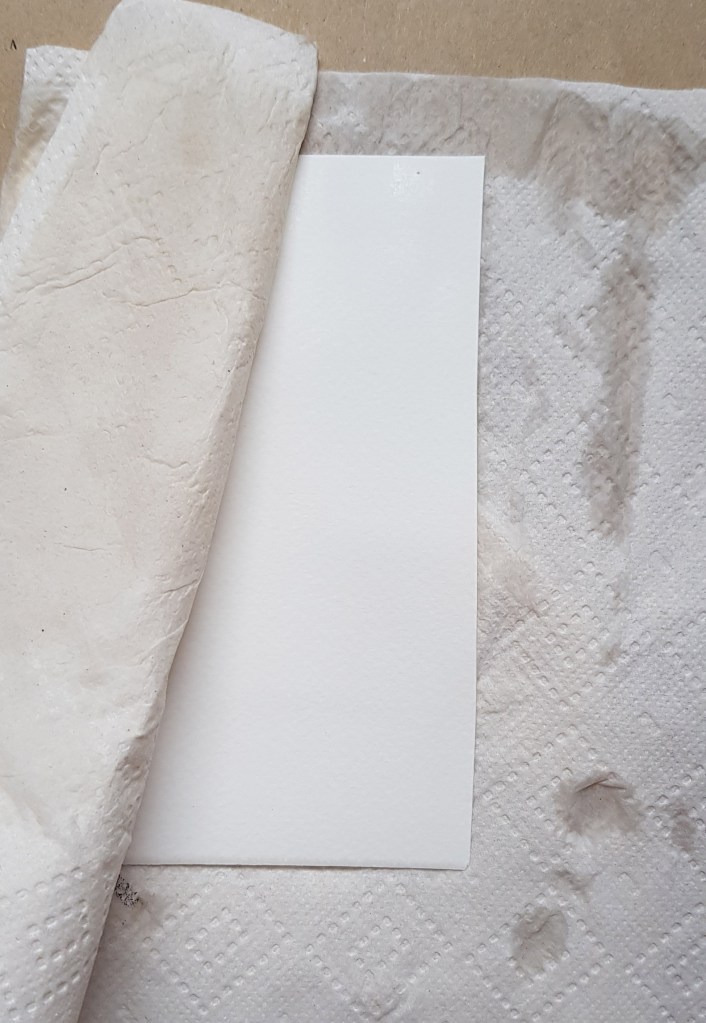
Watercolor paper
Rectangular bowl with water
Plastic gloves
Etching ink e.g. Intaglio ink works the best
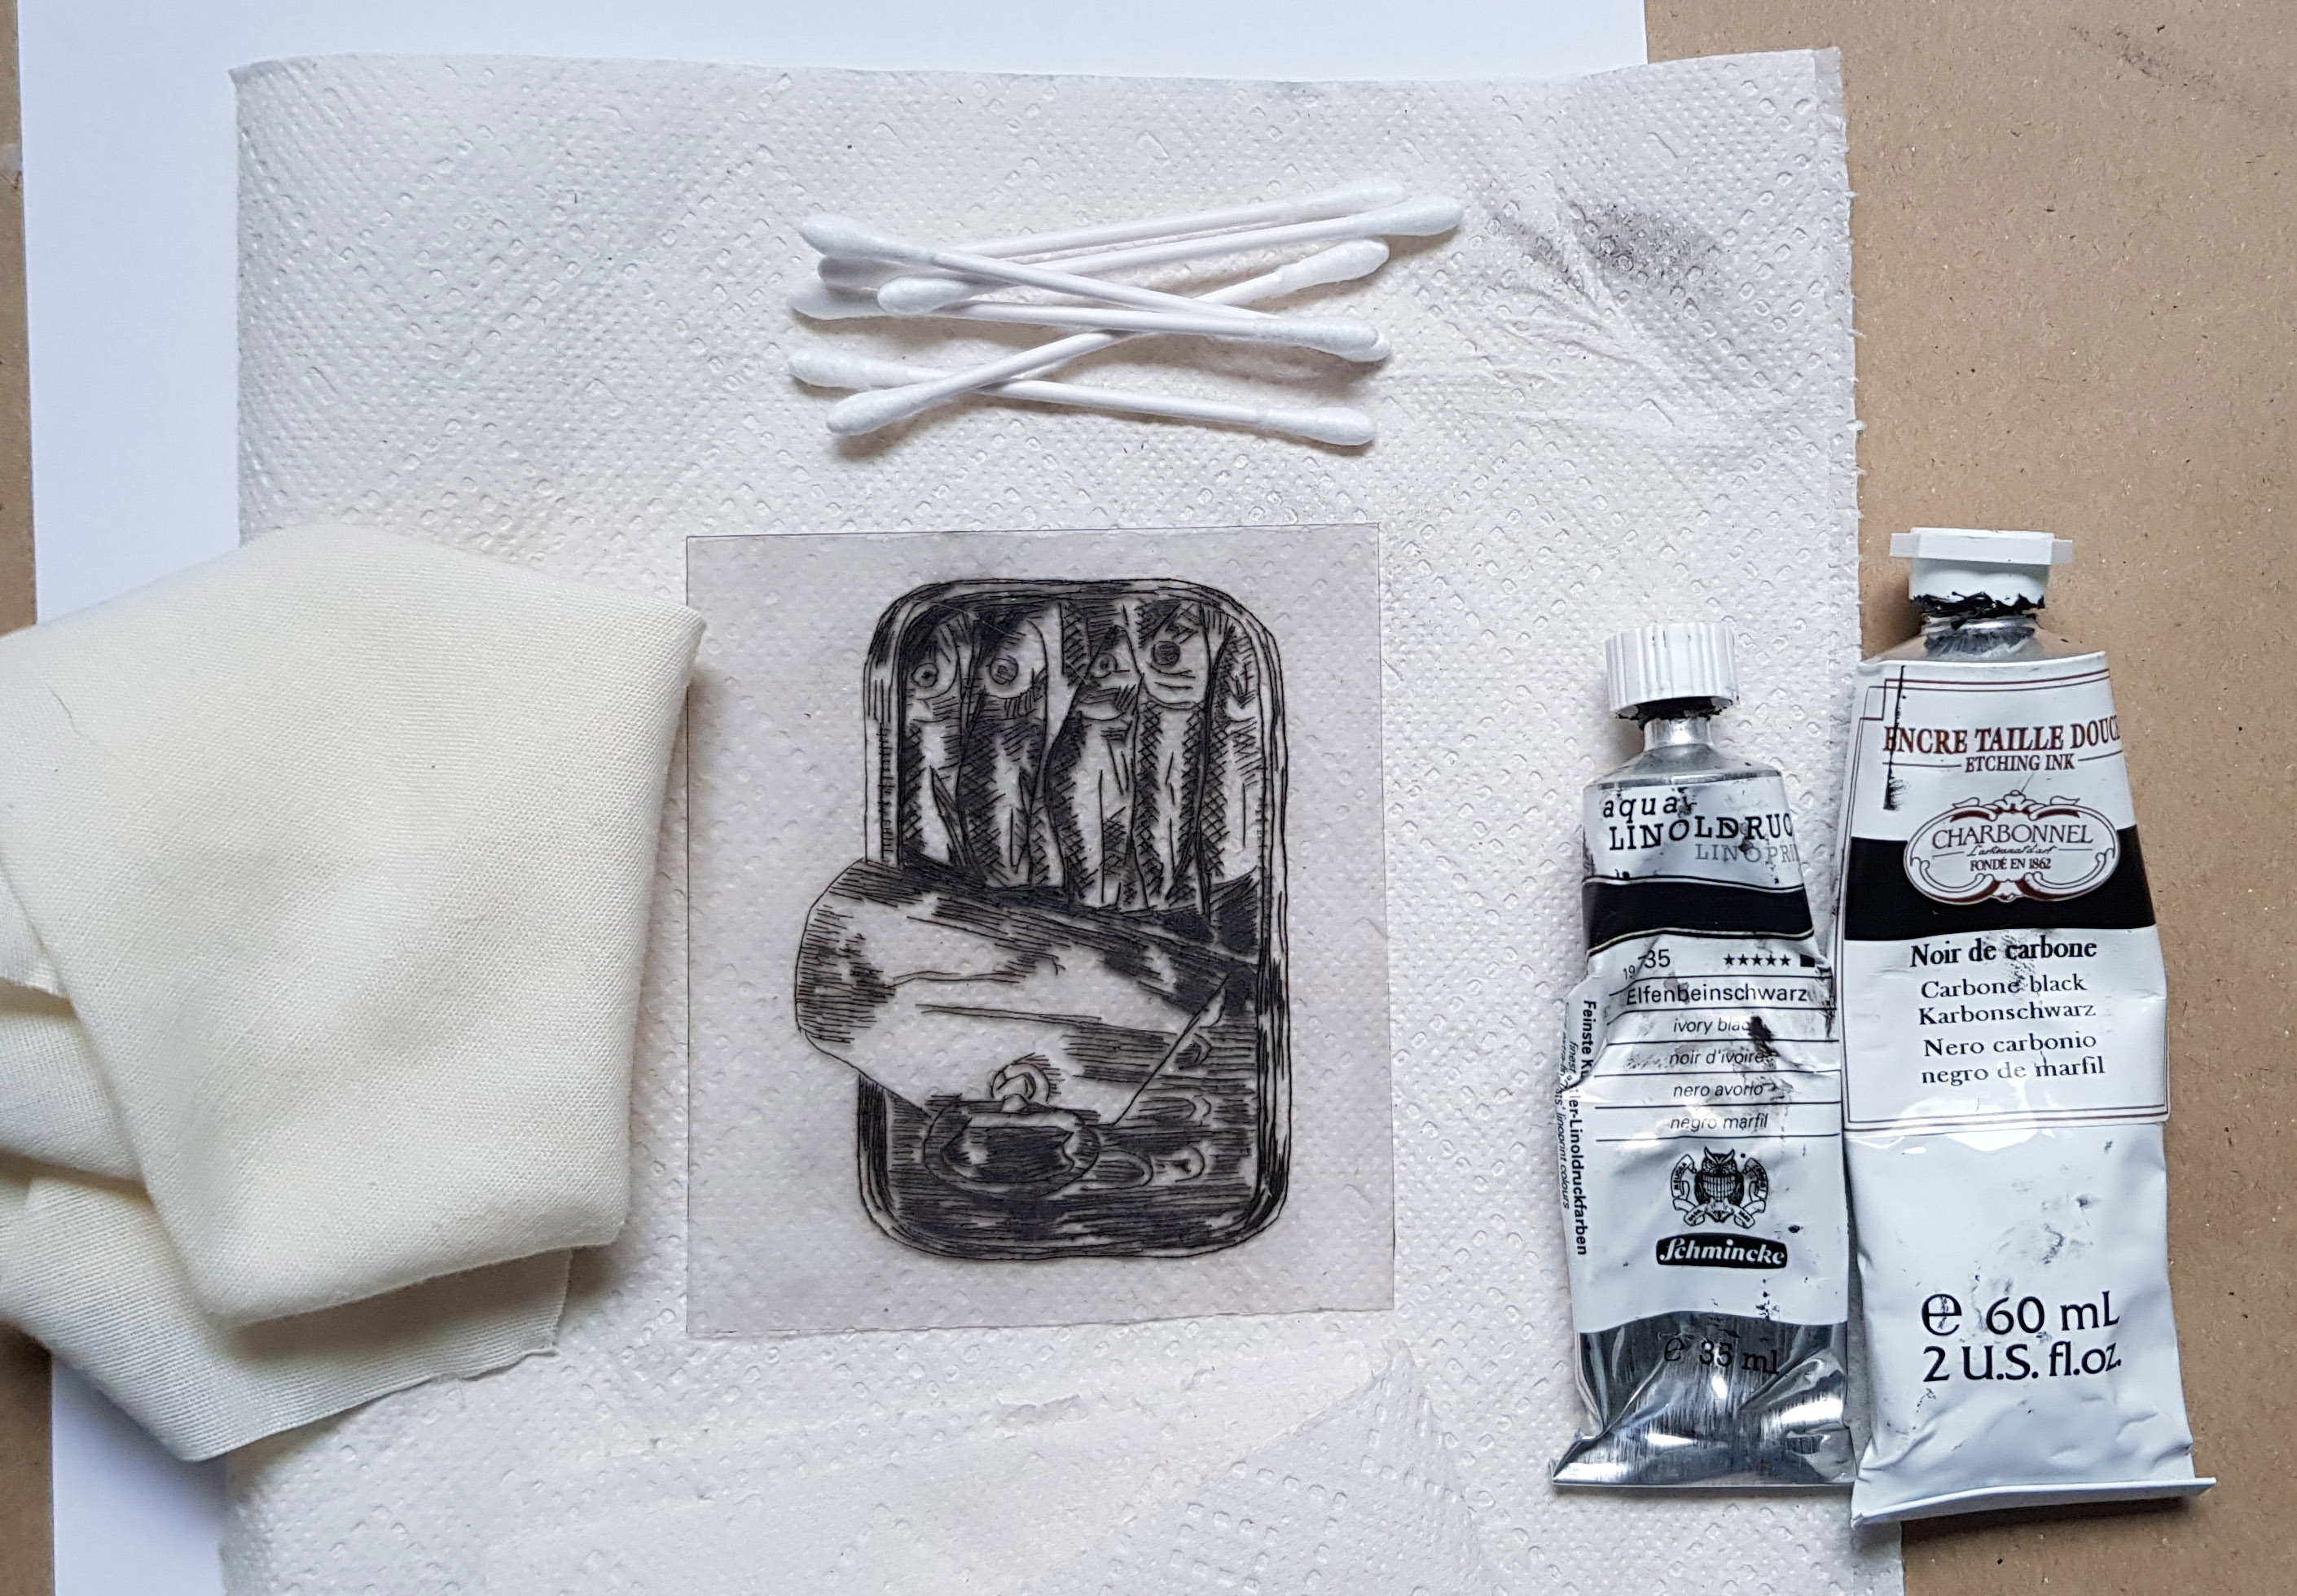
Soft cotton fabric like cheese cloth
Kitchen towel
A few cotton swabs
Paper (it can be printing paper or unprinted newspaper)
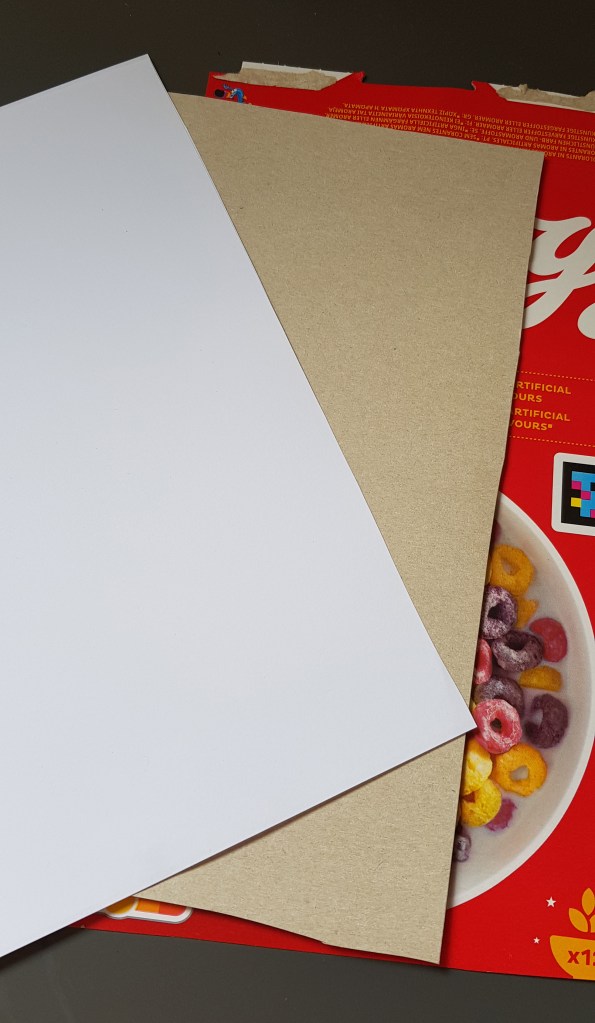
Cardboard from cereal box
Pasta machine, mounted firmly on a table
Method:
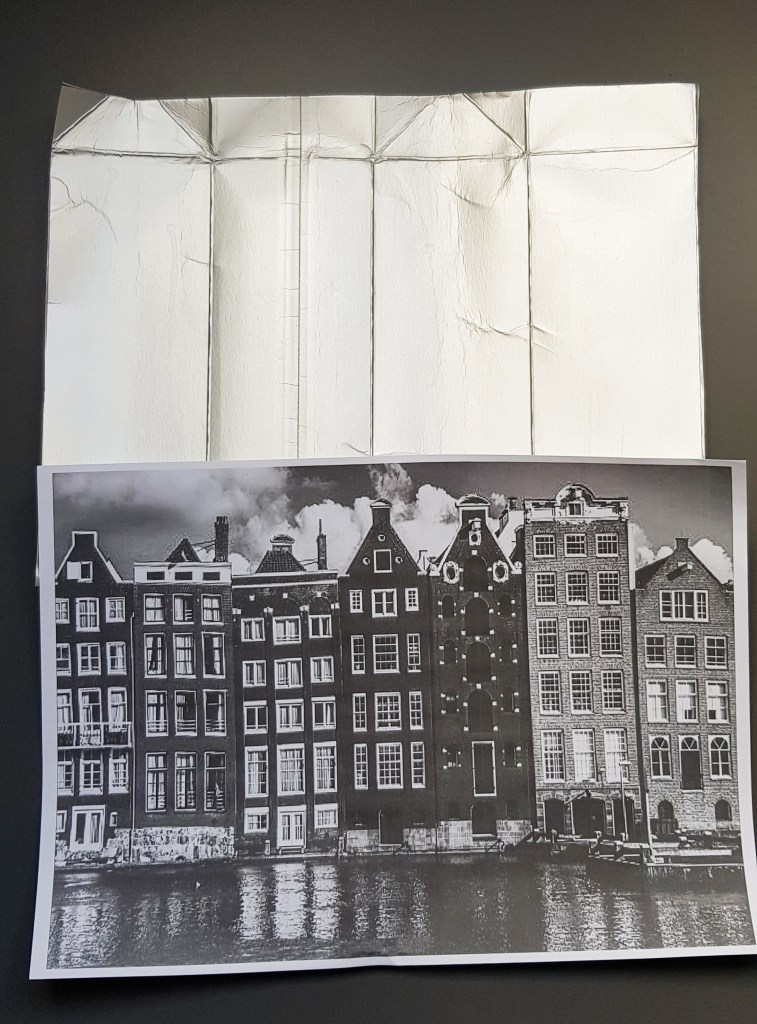
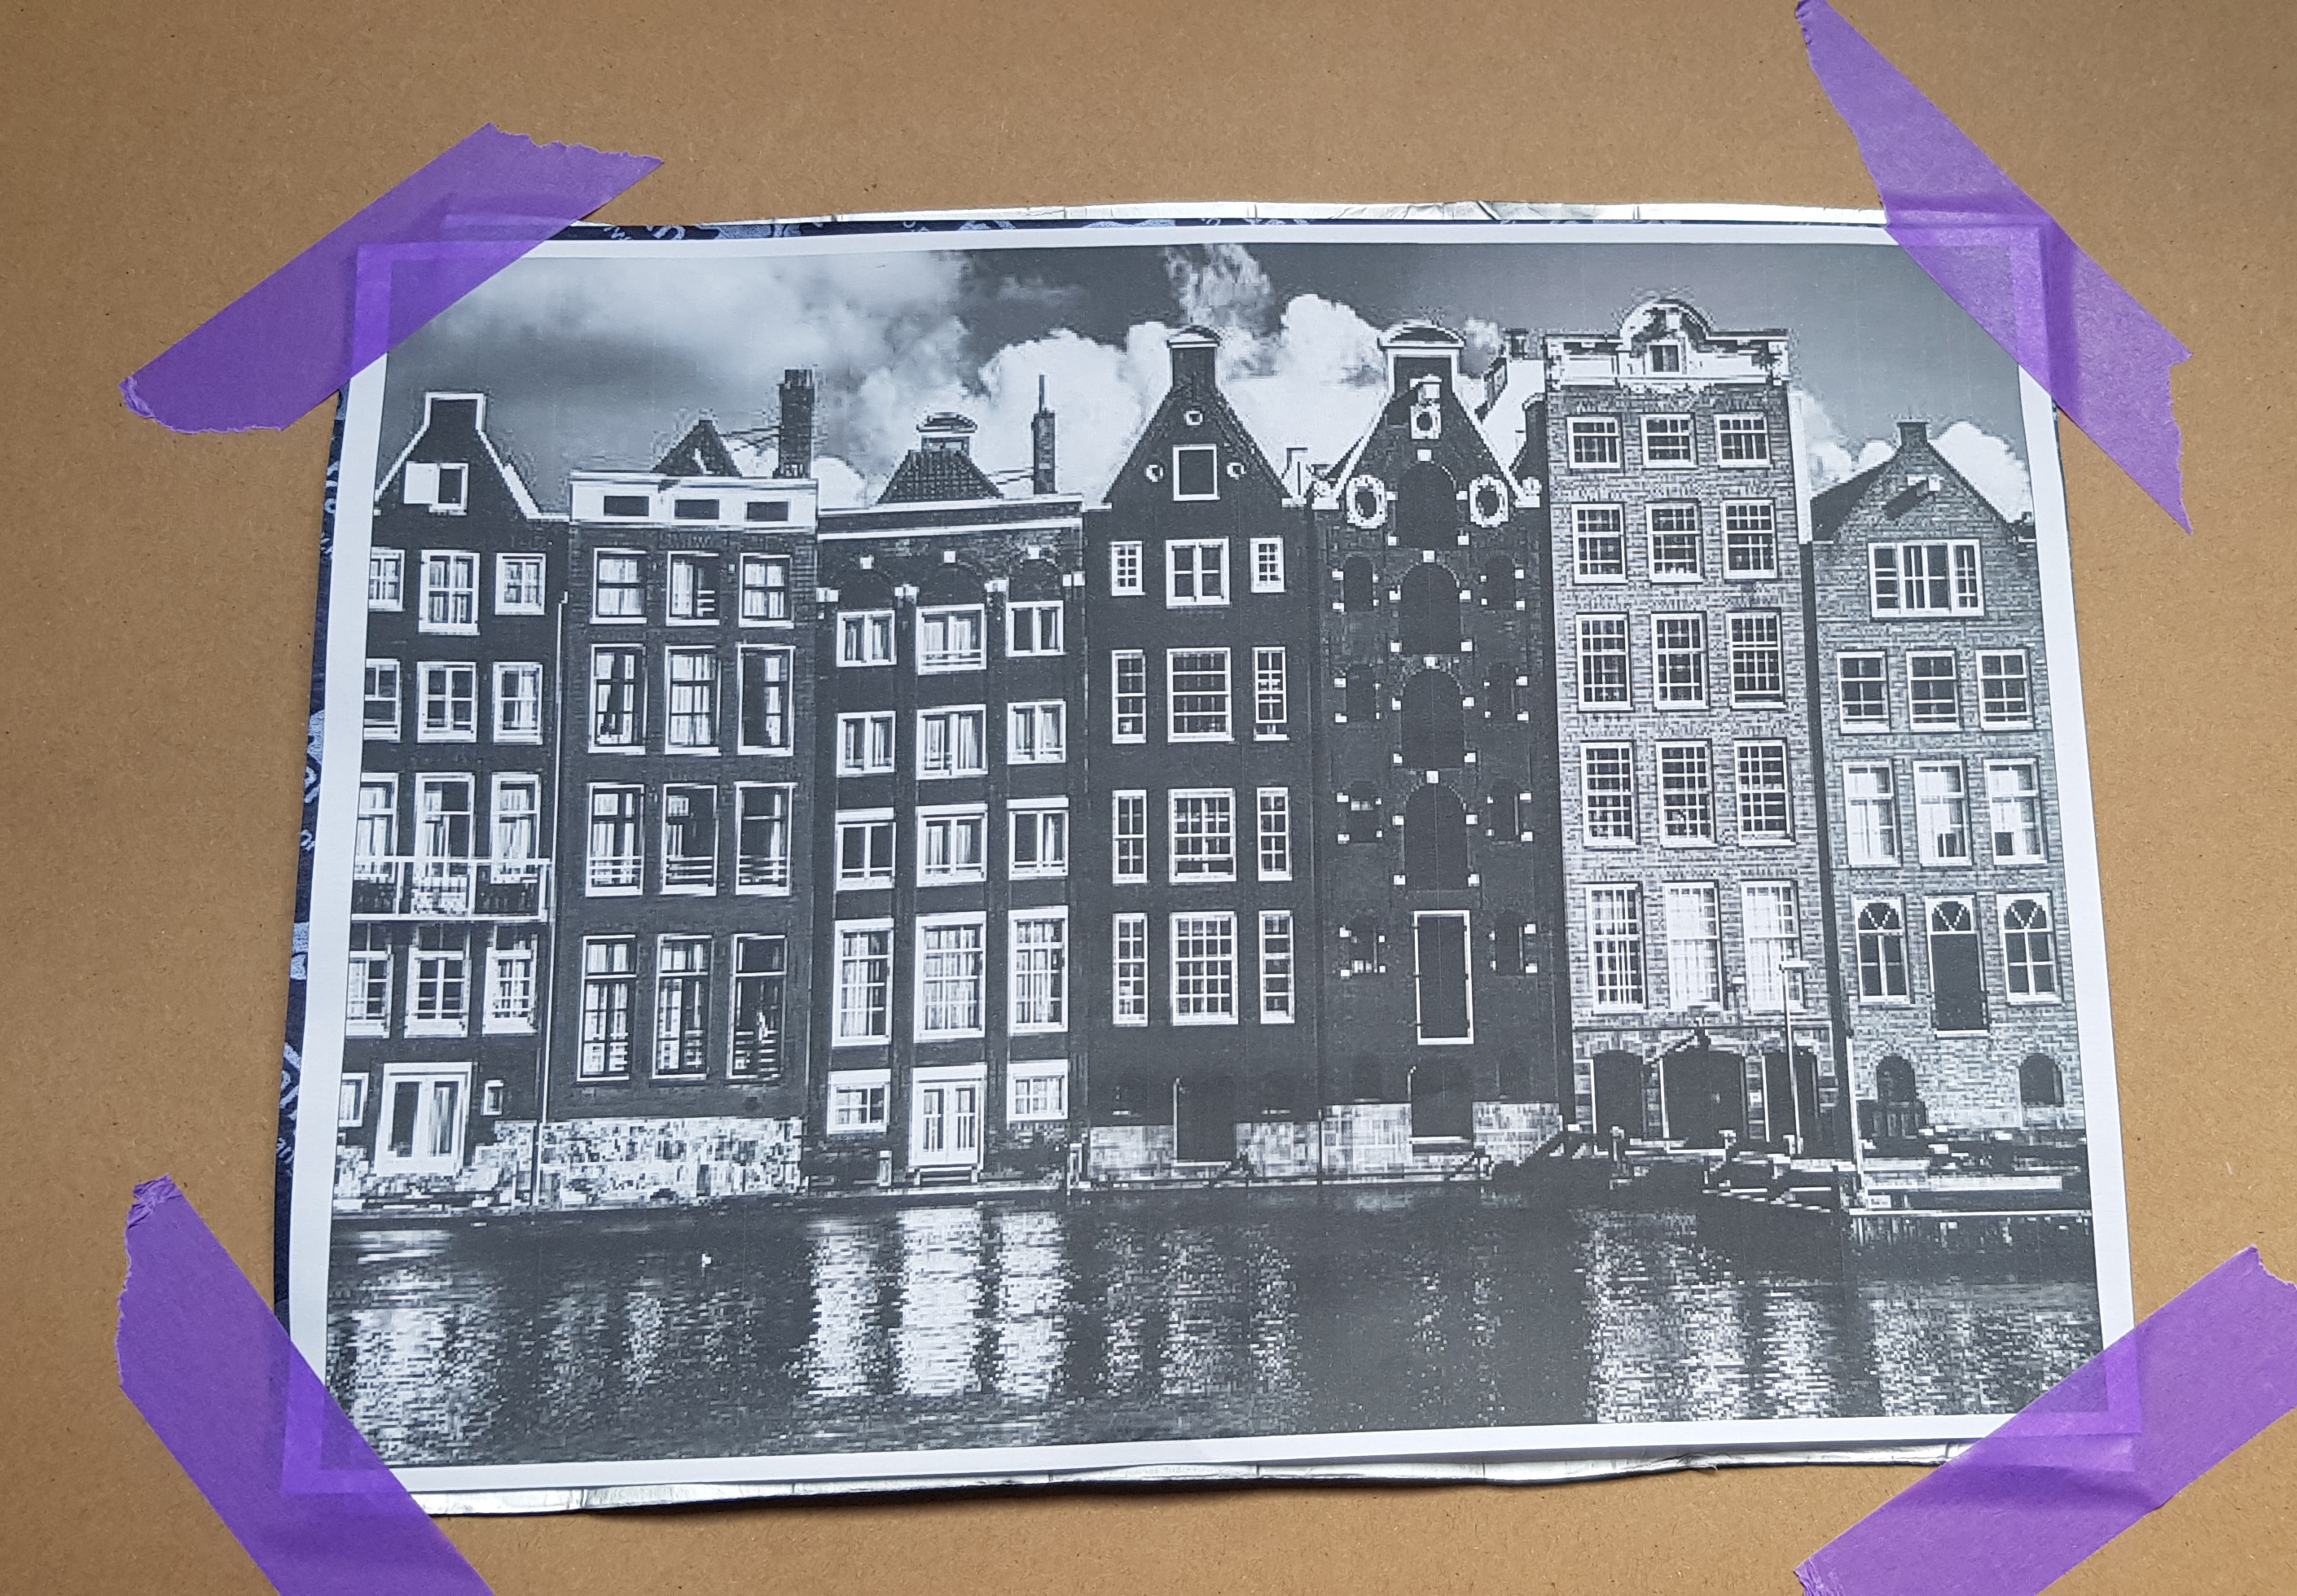
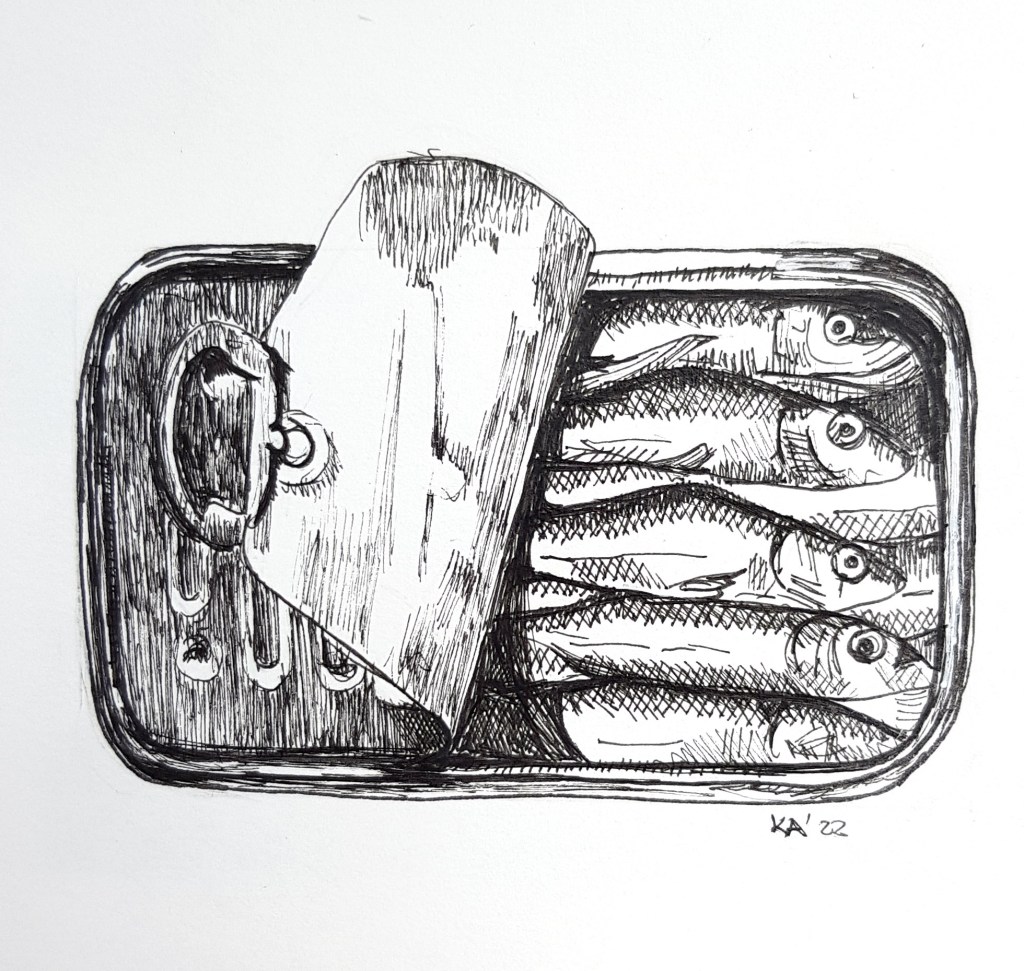
Make a sketch on paper or in your sketchbook or use a picture or photograph. REMEMBER: your image is going to print as a mirror image. If you use text, keep that in mind.
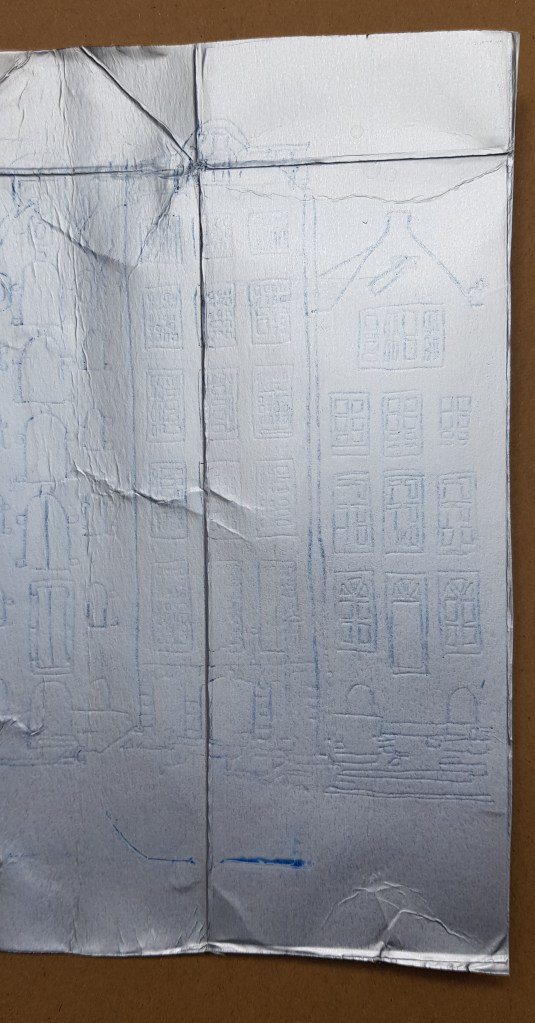
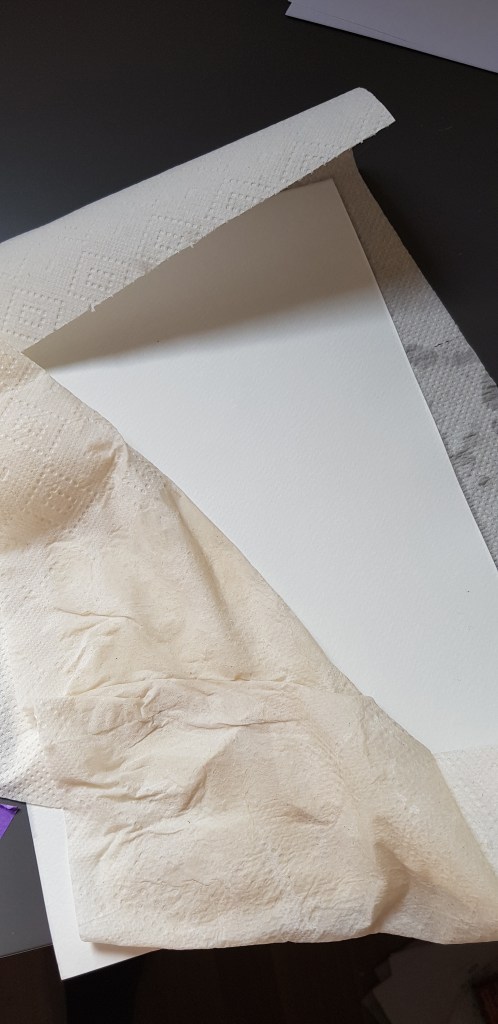
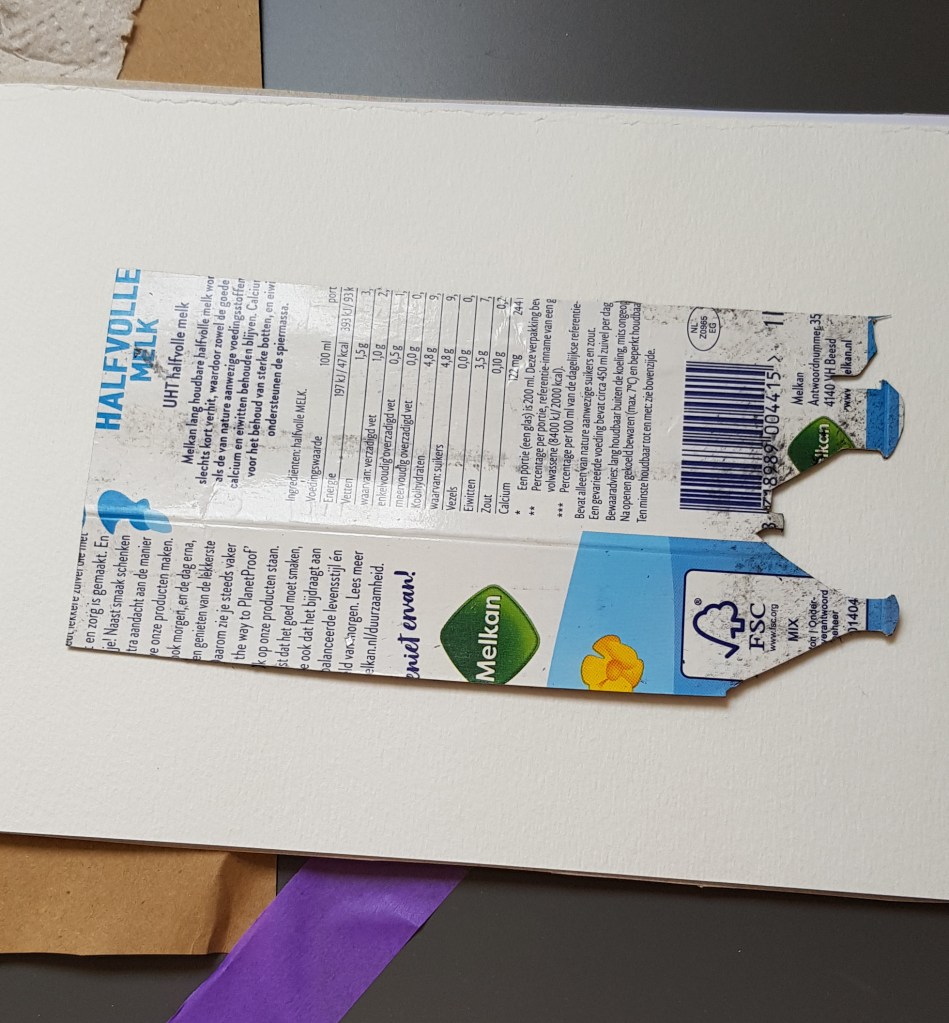
2. Cut the milk carton open and clean the inside. Cut it to the size of the print you want to do. You may use the smooth surfaces only, but keep in mind that the creased surfaces make interesting textures to your print. If you do not have carbon paper, you will still be able to see the image. The carbon paper makes it a bit clearer.
3. Place the image or sketch on top of the carbon paper on top of the carton and keep it in place by using the tape.
4. With a pen, trace along the drawing lines or lines of the image. Remove the image and carbon paper, but keep your image alongside as reference to your shading.
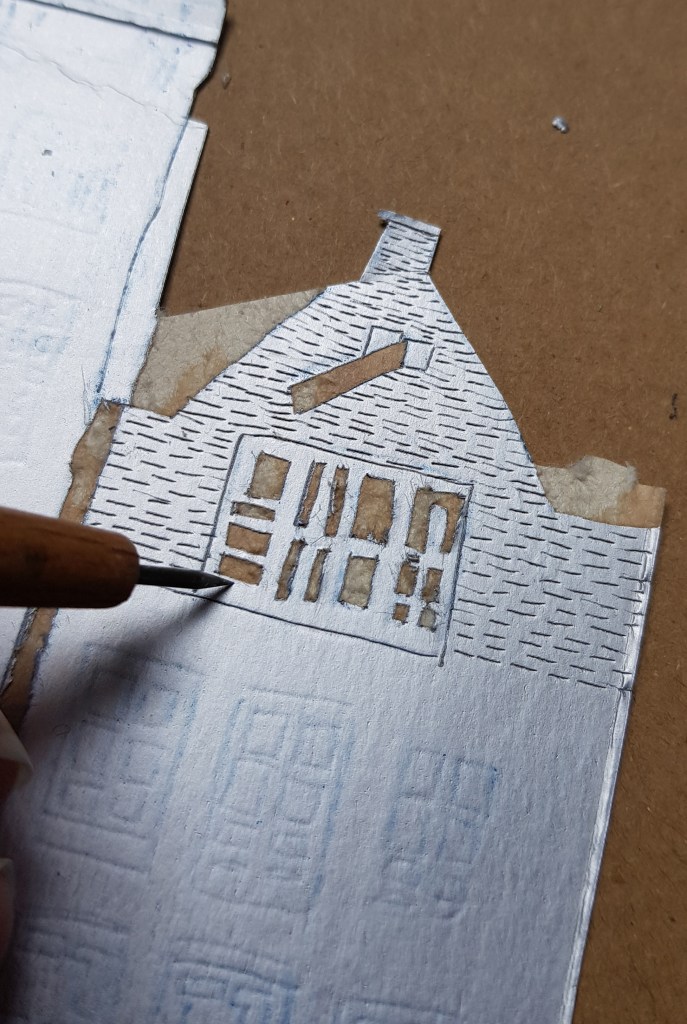
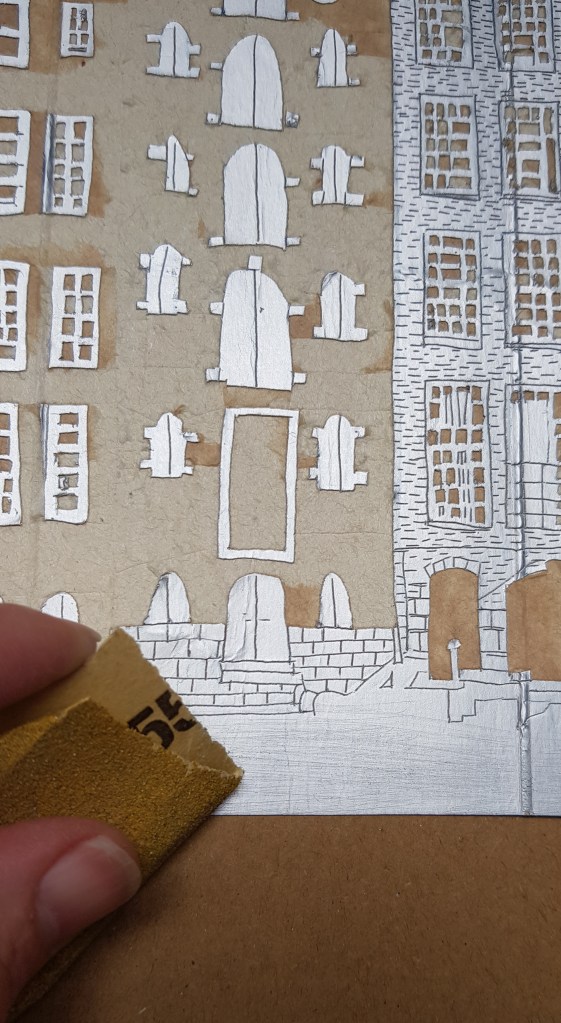
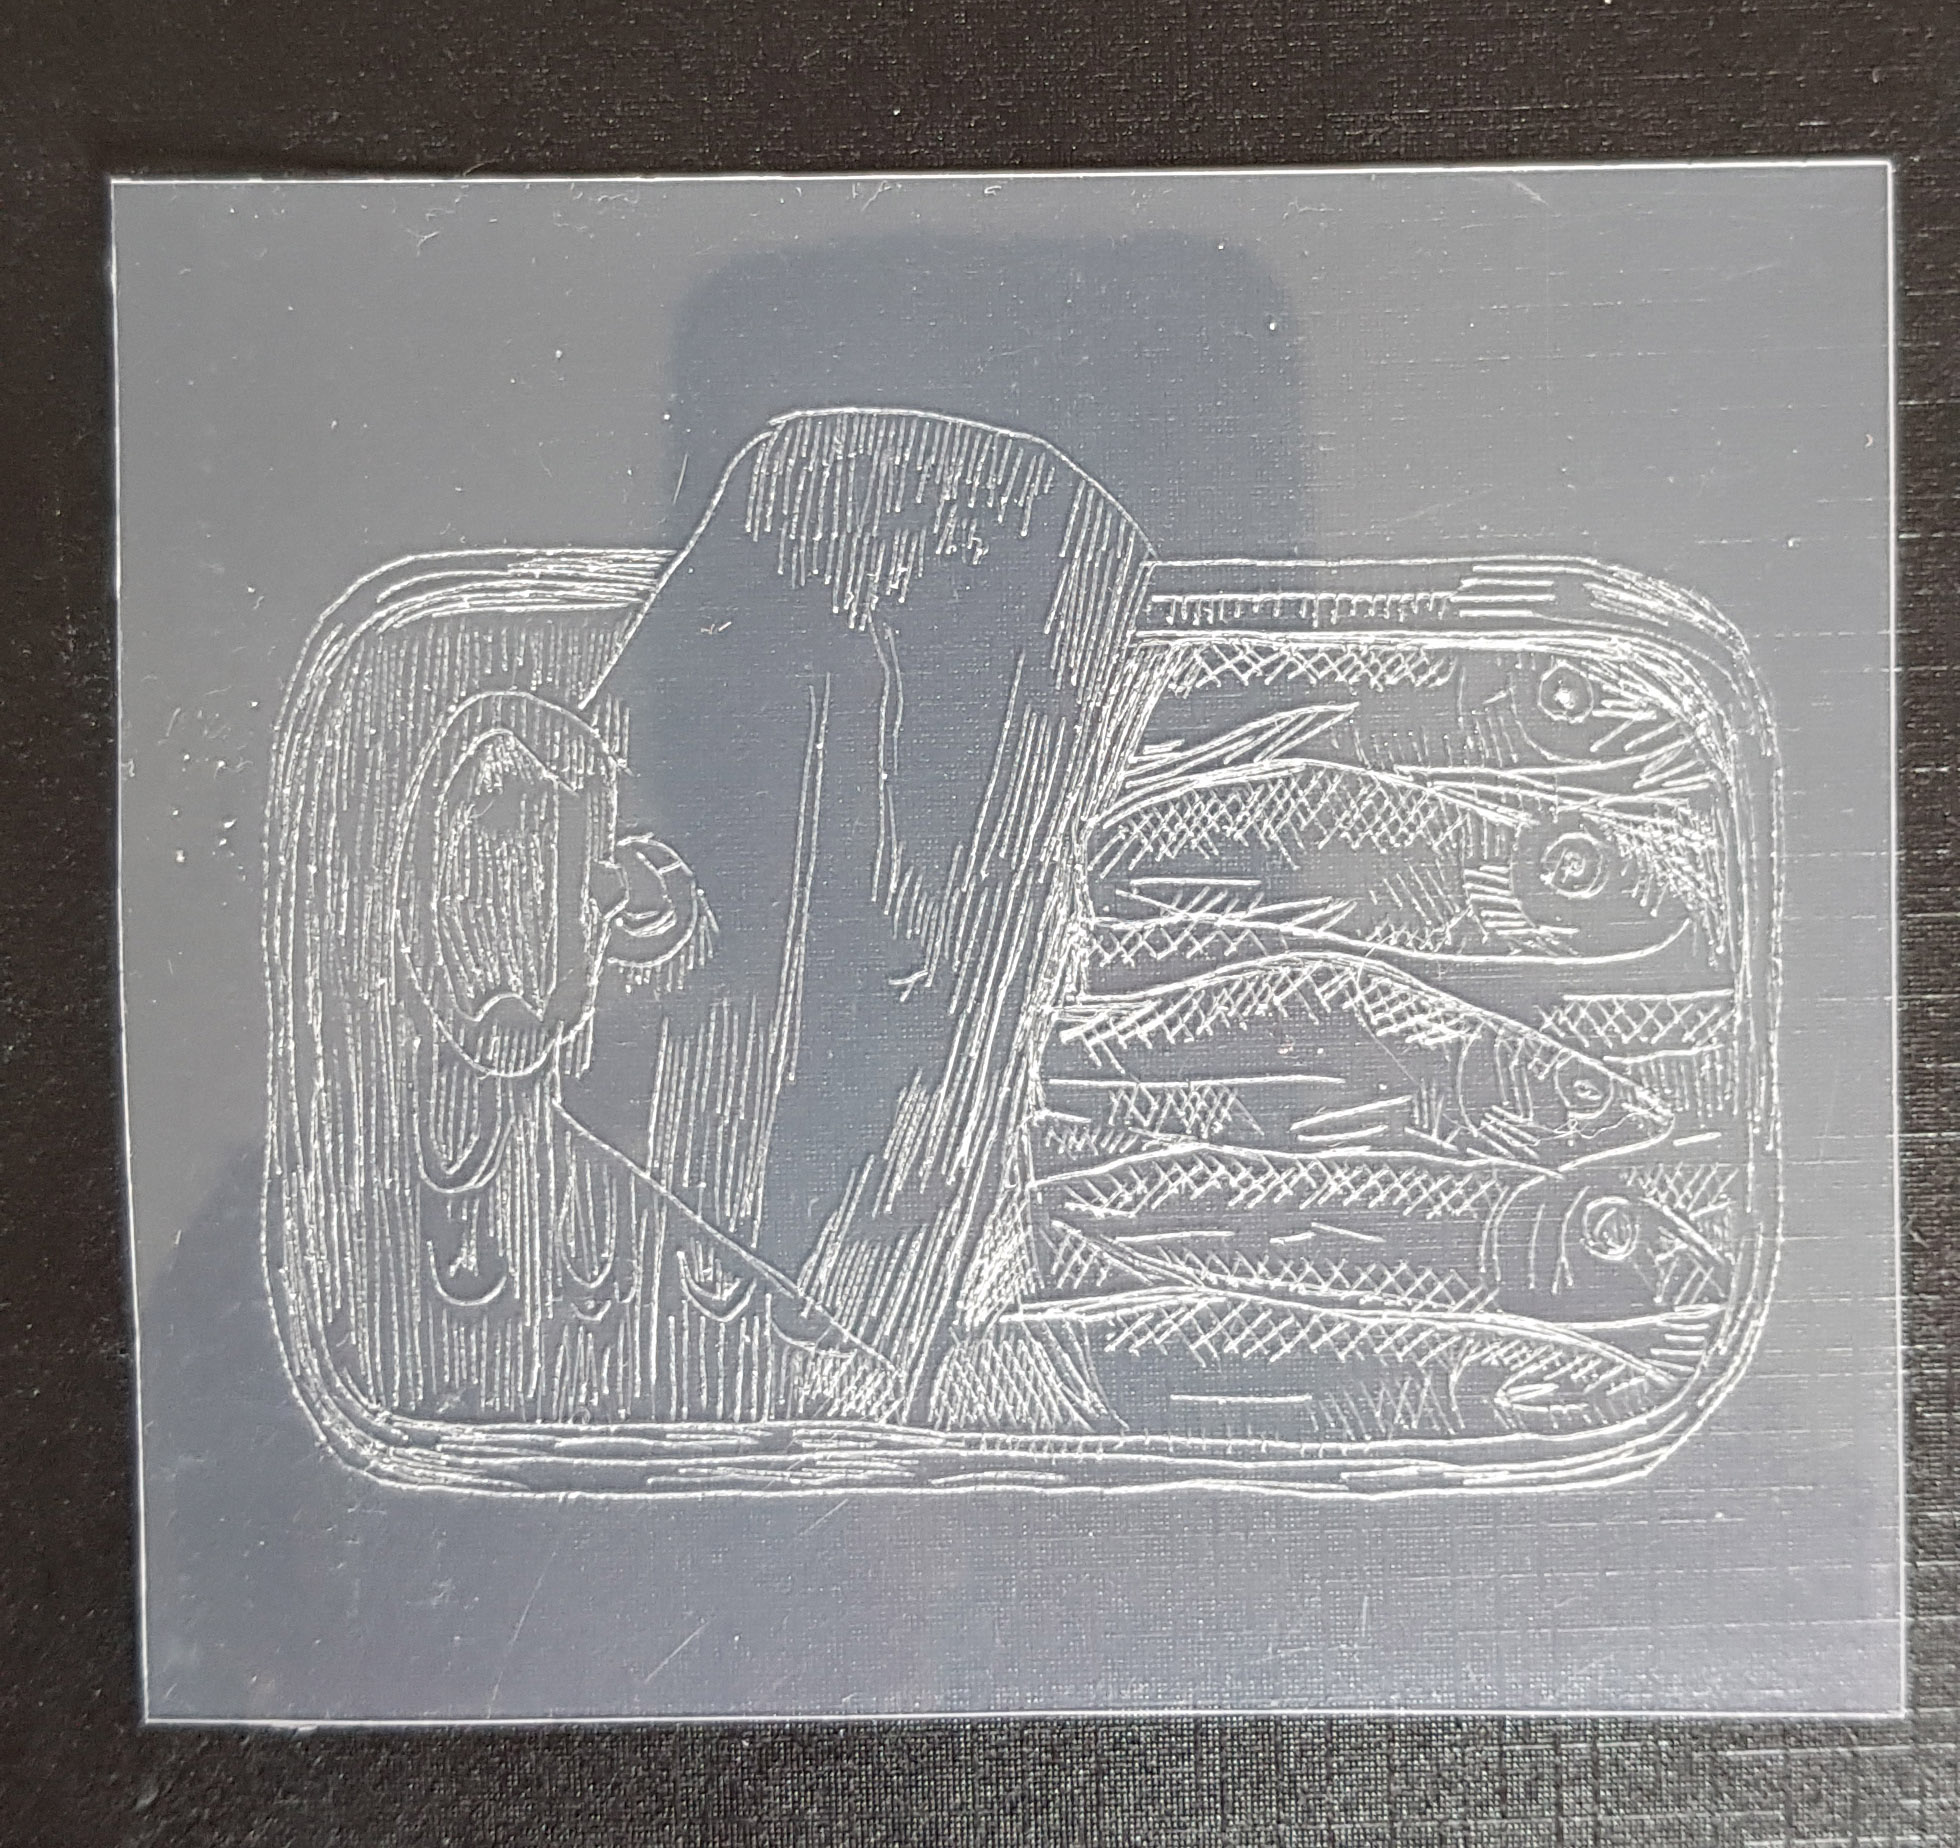
5. Use the etching tool or the sharp point of a craft knife and make engravings into the foil along your black sketch lines. If you want dark areas, make small hatch engravings. For pure black areas, the foil can be teared off. The areas that are not engraved are the light areas, the engraved areas will be darker and the cut-out areas will be the darkest. I have used sanding paper for the water areas to add a finer texture.
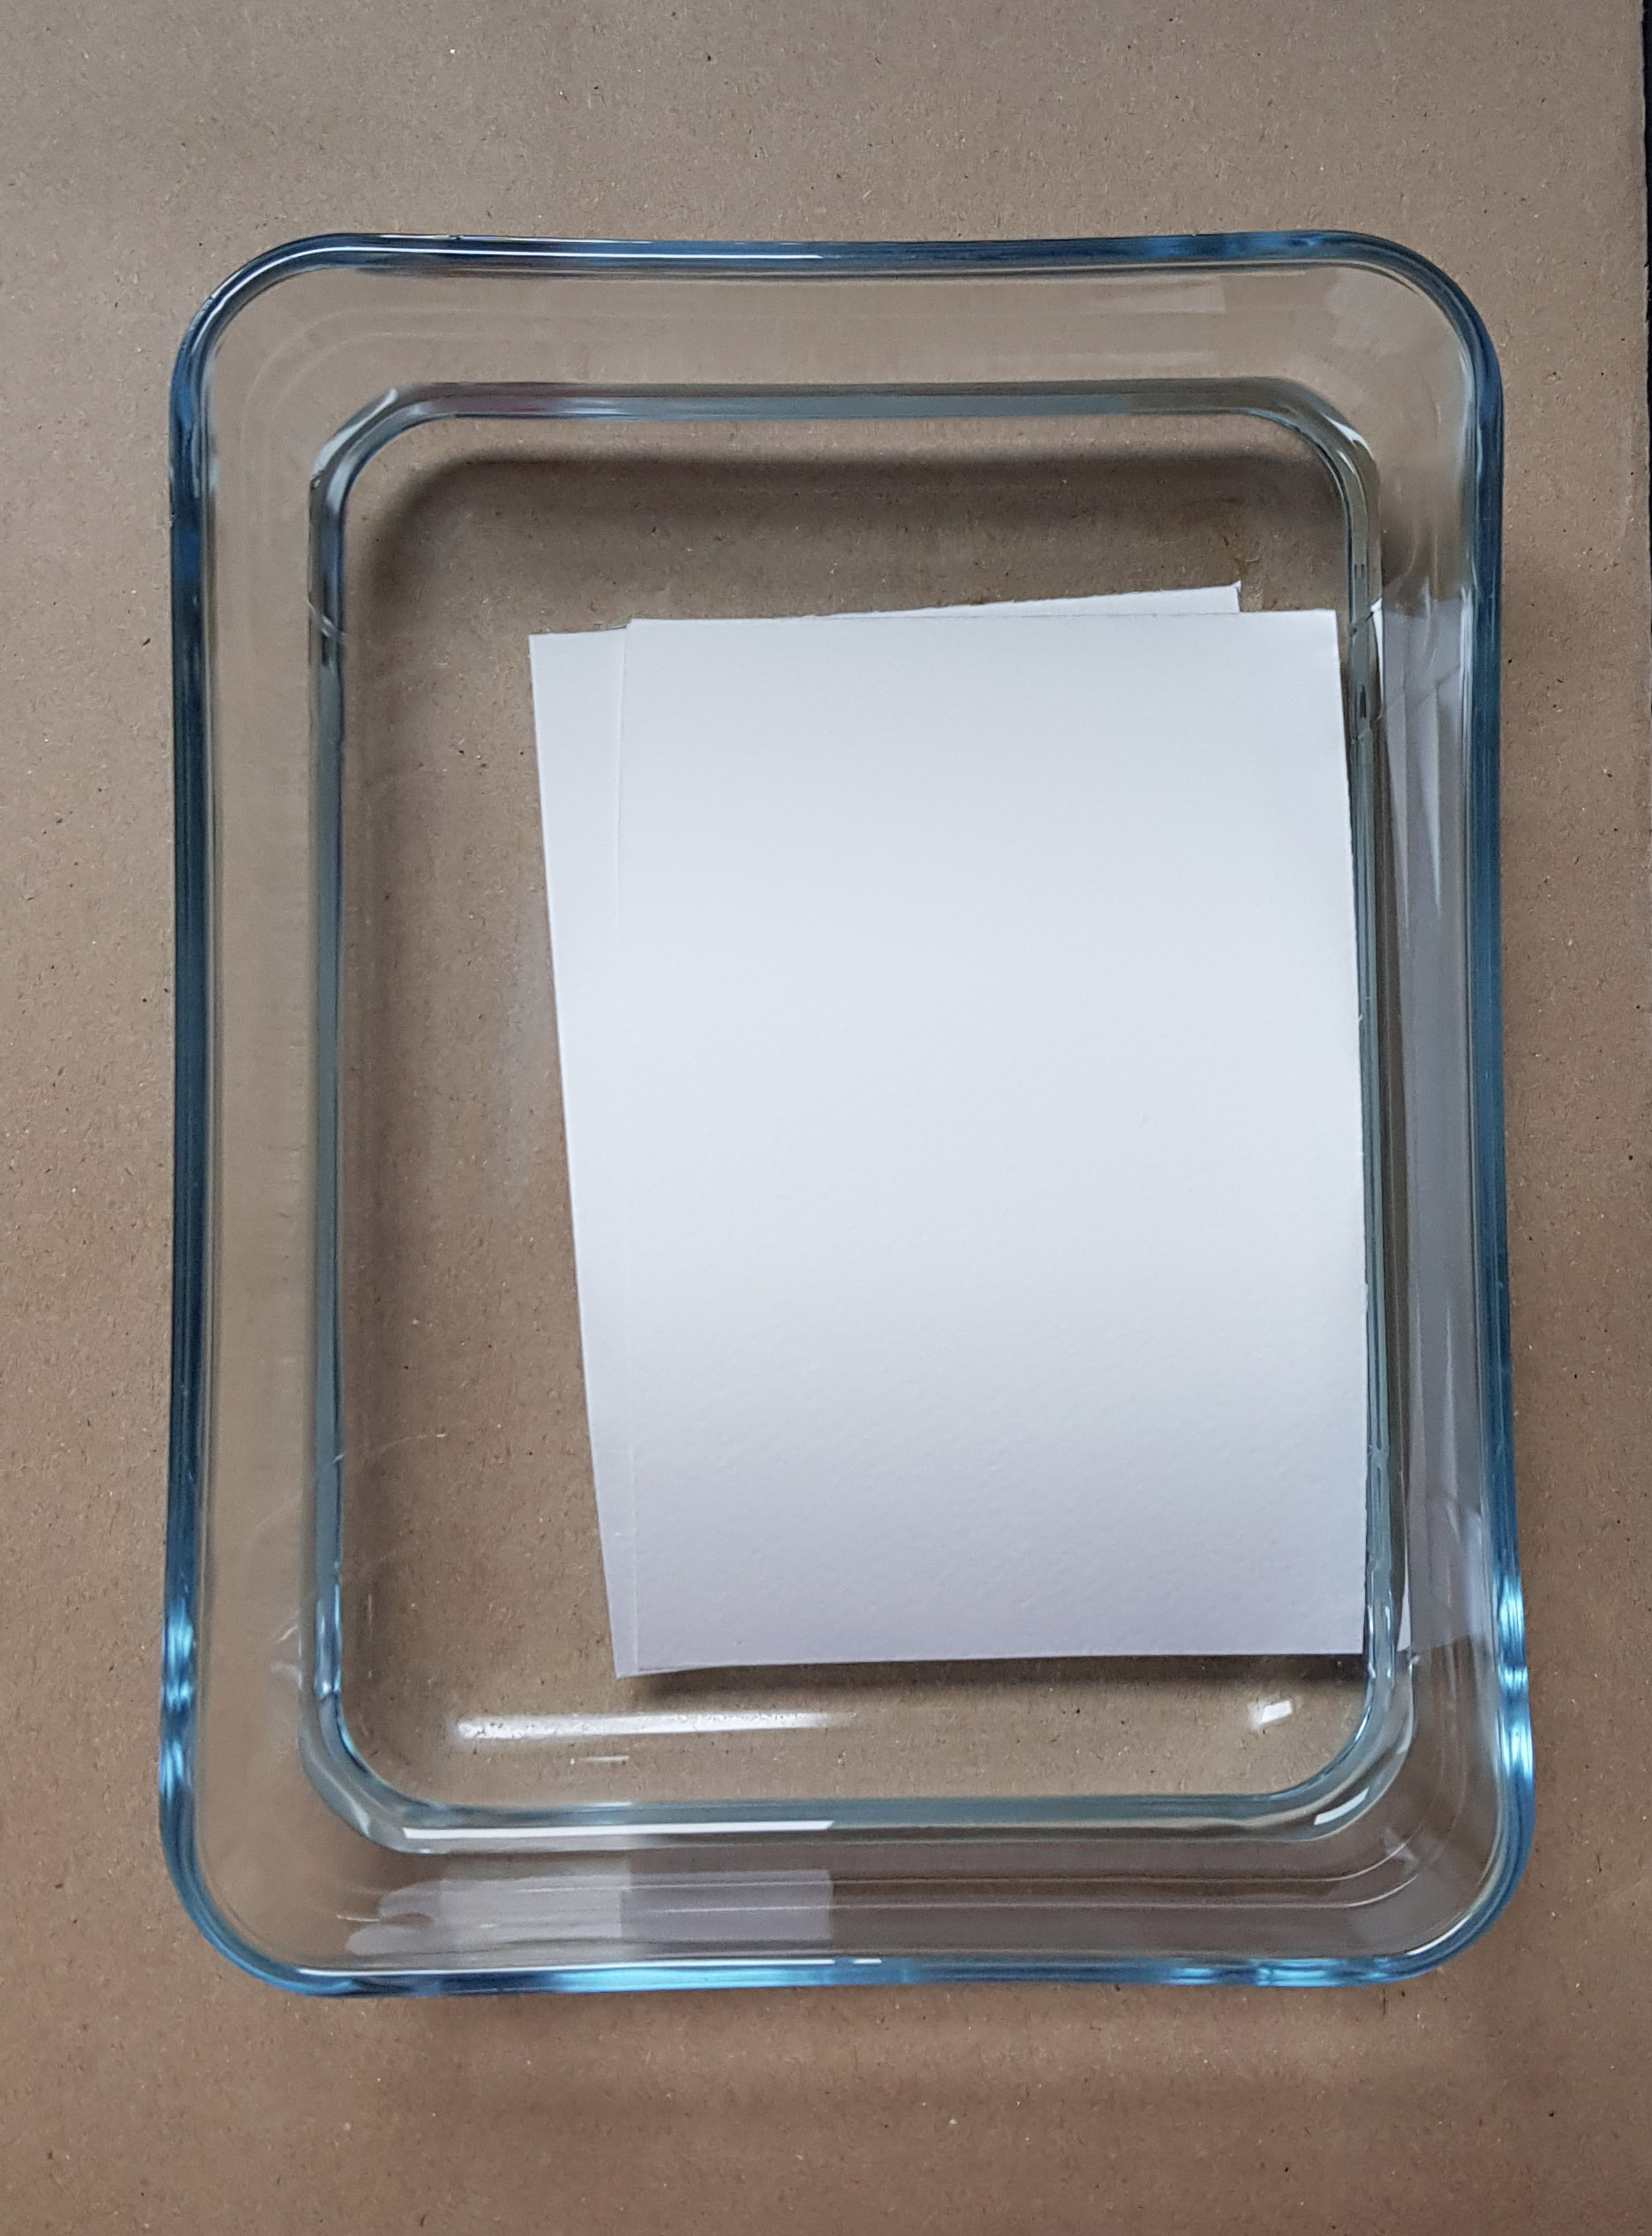
6. Cut the watercolor paper the size or larger than engraved image and soak it for 20 minutes in a flat rectangular bowl of water.
7. Also cut two cardboard pieces and two paper pieces the size of the watercolor paper.
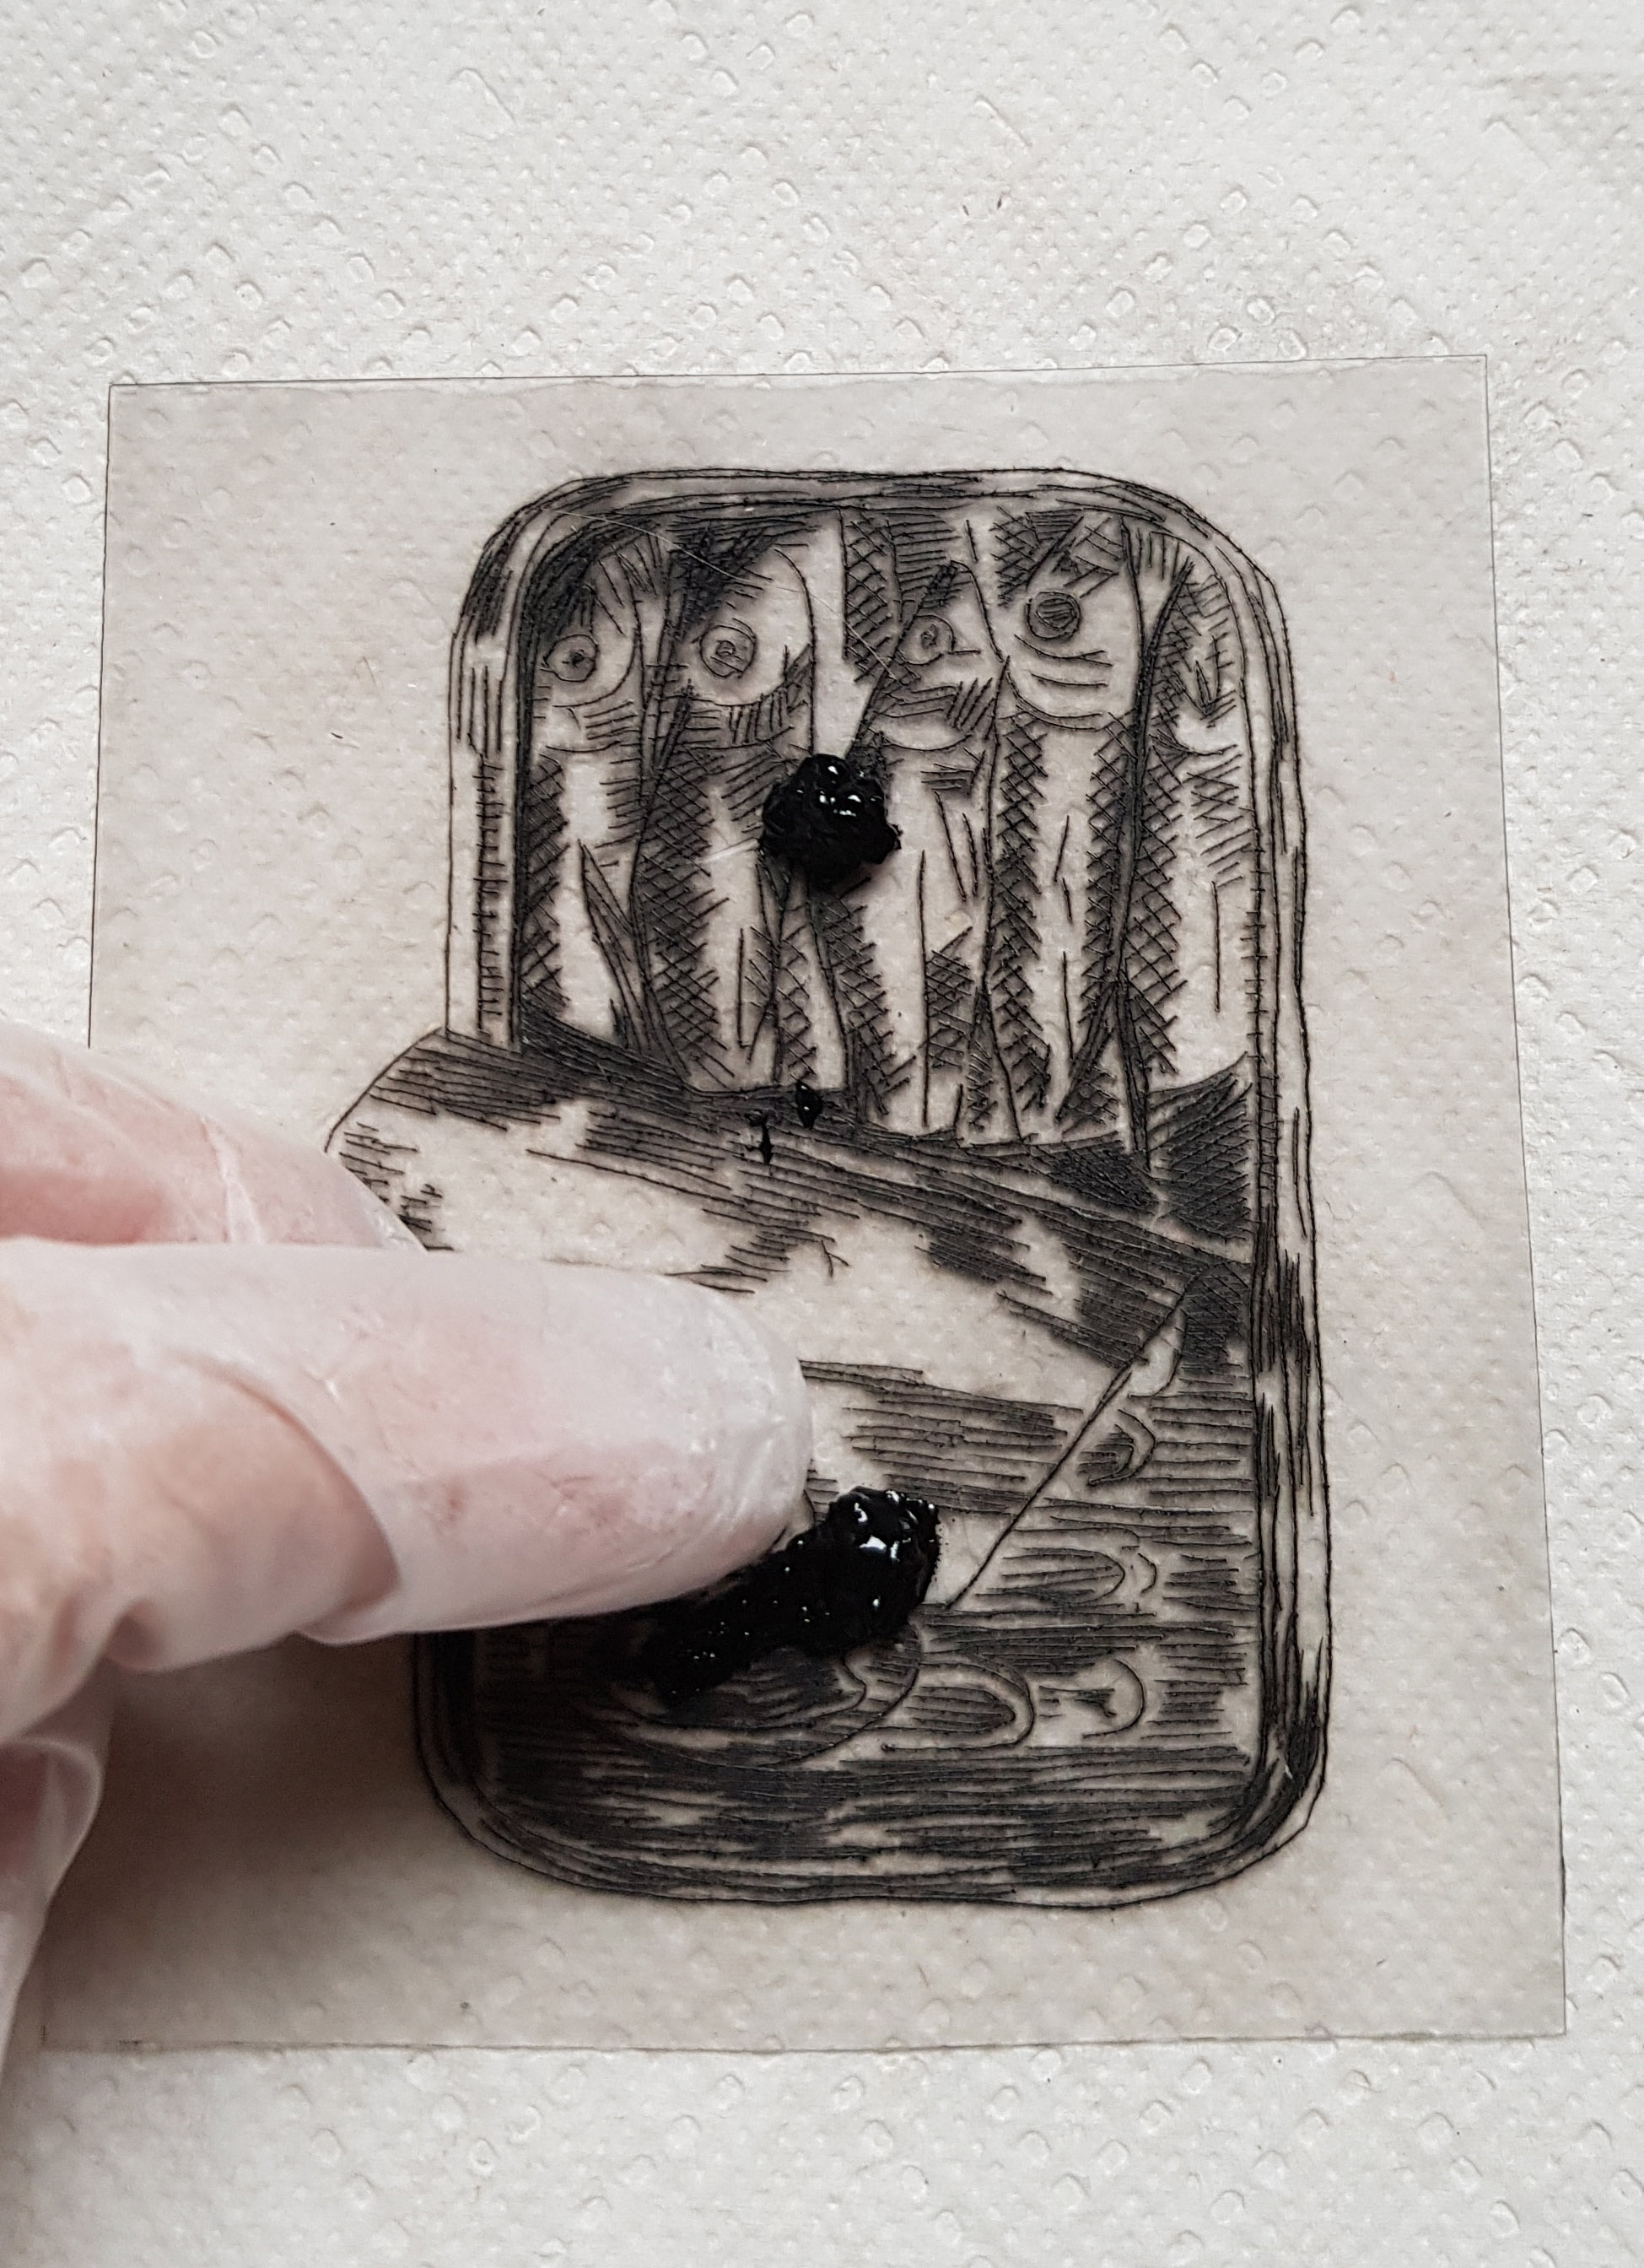
8. Put the plastic gloves on and put a dollop or two of the ink onto the carton plate.
9. With circular movements rub the ink with your finger into the grooves and cover the whole plate. You may also use an old bank card to swipe the ink over the carton plate.
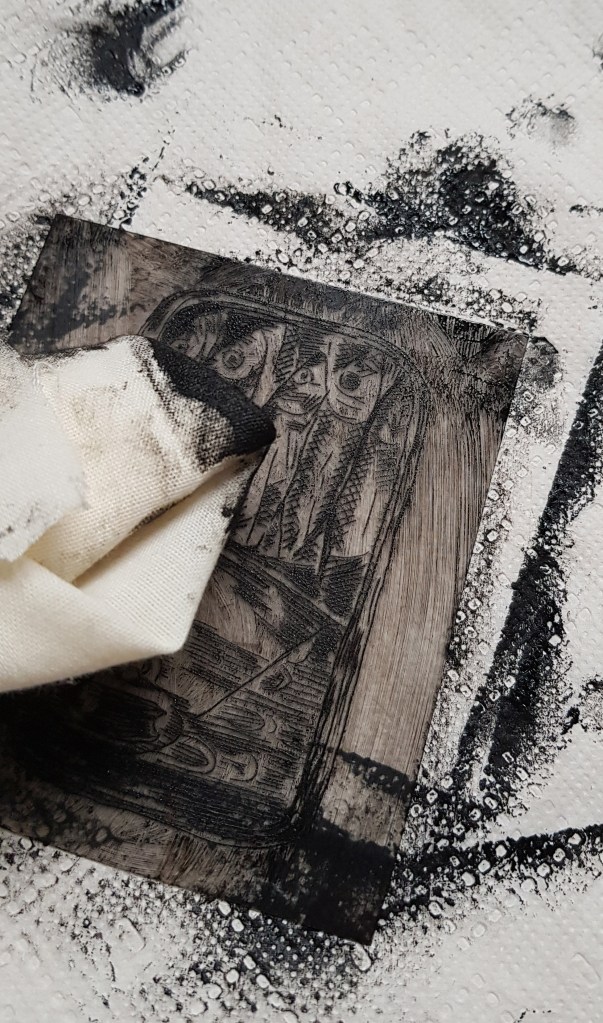
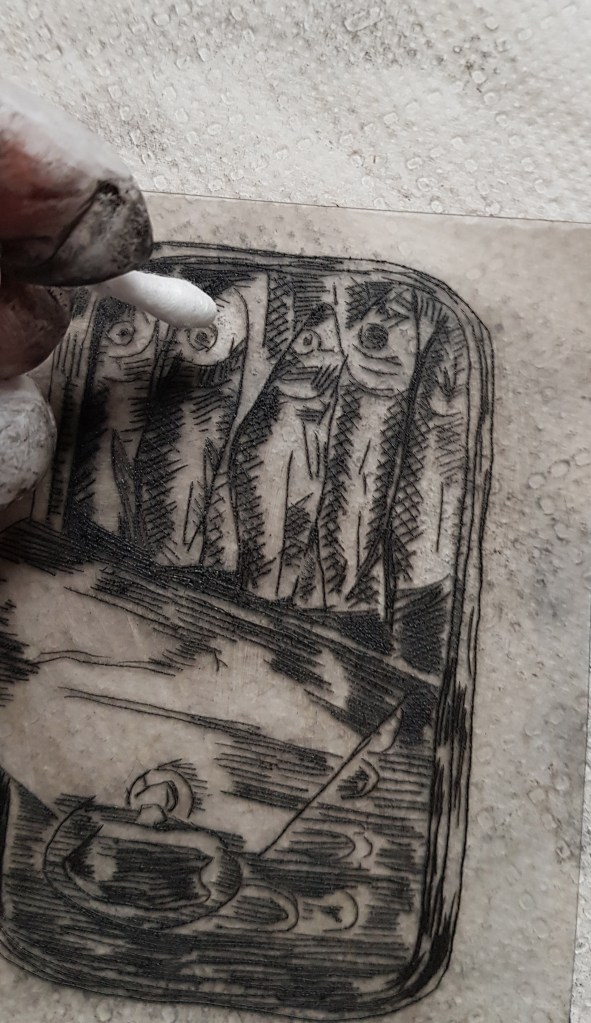
10. With the cloth, rub all the excess ink from the plate. Lastly with light movements and kitchen towel, wipe off any excess ink so that the silver parts are more clear.
11. Use the cotton swabs and wipe small highlight areas.
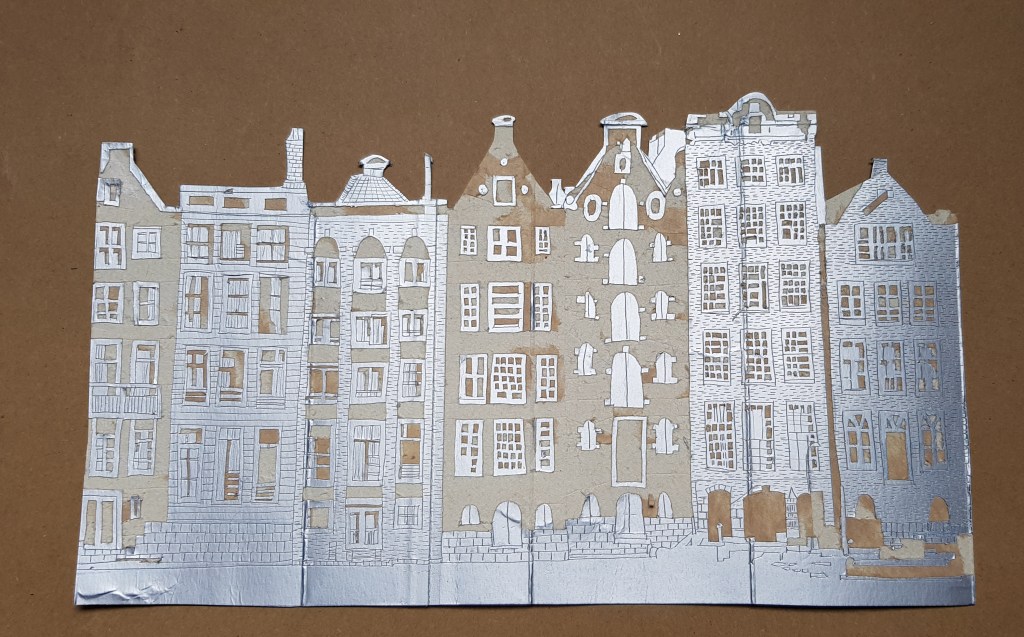
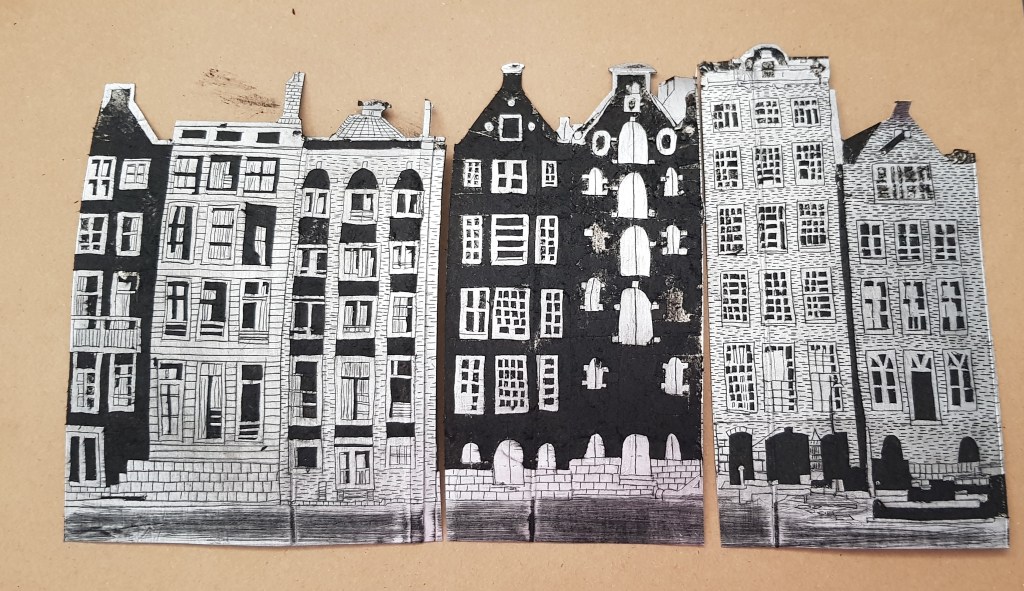
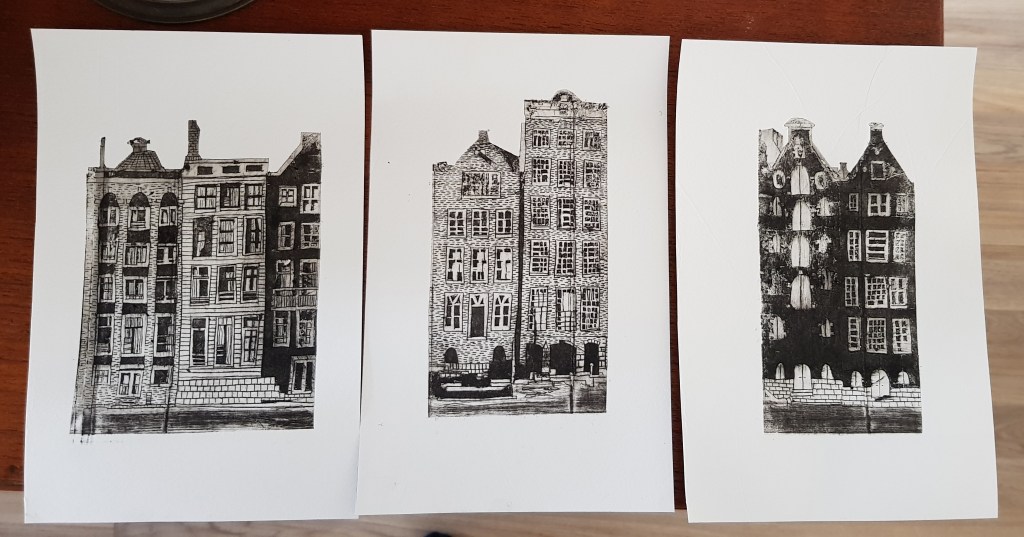
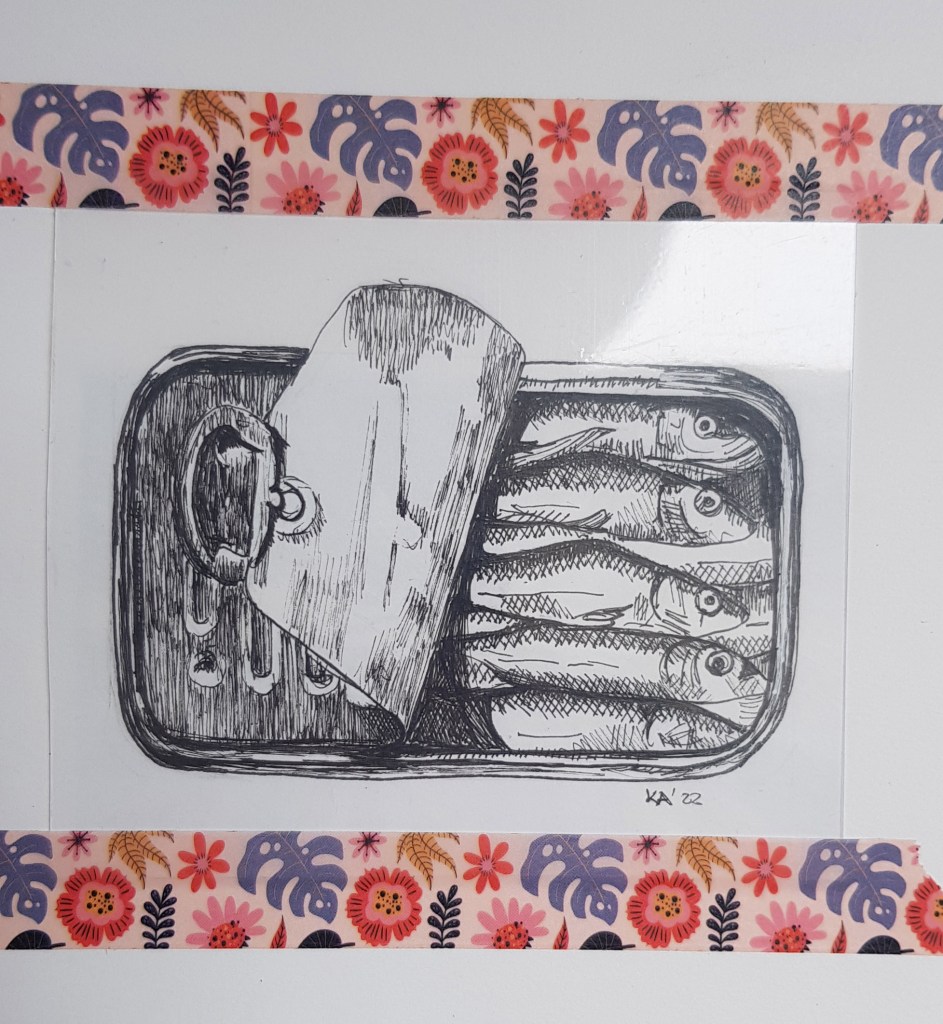
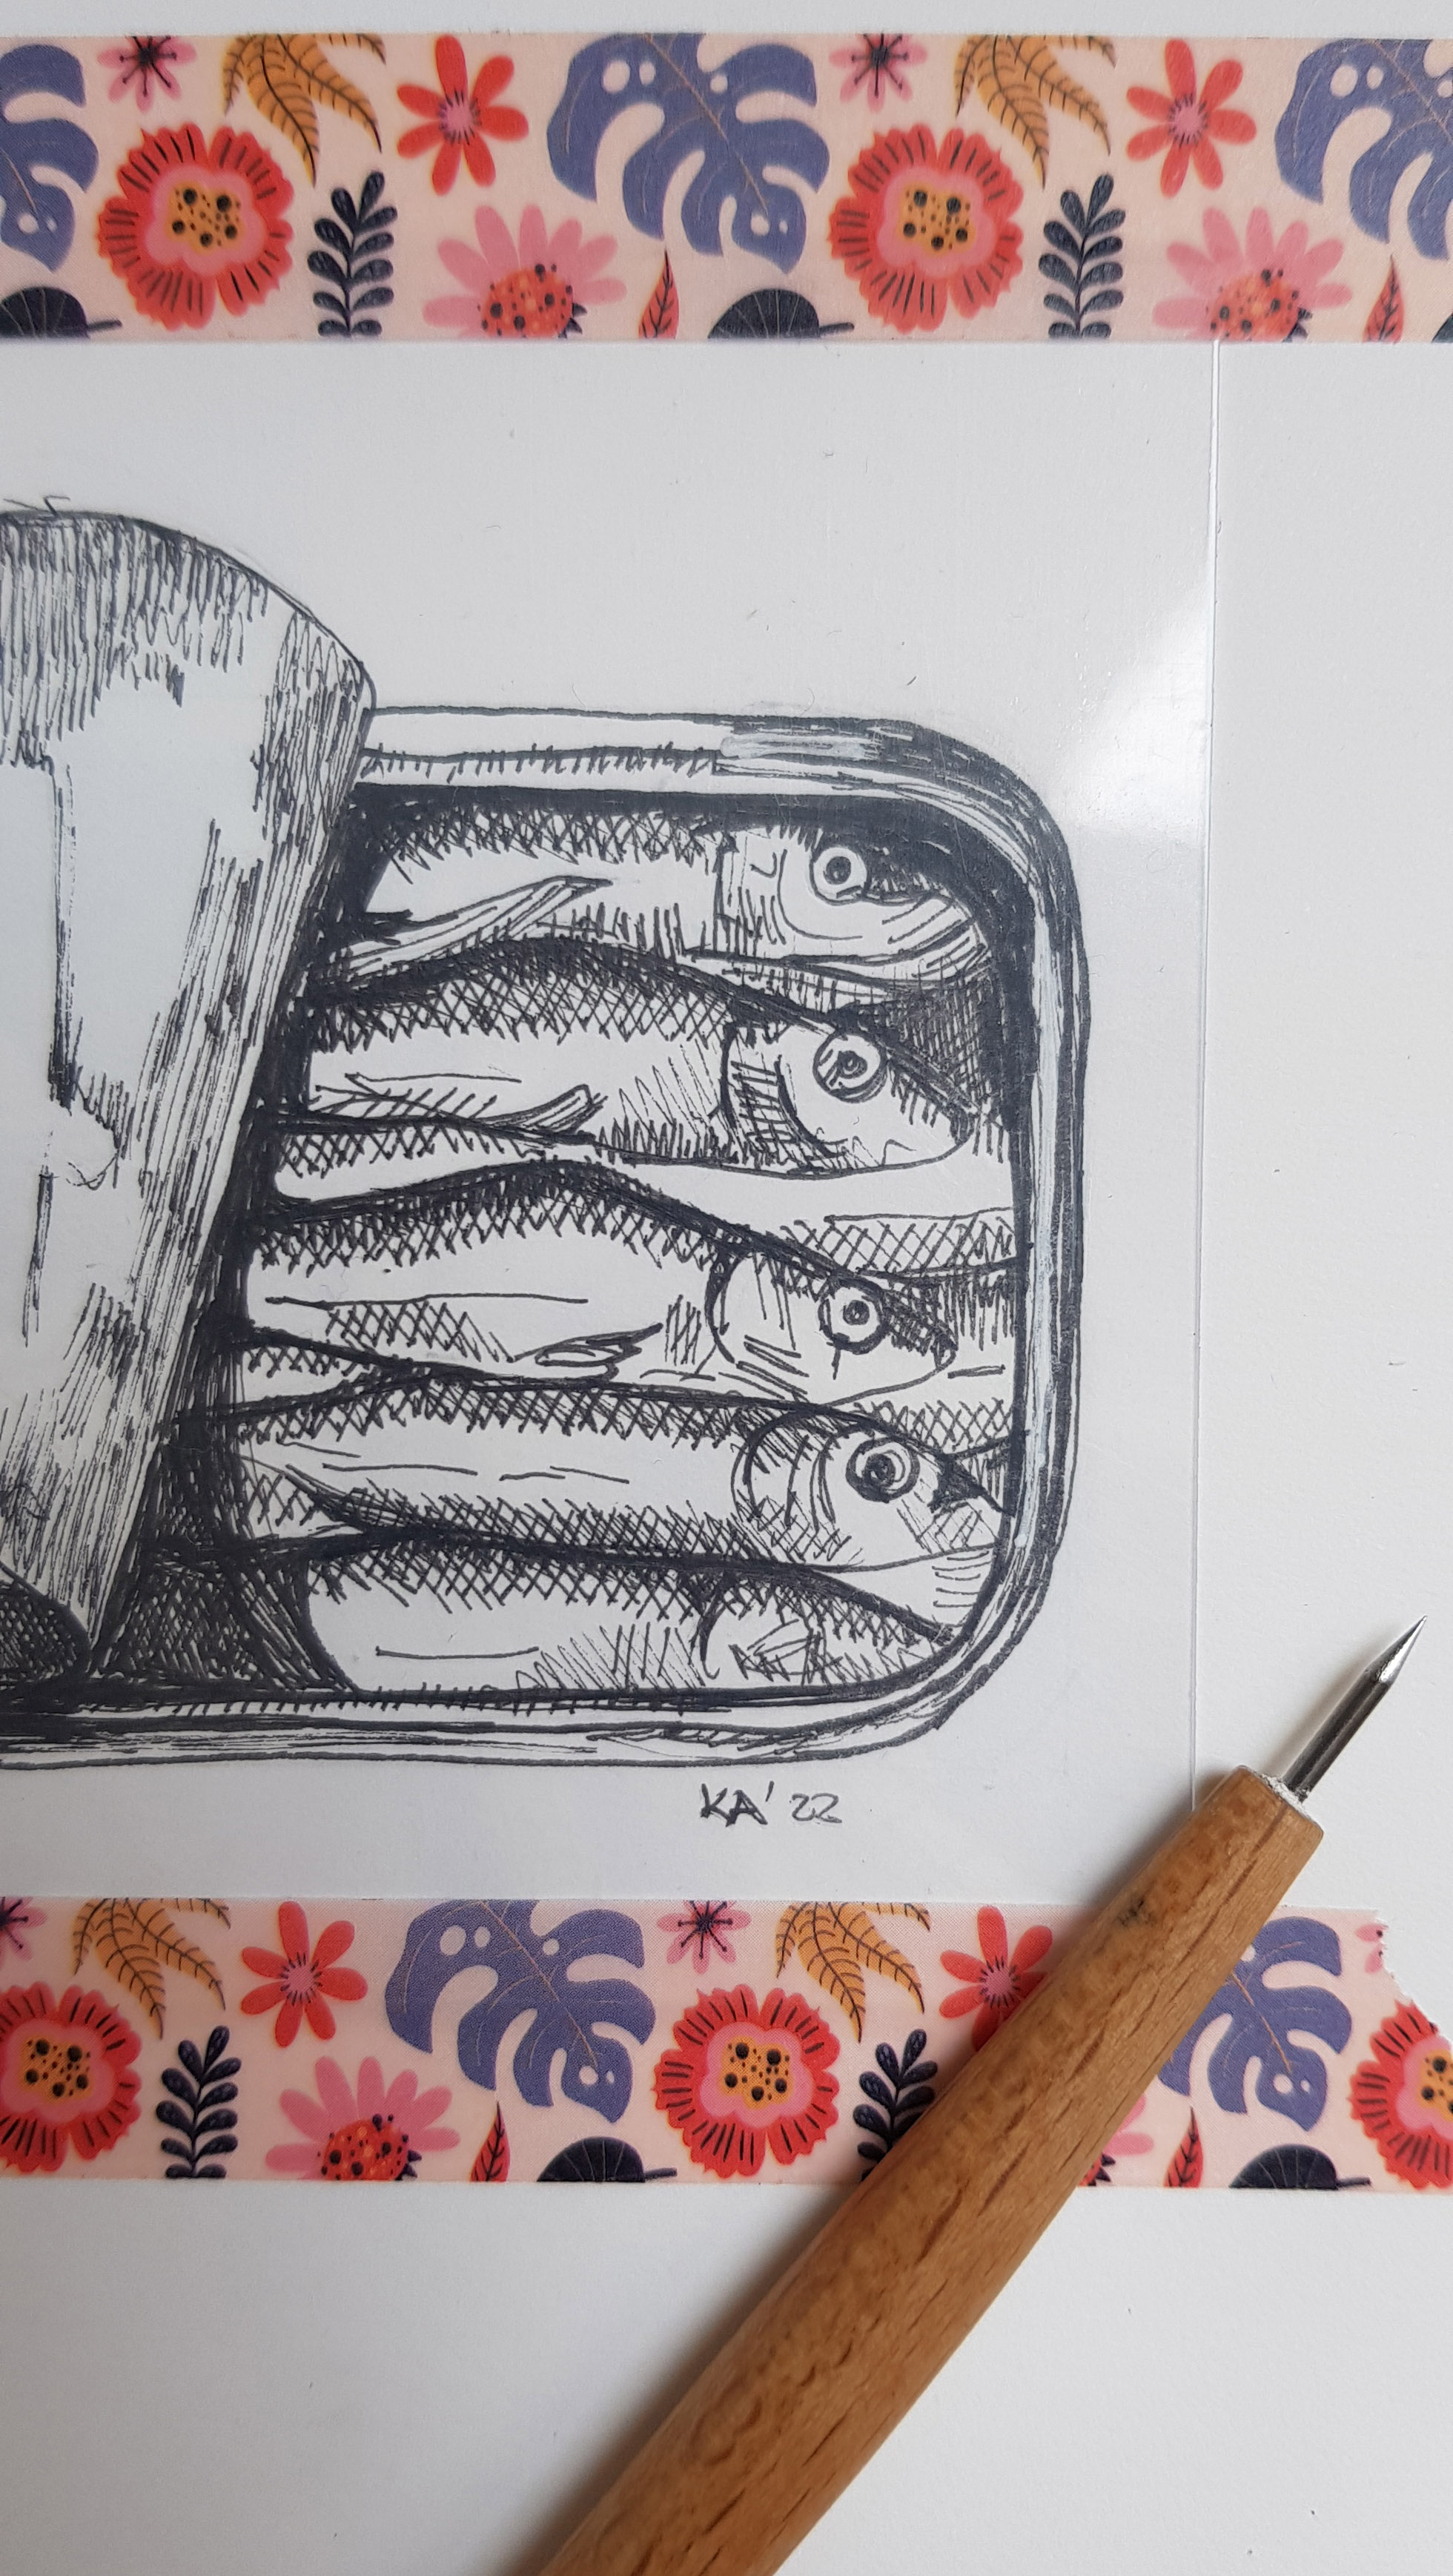
12. When you are happy with your plate, remove your gloves and wash your hands. You do not want any black fingerprints on your paper. I have decided to cut the image into 3 to make it easier for me to handle through the pasta machine.
13. Remove the watercolor paper from the water and tap dry with kitchen towel. When you hold the paper against the light, there should be no shiny parts.
14. Stack the pieces as follows: a piece of cardboard, then a piece of paper on top of the cardboard, next the watercolor paper, then the plate – face down onto the watercolor paper, again a piece of paper and lastly a piece of cardboard.
15.Grip it firmly and feed it into the pasta machine while rolling it evenly through the machine.
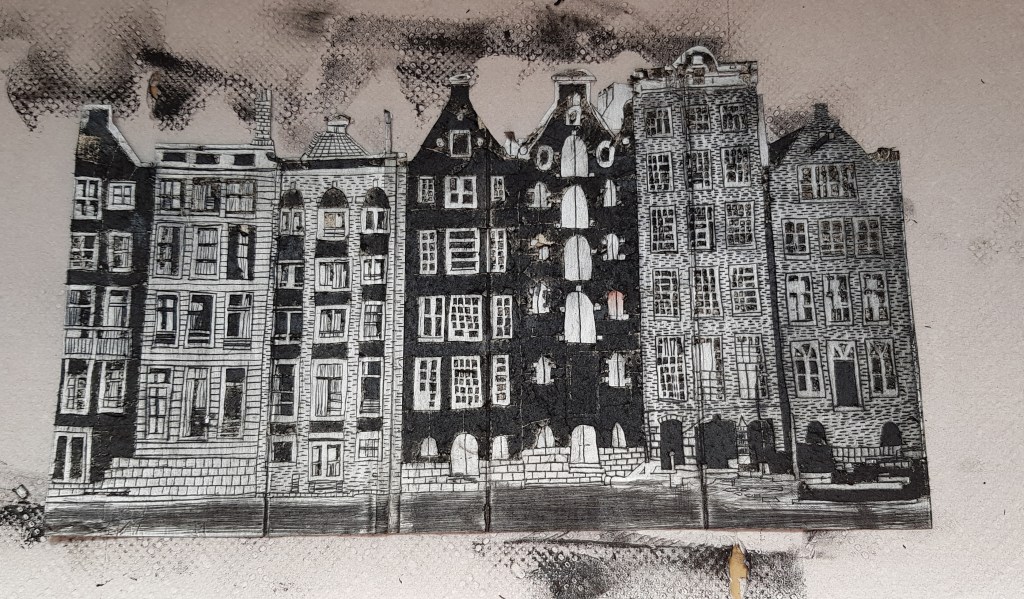
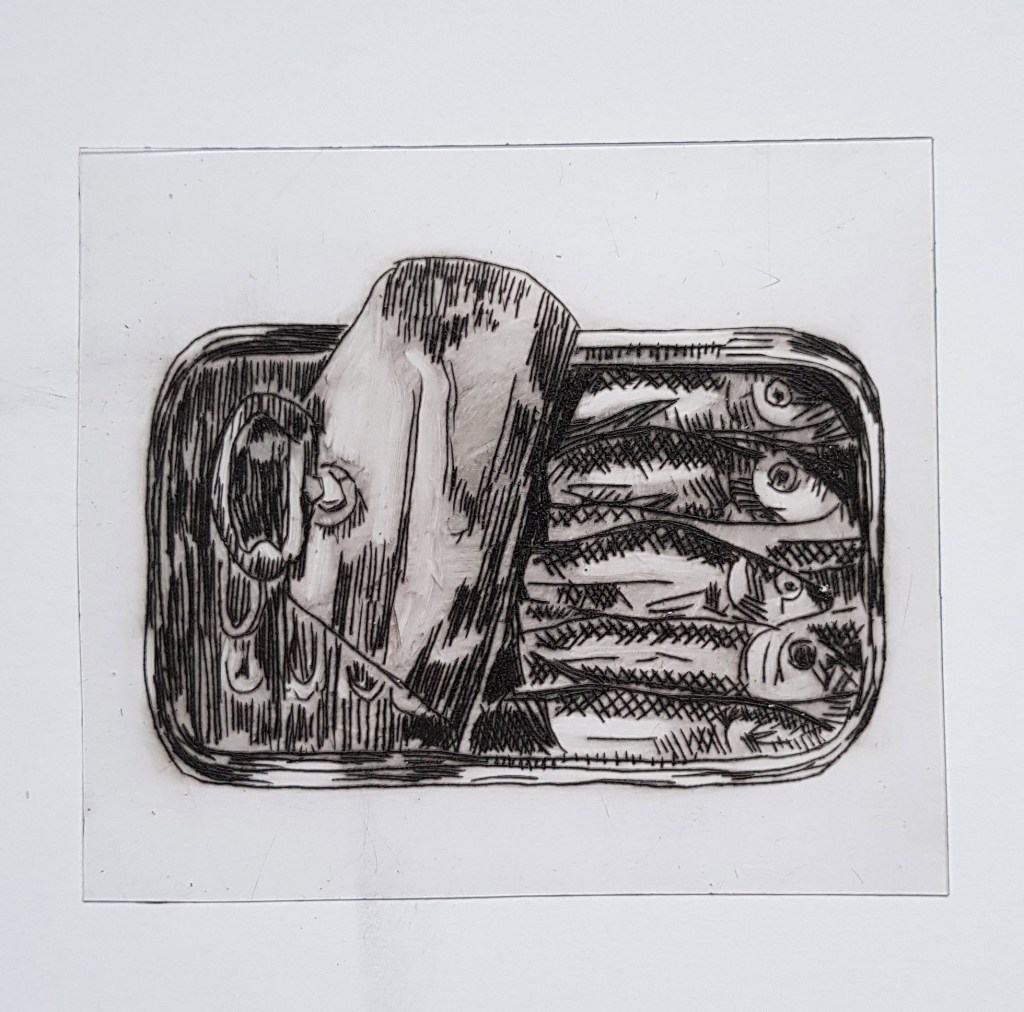
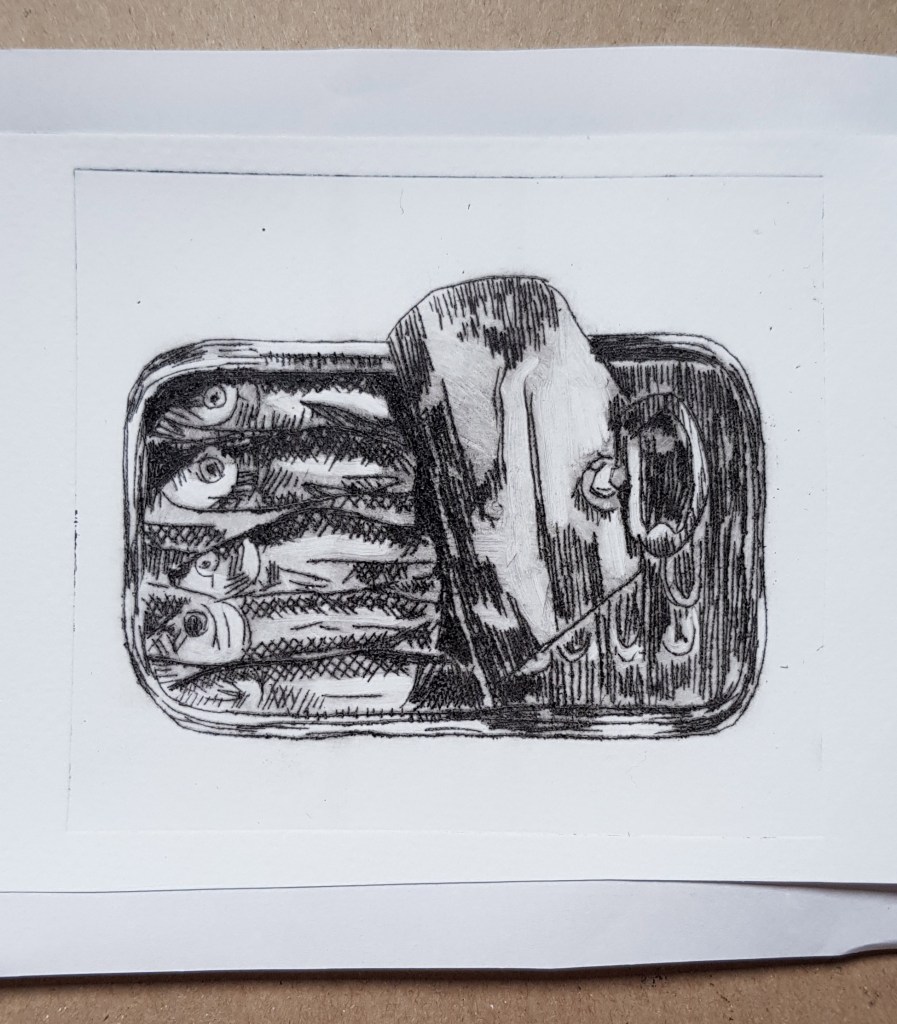
16.Remove all the pieces and enjoy your first piece of art!!!!
This printing process is called drypoint printing. Drypoint is a printing technique, where an image is engraved with a sharp point tool into a material such as metal or plastic. When the ink is rubbed over the engraved lines, the ink lies in the grooves of these lines while the rest is rubbed away.
This is a fun way to print at home without an etching press and a wonderful way to recycle plastic from food containers.
What you need:
Sketch/photograph
Plastic from a food container
Washi tape or sensitive masking tape: too strong masking tape might tear the surface of your sketch paper or image
Etching tool or craft knife
Watercolor paper
Rectangular bowl with water
Plastic gloves
Etching ink
Soft cotton fabric like cheese cloth
Kitchen towel
A few cotton swabs
Paper (it can be printing paper or unprinted newspaper)
Cardboard from cereal box
Pasta machine, mounted firmly on a table
Method:
Make a sketch on paper or in your sketchbook or use a picture or photograph. REMEMBER: your image is going to print as a mirror image.
2. Cut a piece of plastic the size of the image – when you cut it slightly larger than the image, it will have more space around the image.
3. Stick the plastic with washi tape/sensitive tape onto the image or sketch to keep it in place while you trace it.
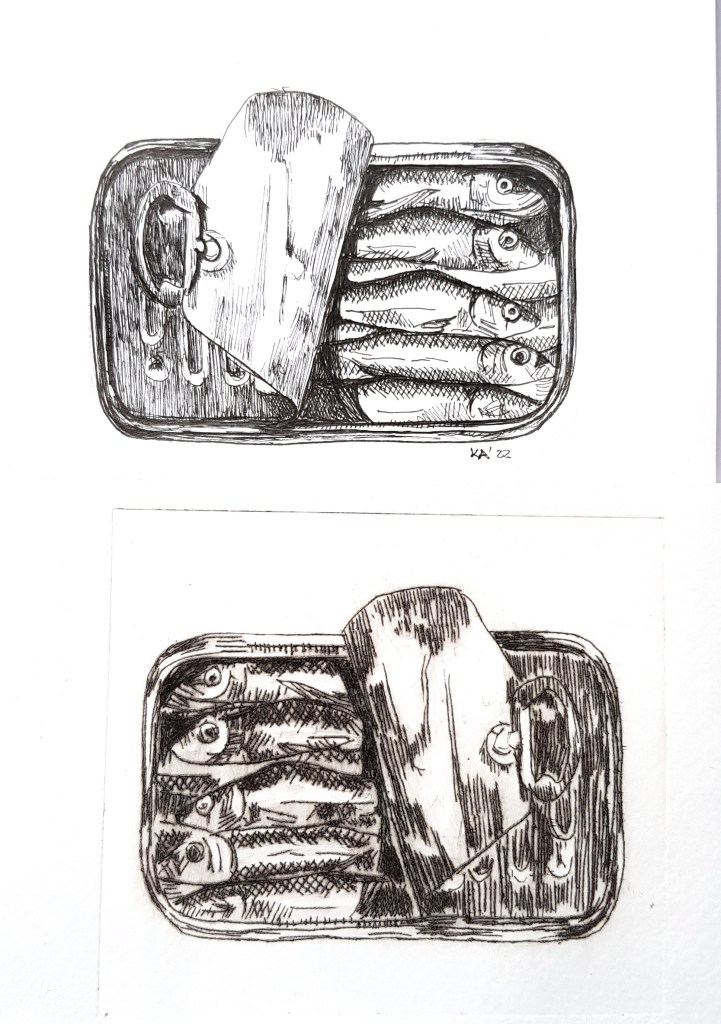
3. Use the etching tool or the sharp point of a craft knife and make engravings into the plastic along your black sketch lines. If you want dark areas, make small cross-hatched engravings.
4. Cut the watercolor paper the size or larger than engraved image and soak it for 20 minutes in a flat rectangular bowl of water.
5. Also cut two cardboard pieces and two paper pieces larger than the watercolor paper.
6. While waiting, remove the engraved plastic plate from the paper image or sketch.
7. Put the plastic gloves on and put a dollop or two of the ink onto the plastic plate. I have used Lino ink, because I already had it in my arts stash and it is water based. Other non-water based etching inks will be stickier and harder to rub clean, but also works perfect.
8. With circular movements rub the ink with your finger into the grooves and cover the whole plate.
9. With the cloth, rub all the excess ink from the plate. Lastly with light movements and kitchen towel, wipe the plate on both sides clean.
10. Use the cotton swabs and wipe small highlight areas.
11. When you are happy with your plate, remove your gloves and wash your hands. You do not want any black fingerprints on your paper.
12. Remove the watercolor paper from the water and tap dry with kitchen towel. When you hold the paper against the light, there should be no shiny parts.
13. Stack the pieces as follows: a piece of cardboard, then a piece of paper on top of the cardboard, next the watercolor paper, then the plate – face down onto the watercolor paper, again a piece of paper and lastly a piece of cardboard.
14. Grip it firmly and feed it into the pasta machine while rolling it evenly through the machine.
15. Remove all the pieces and enjoy your first piece of art!!!!
Some possible problems you might encounter:
If it is too light, you have rubbed away too many ink:
If your paper was too wet, you will have runny ink marks:
Experiment, have fun and just enjoy the creative process!
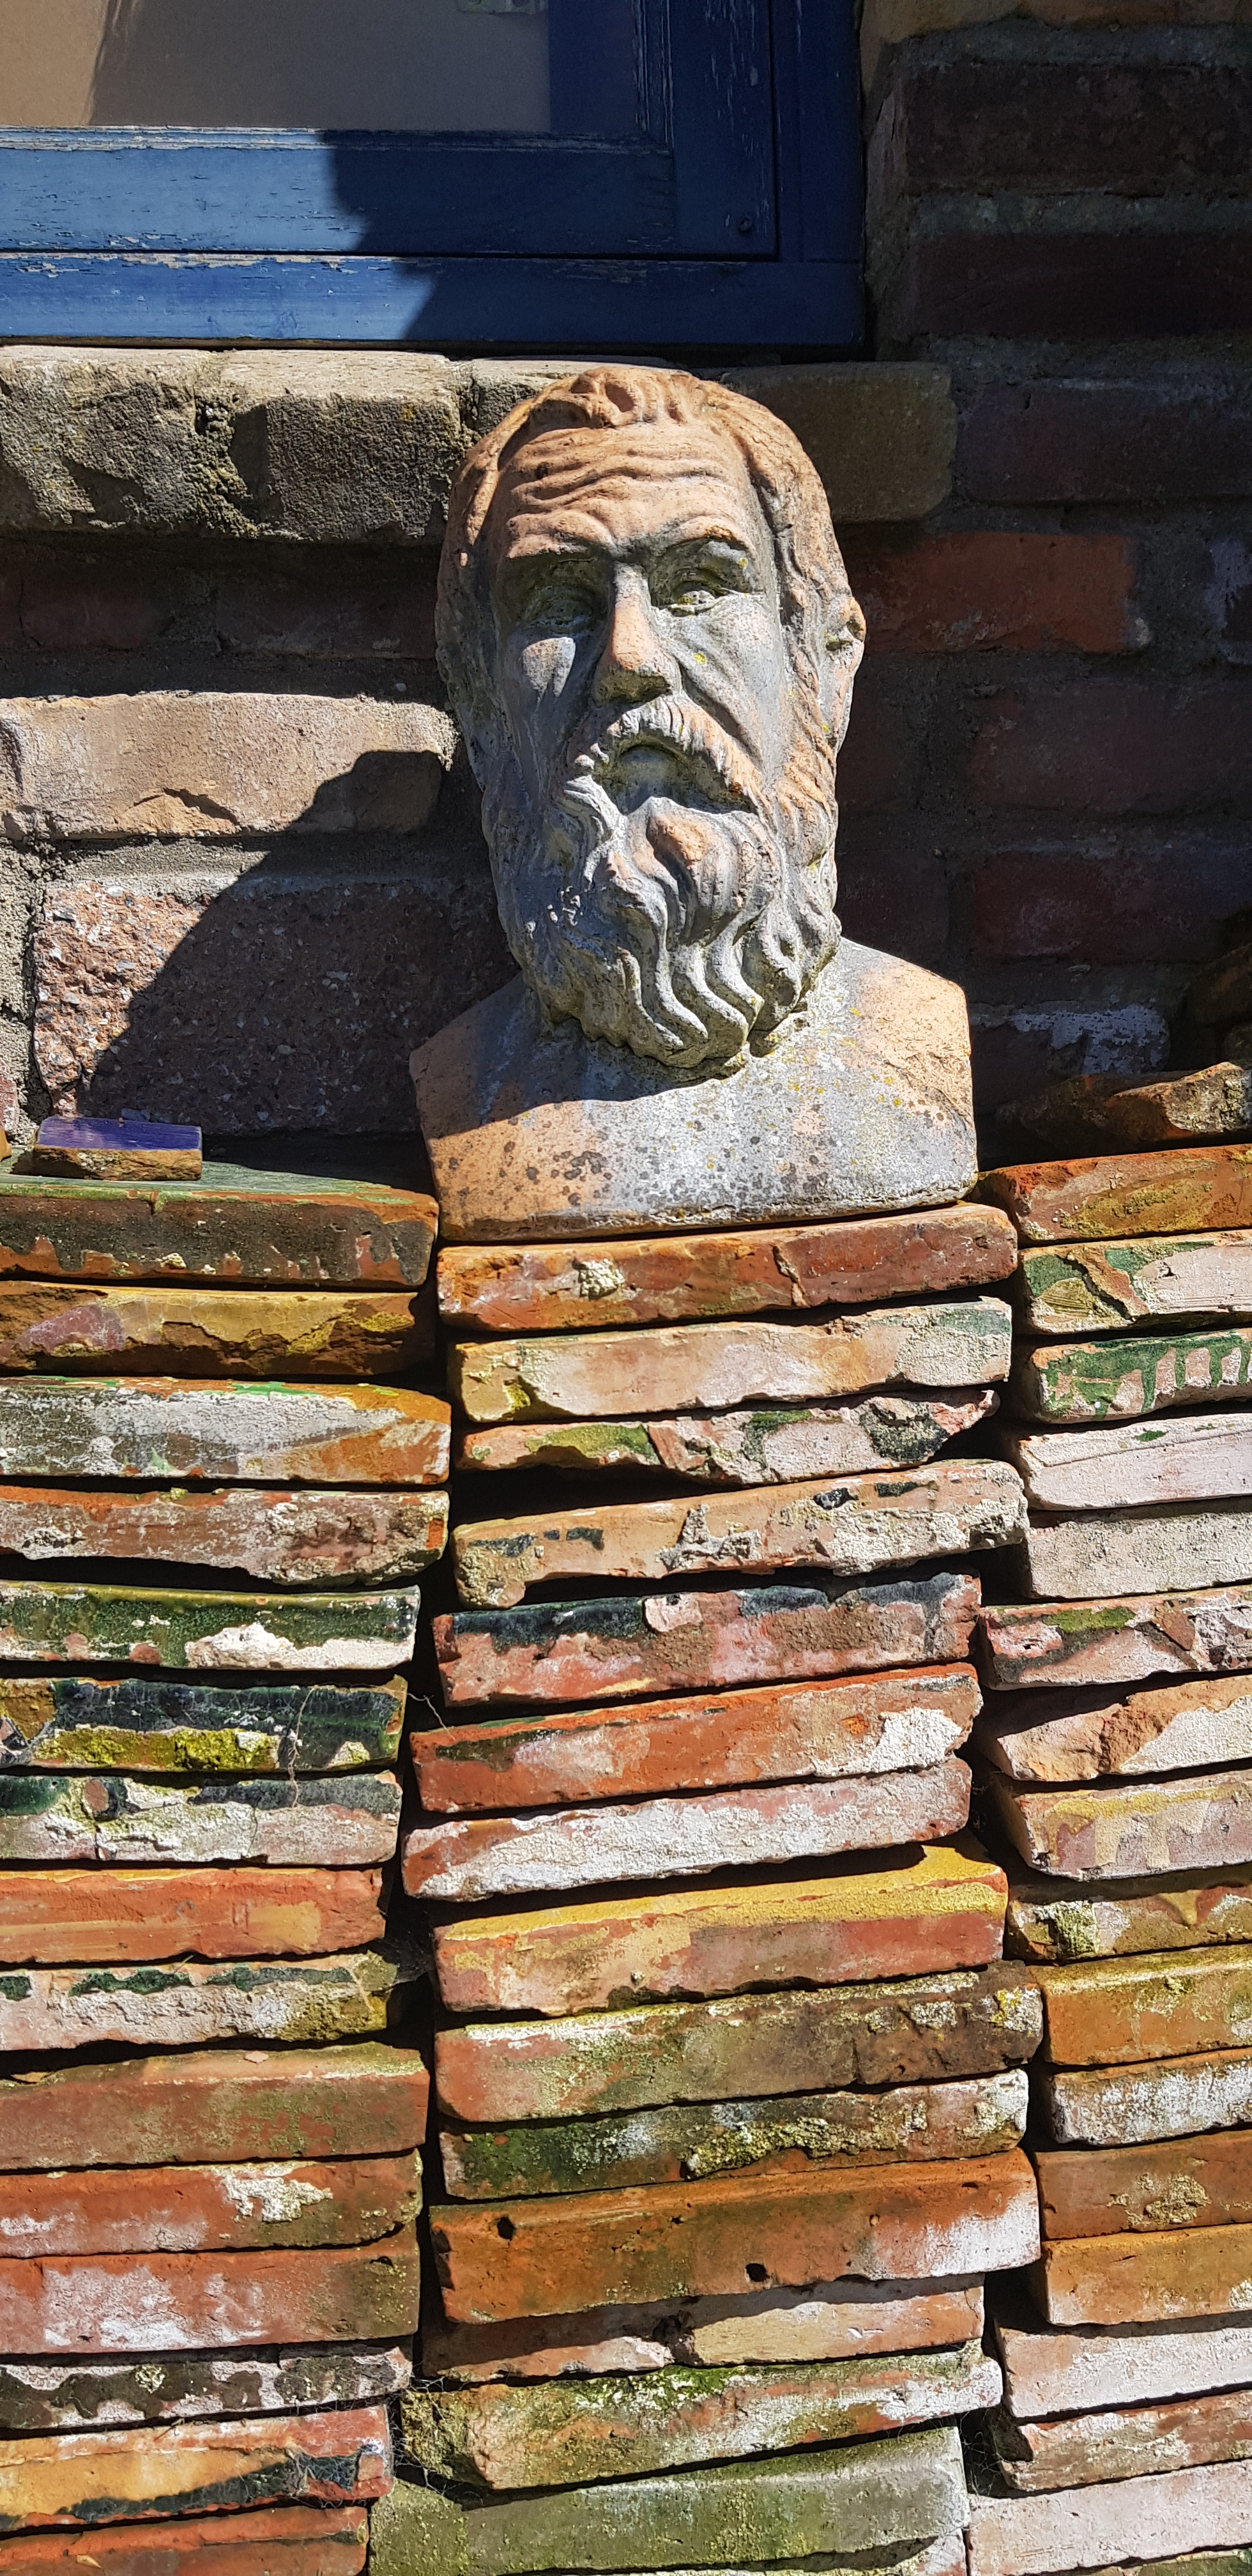
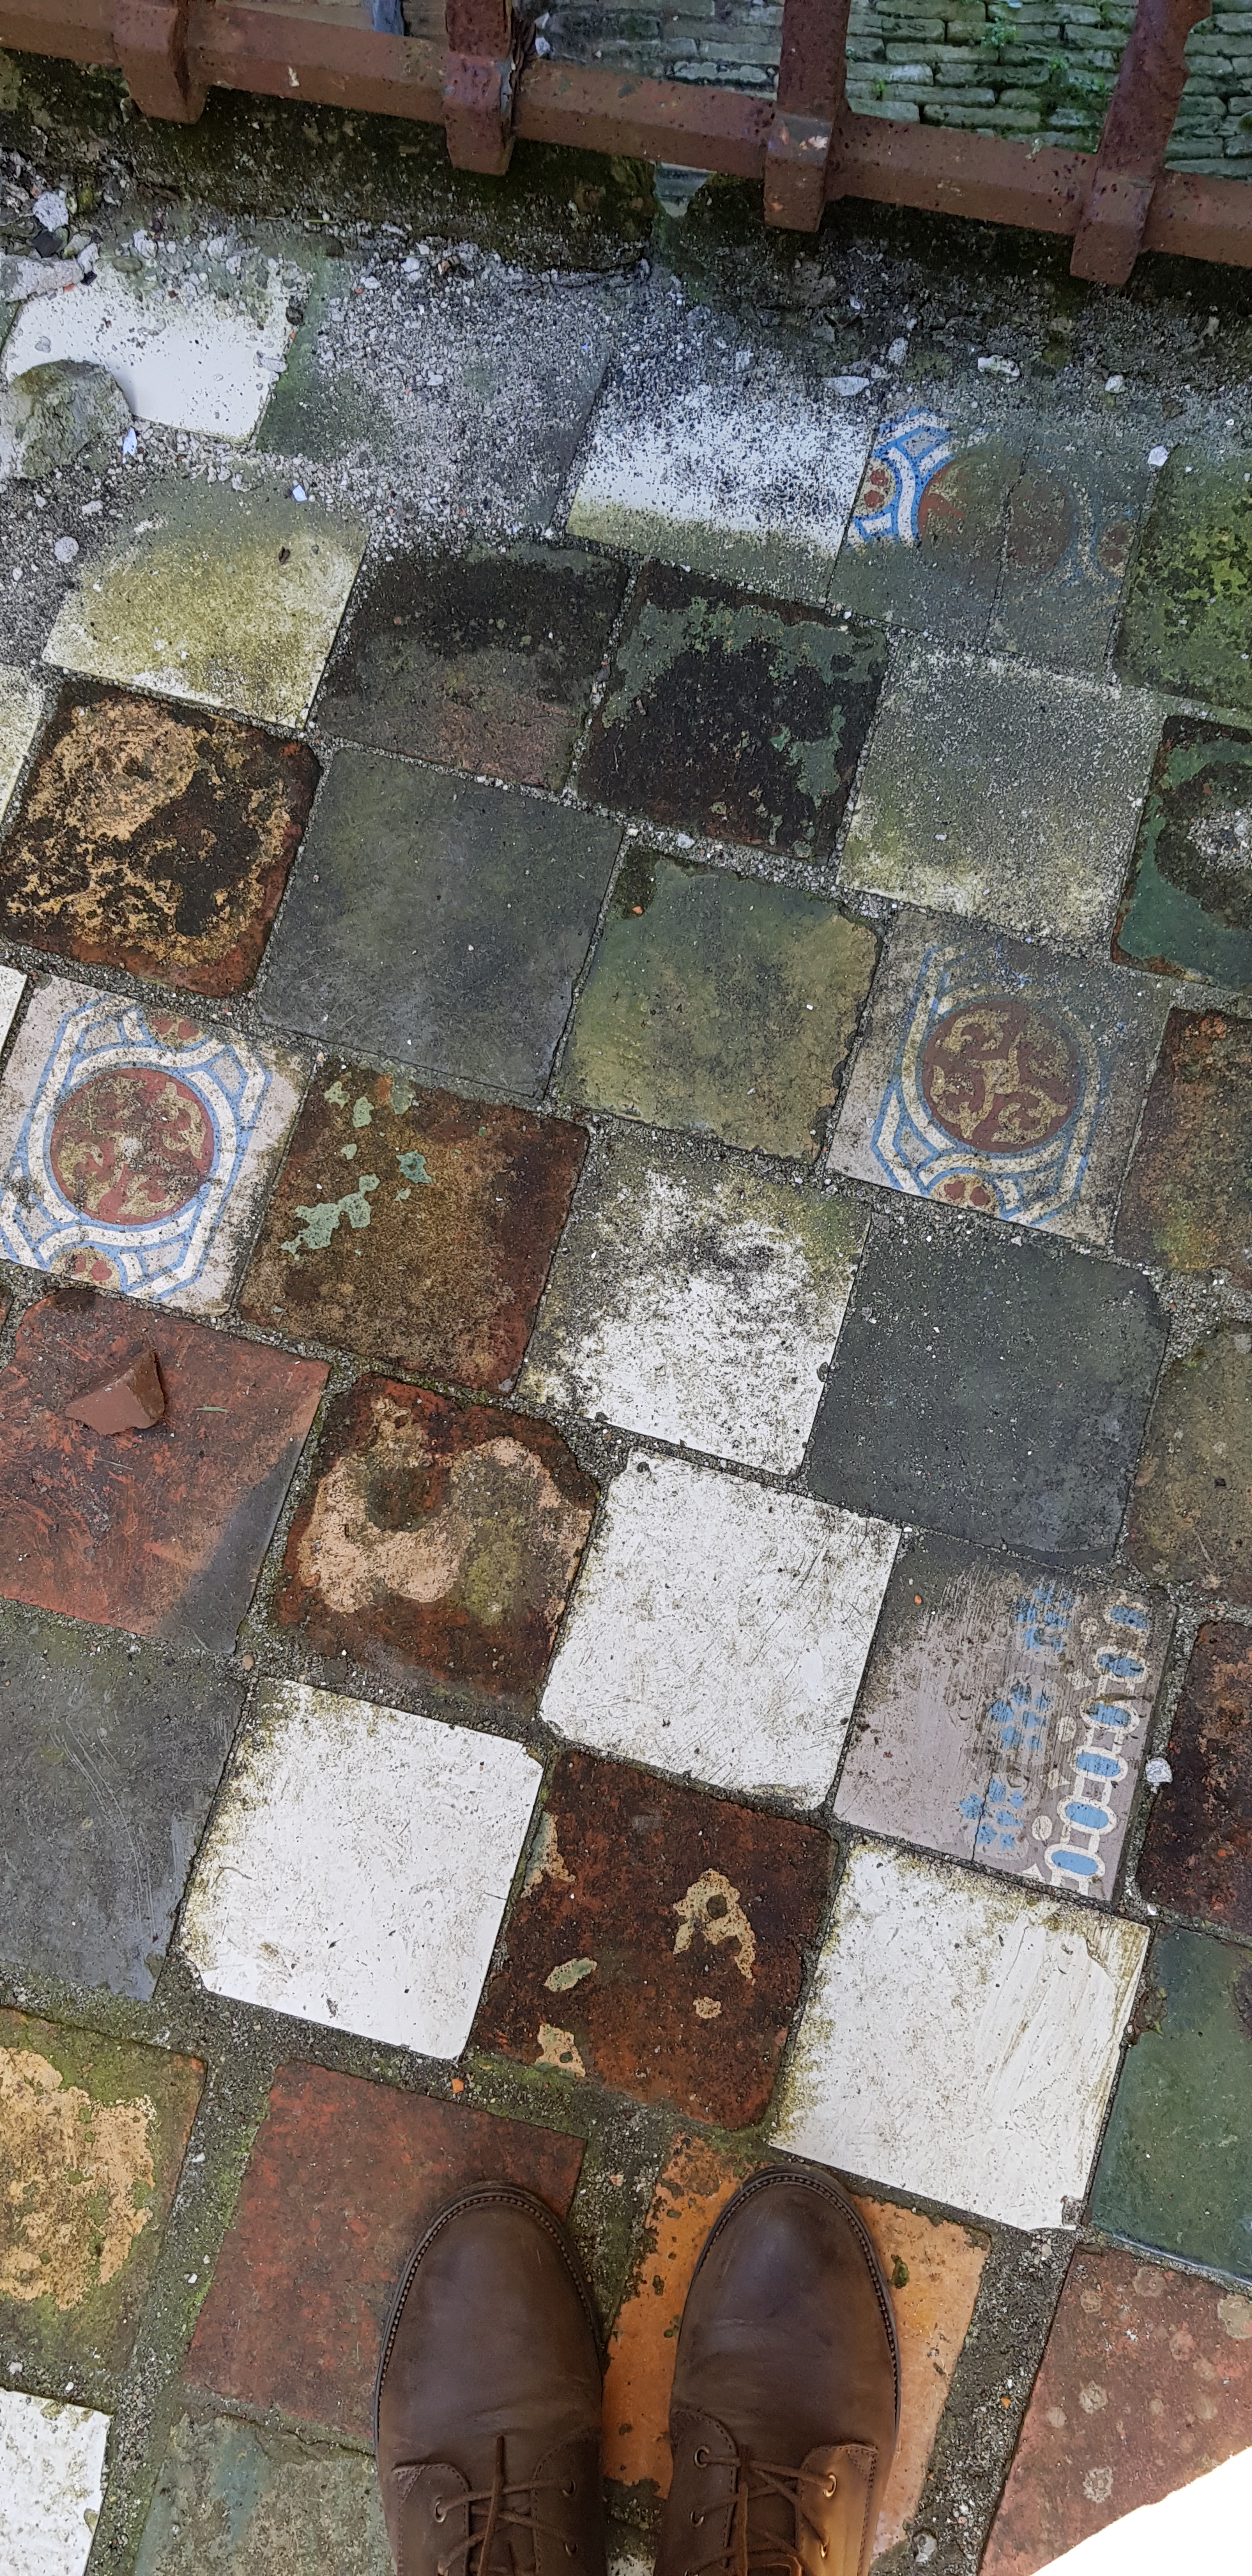
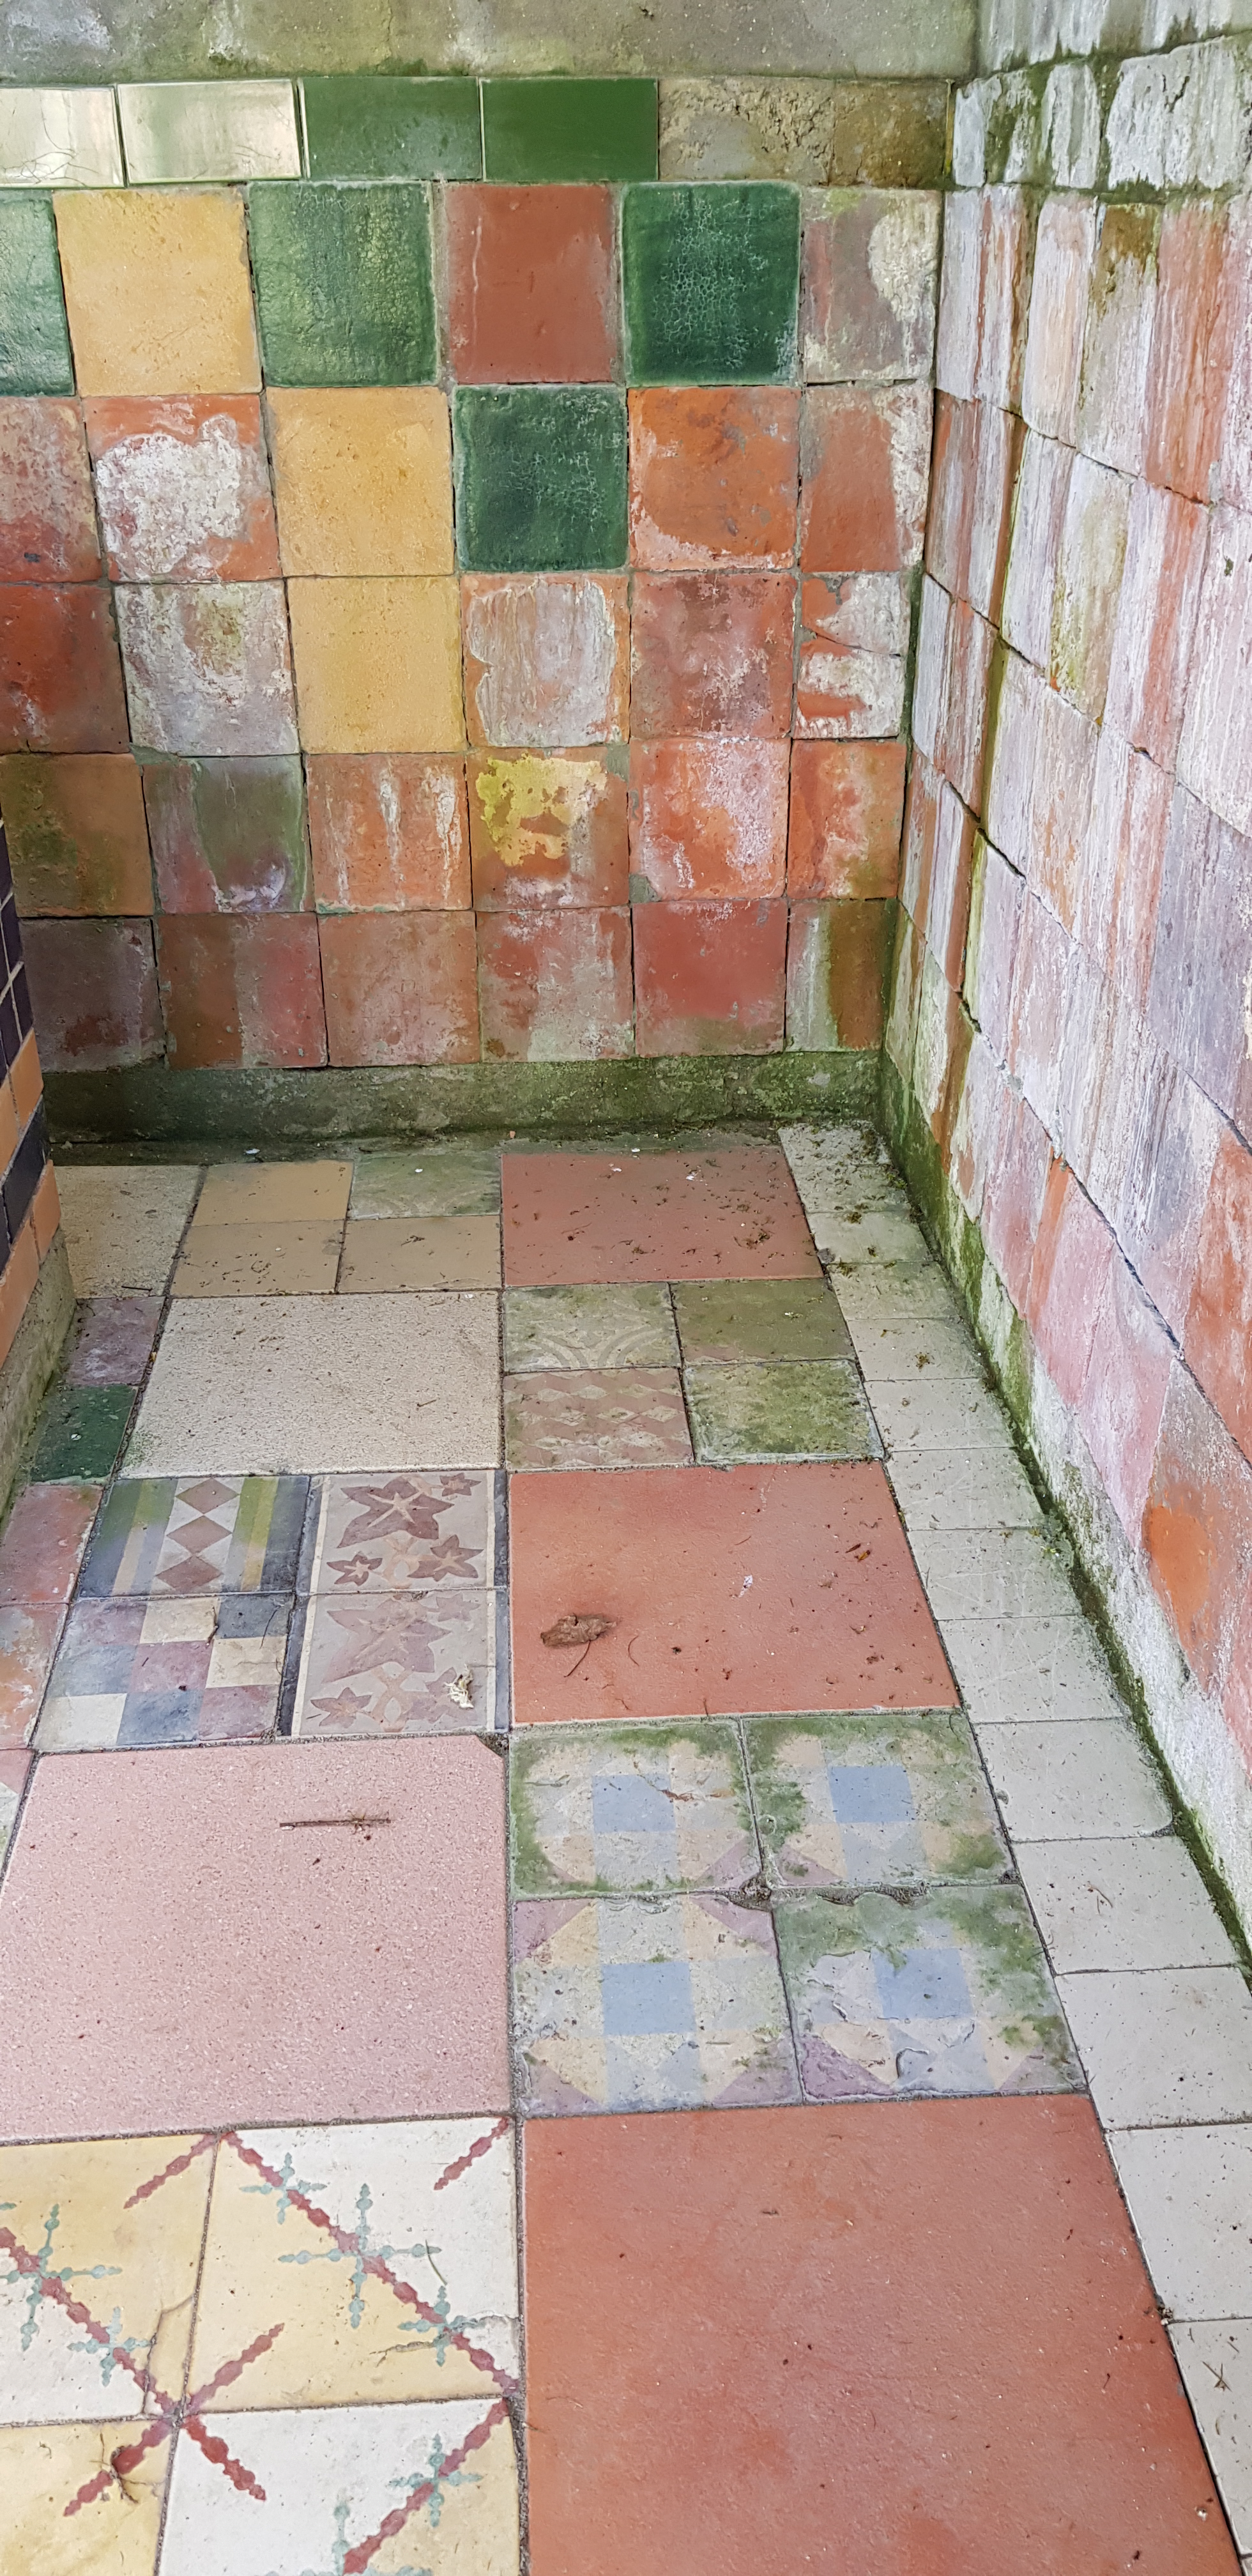
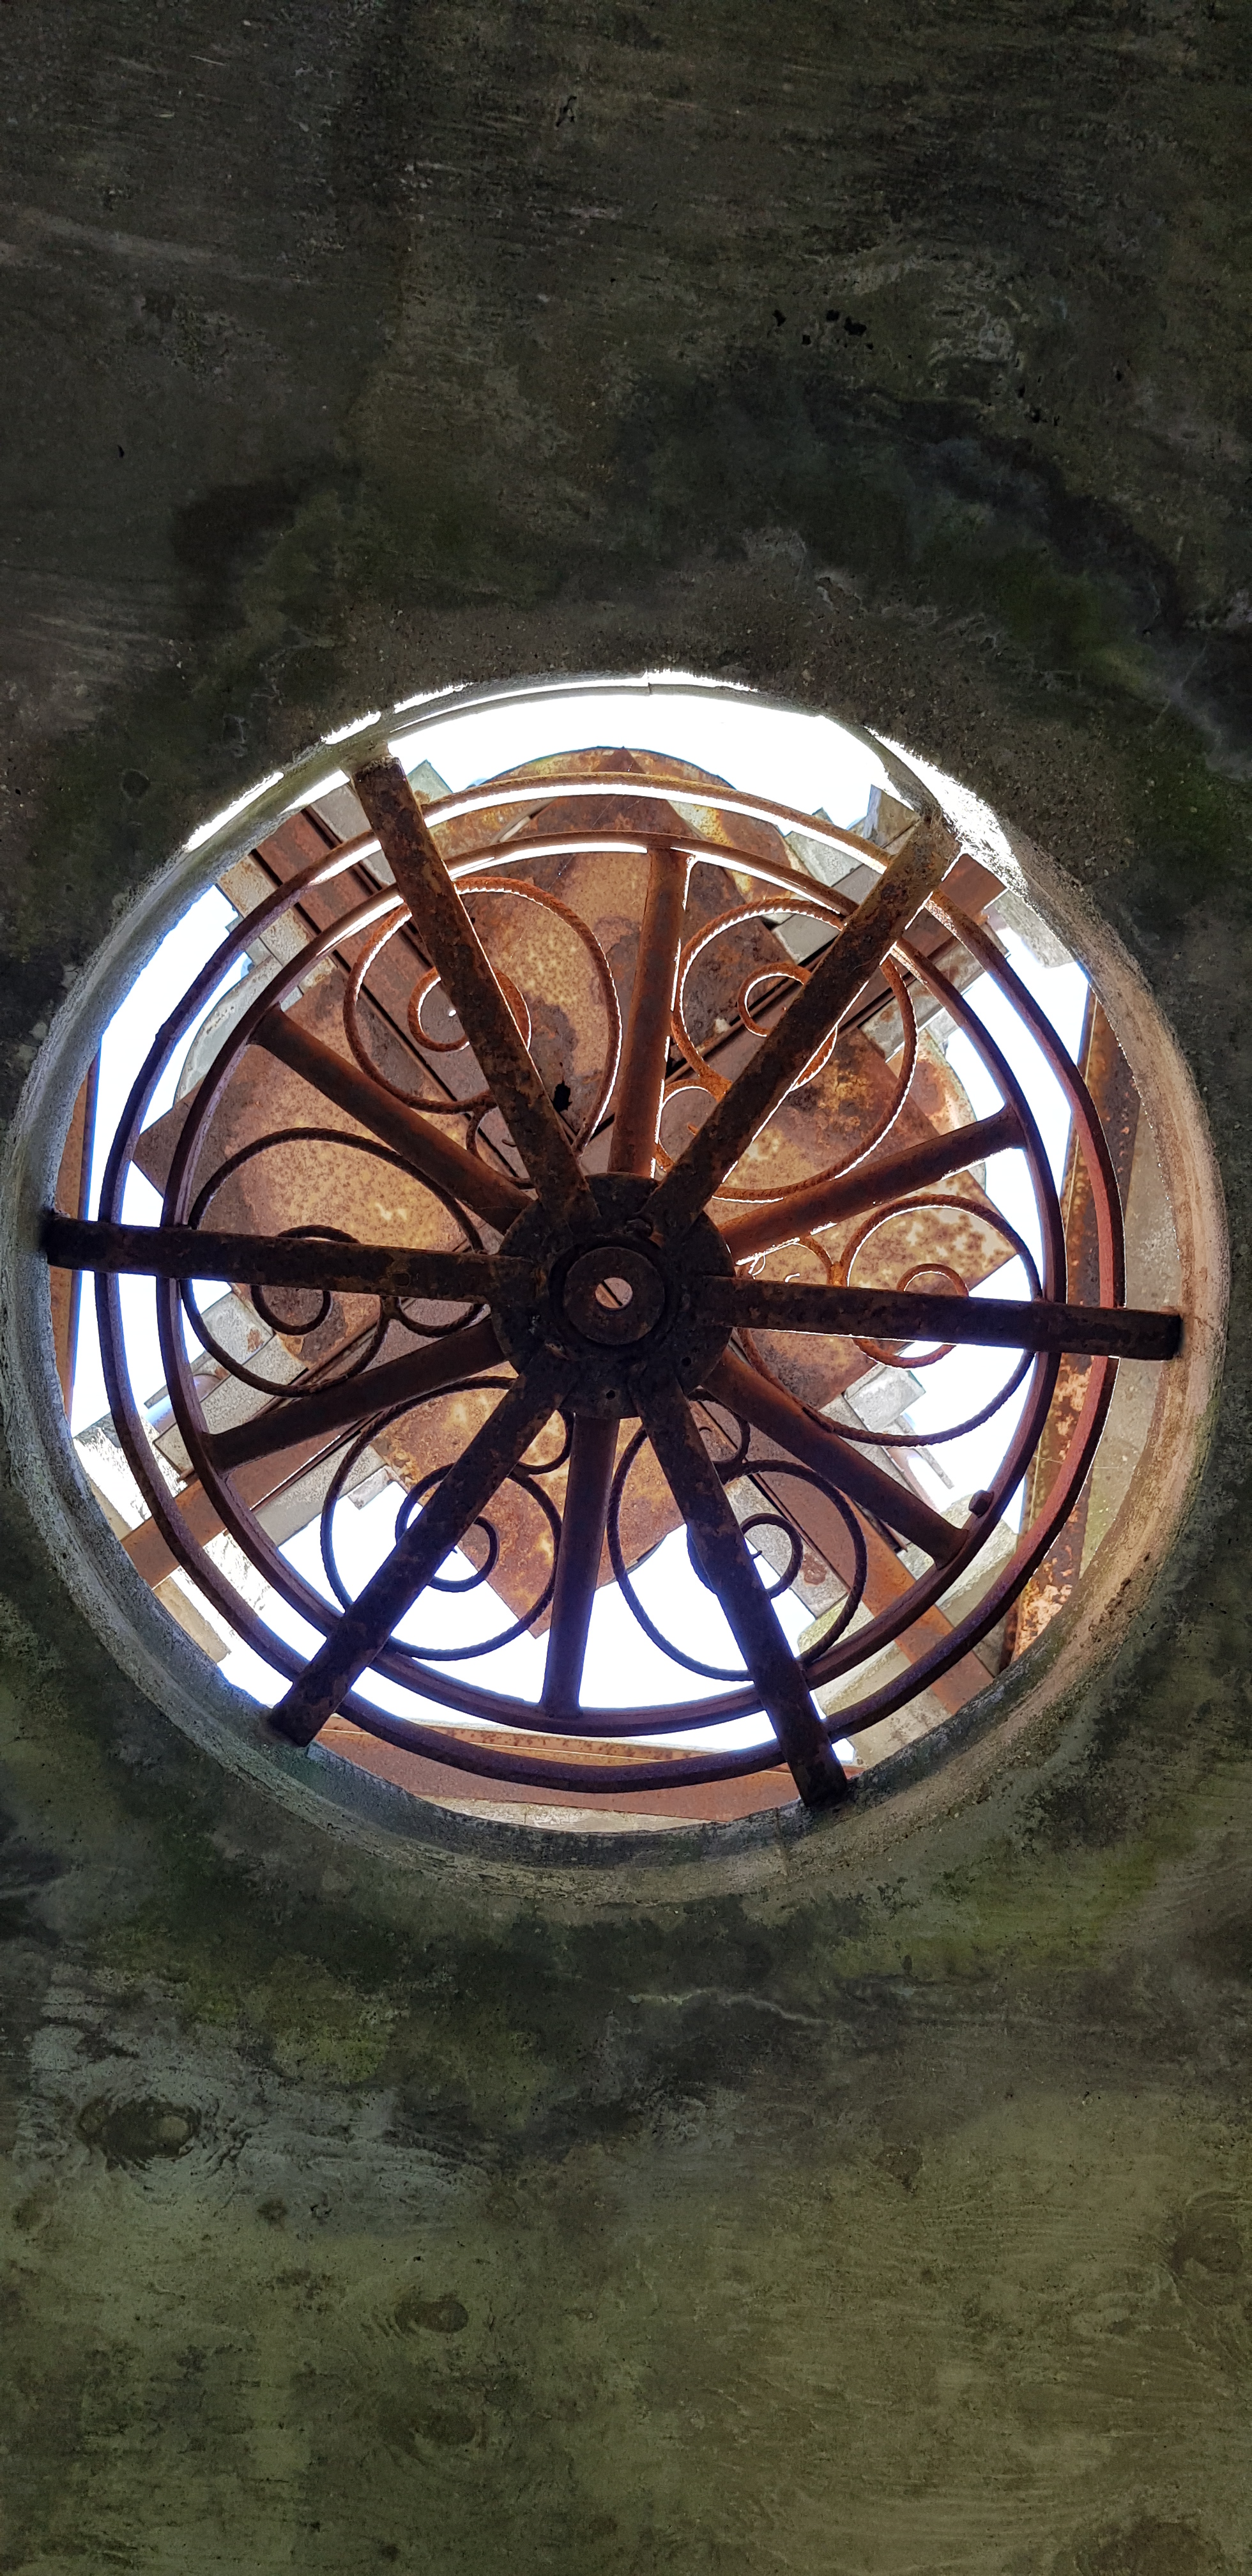
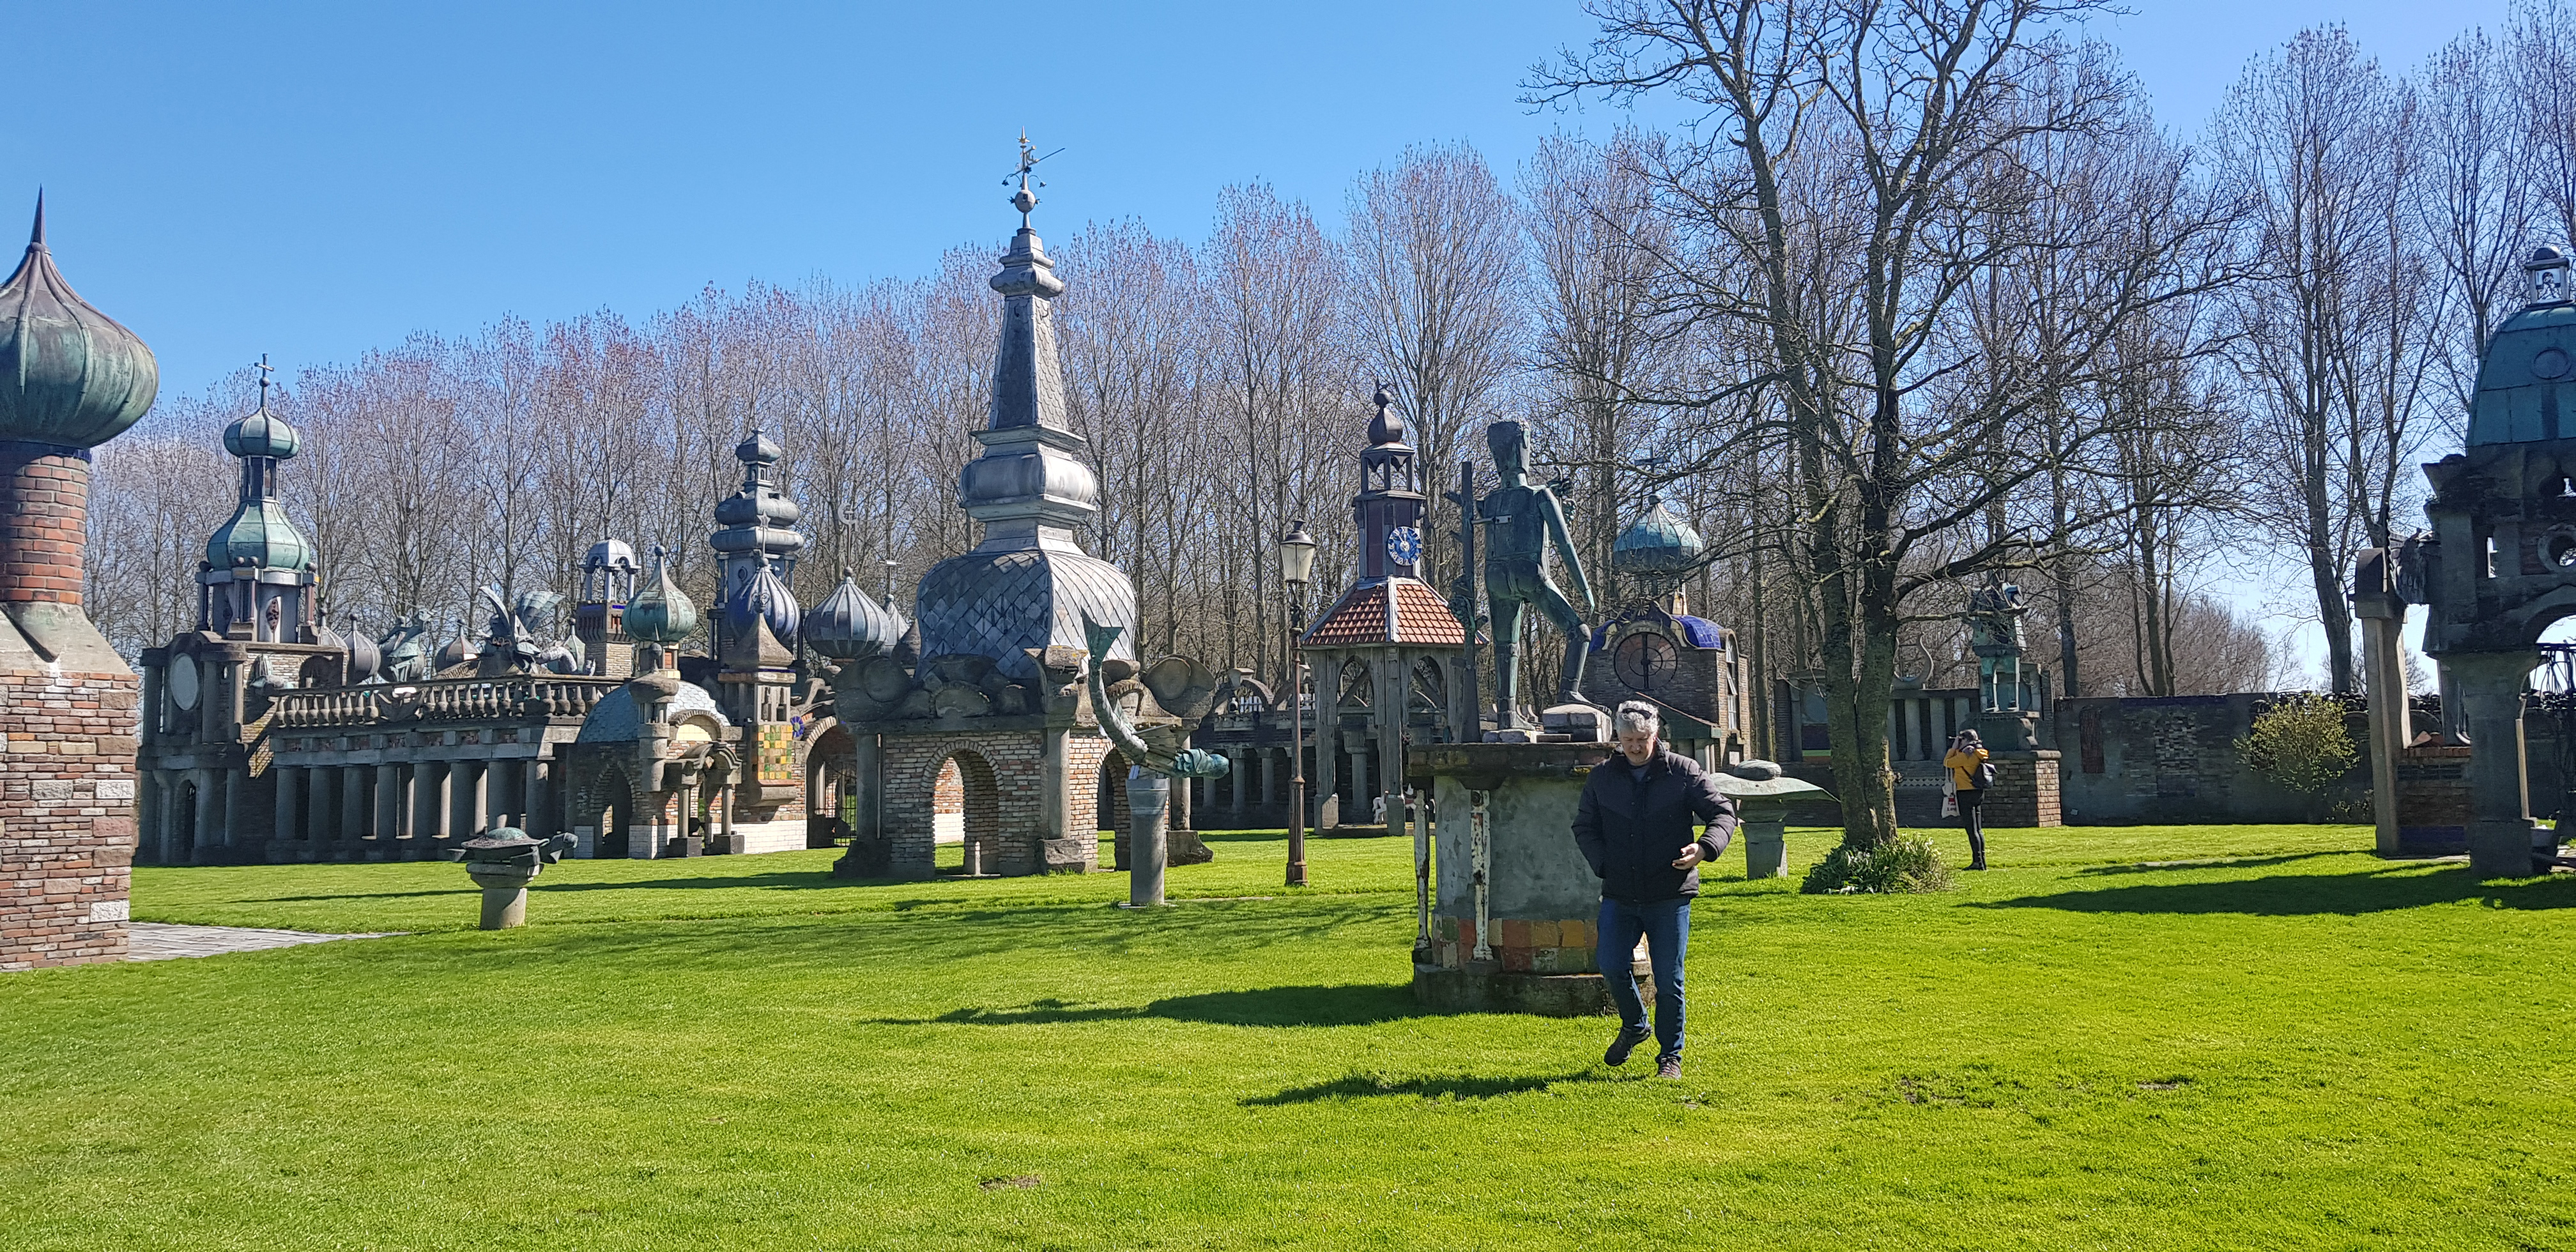
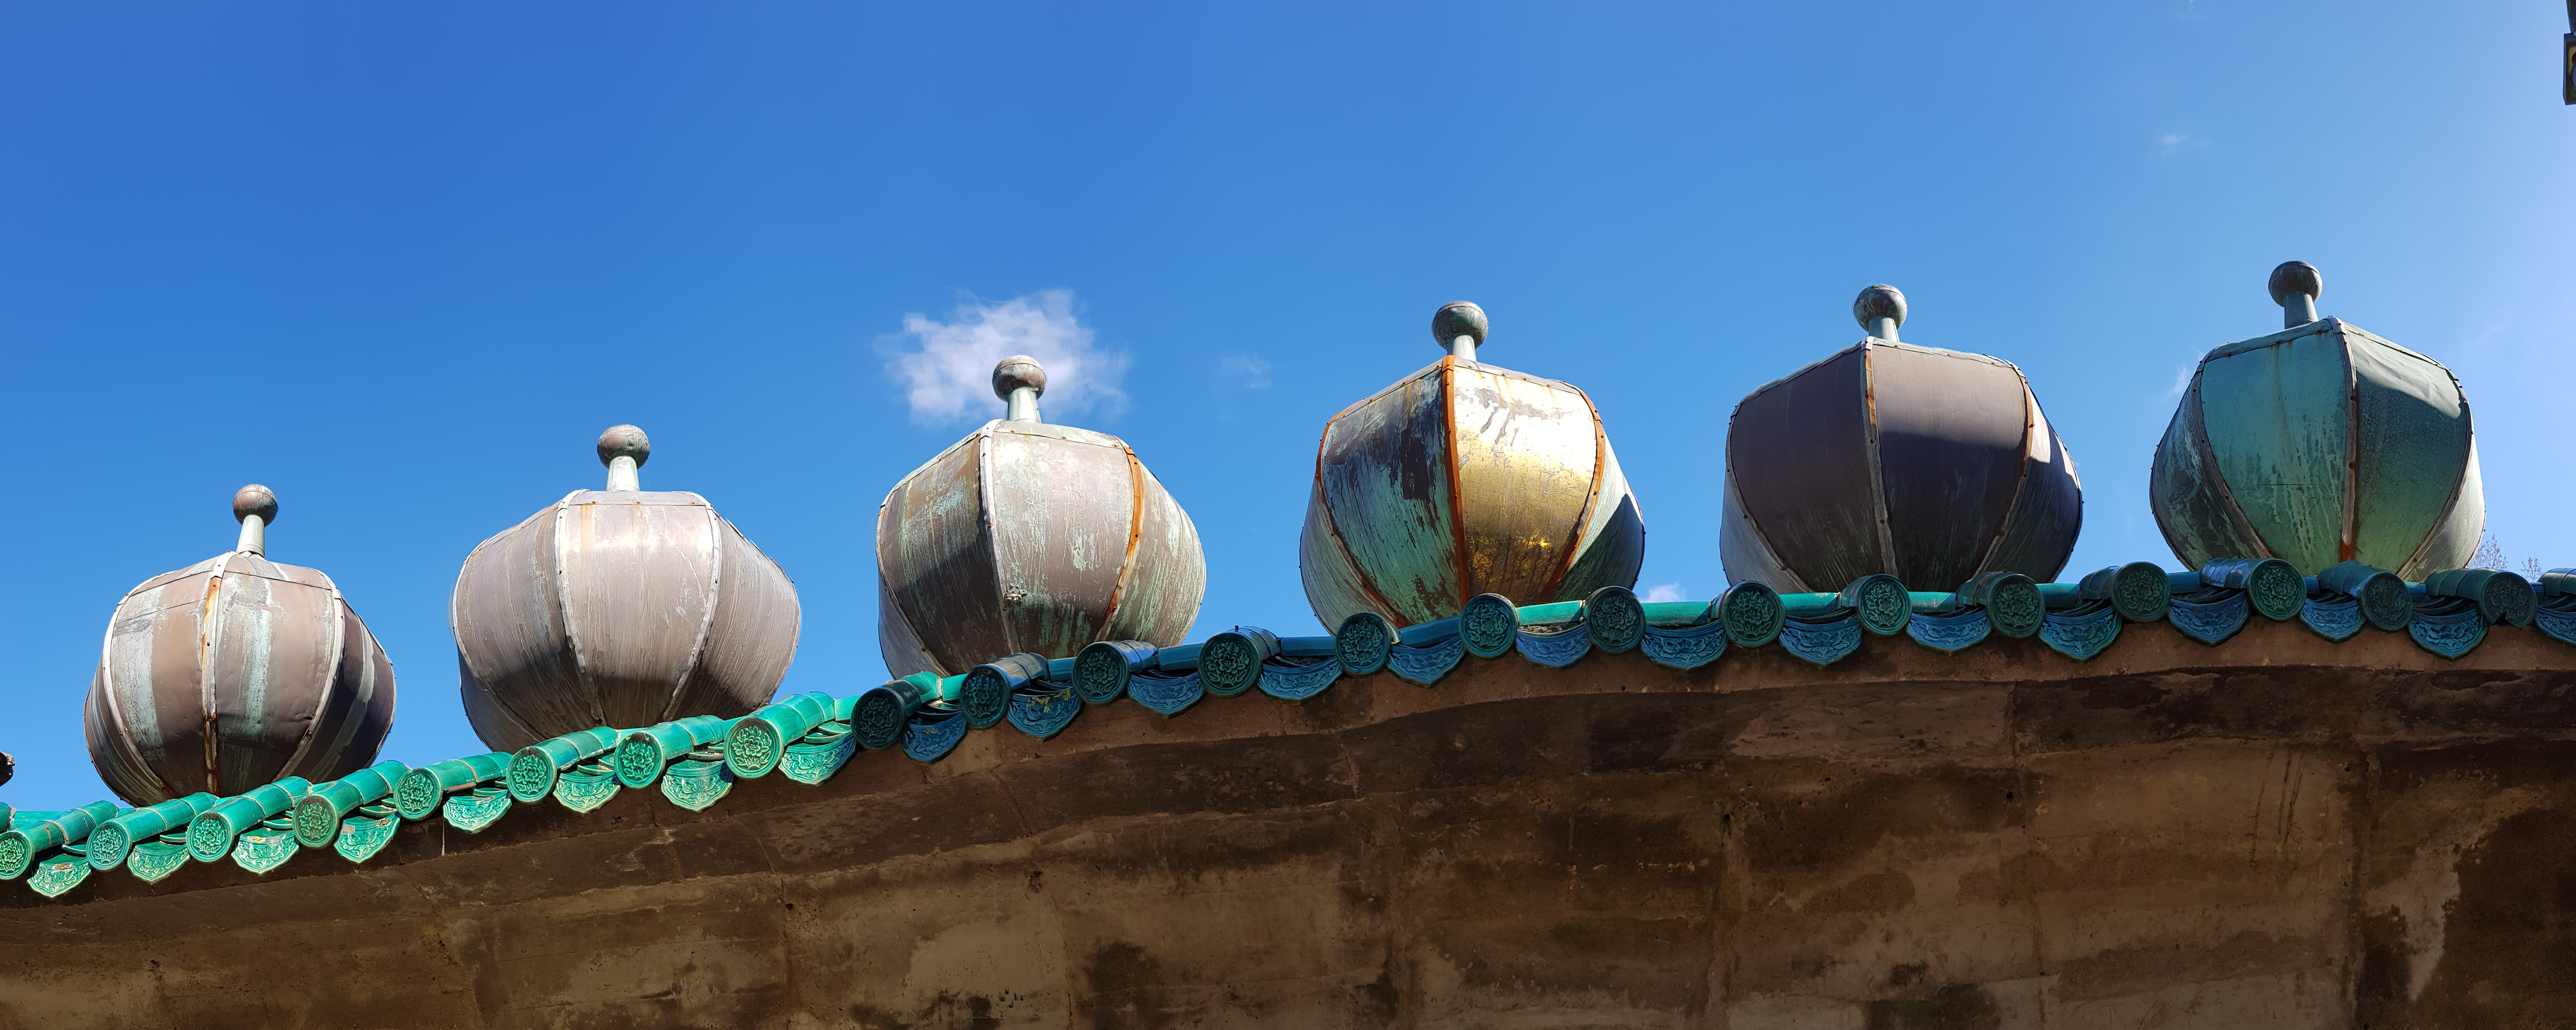
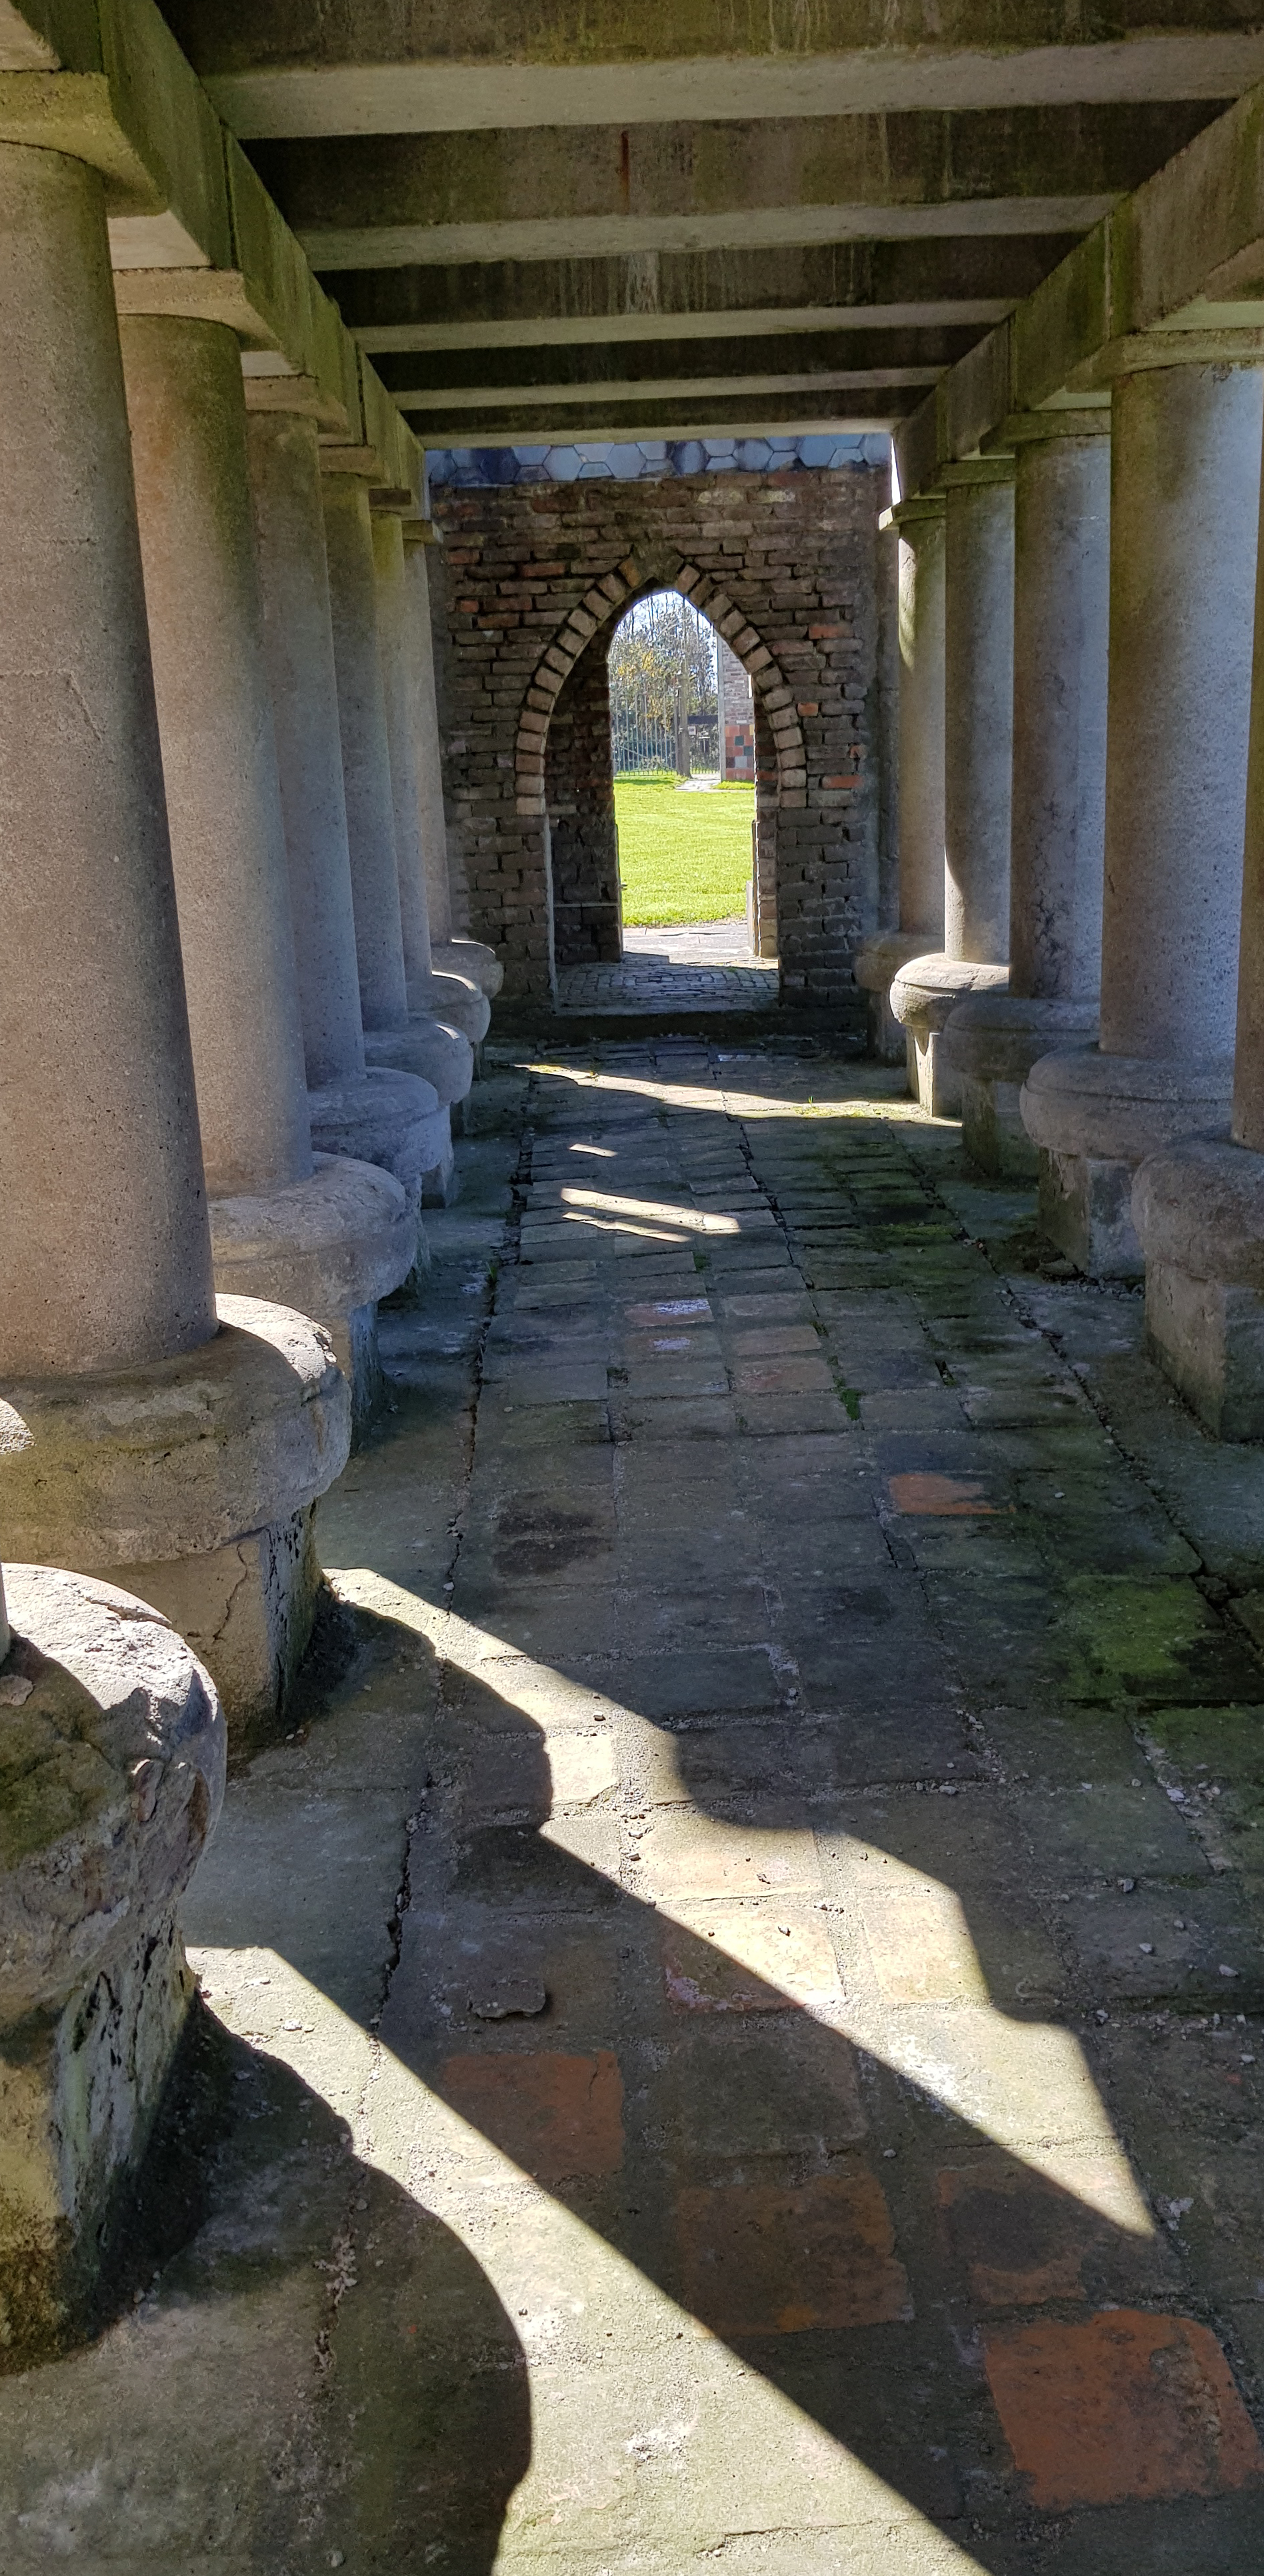
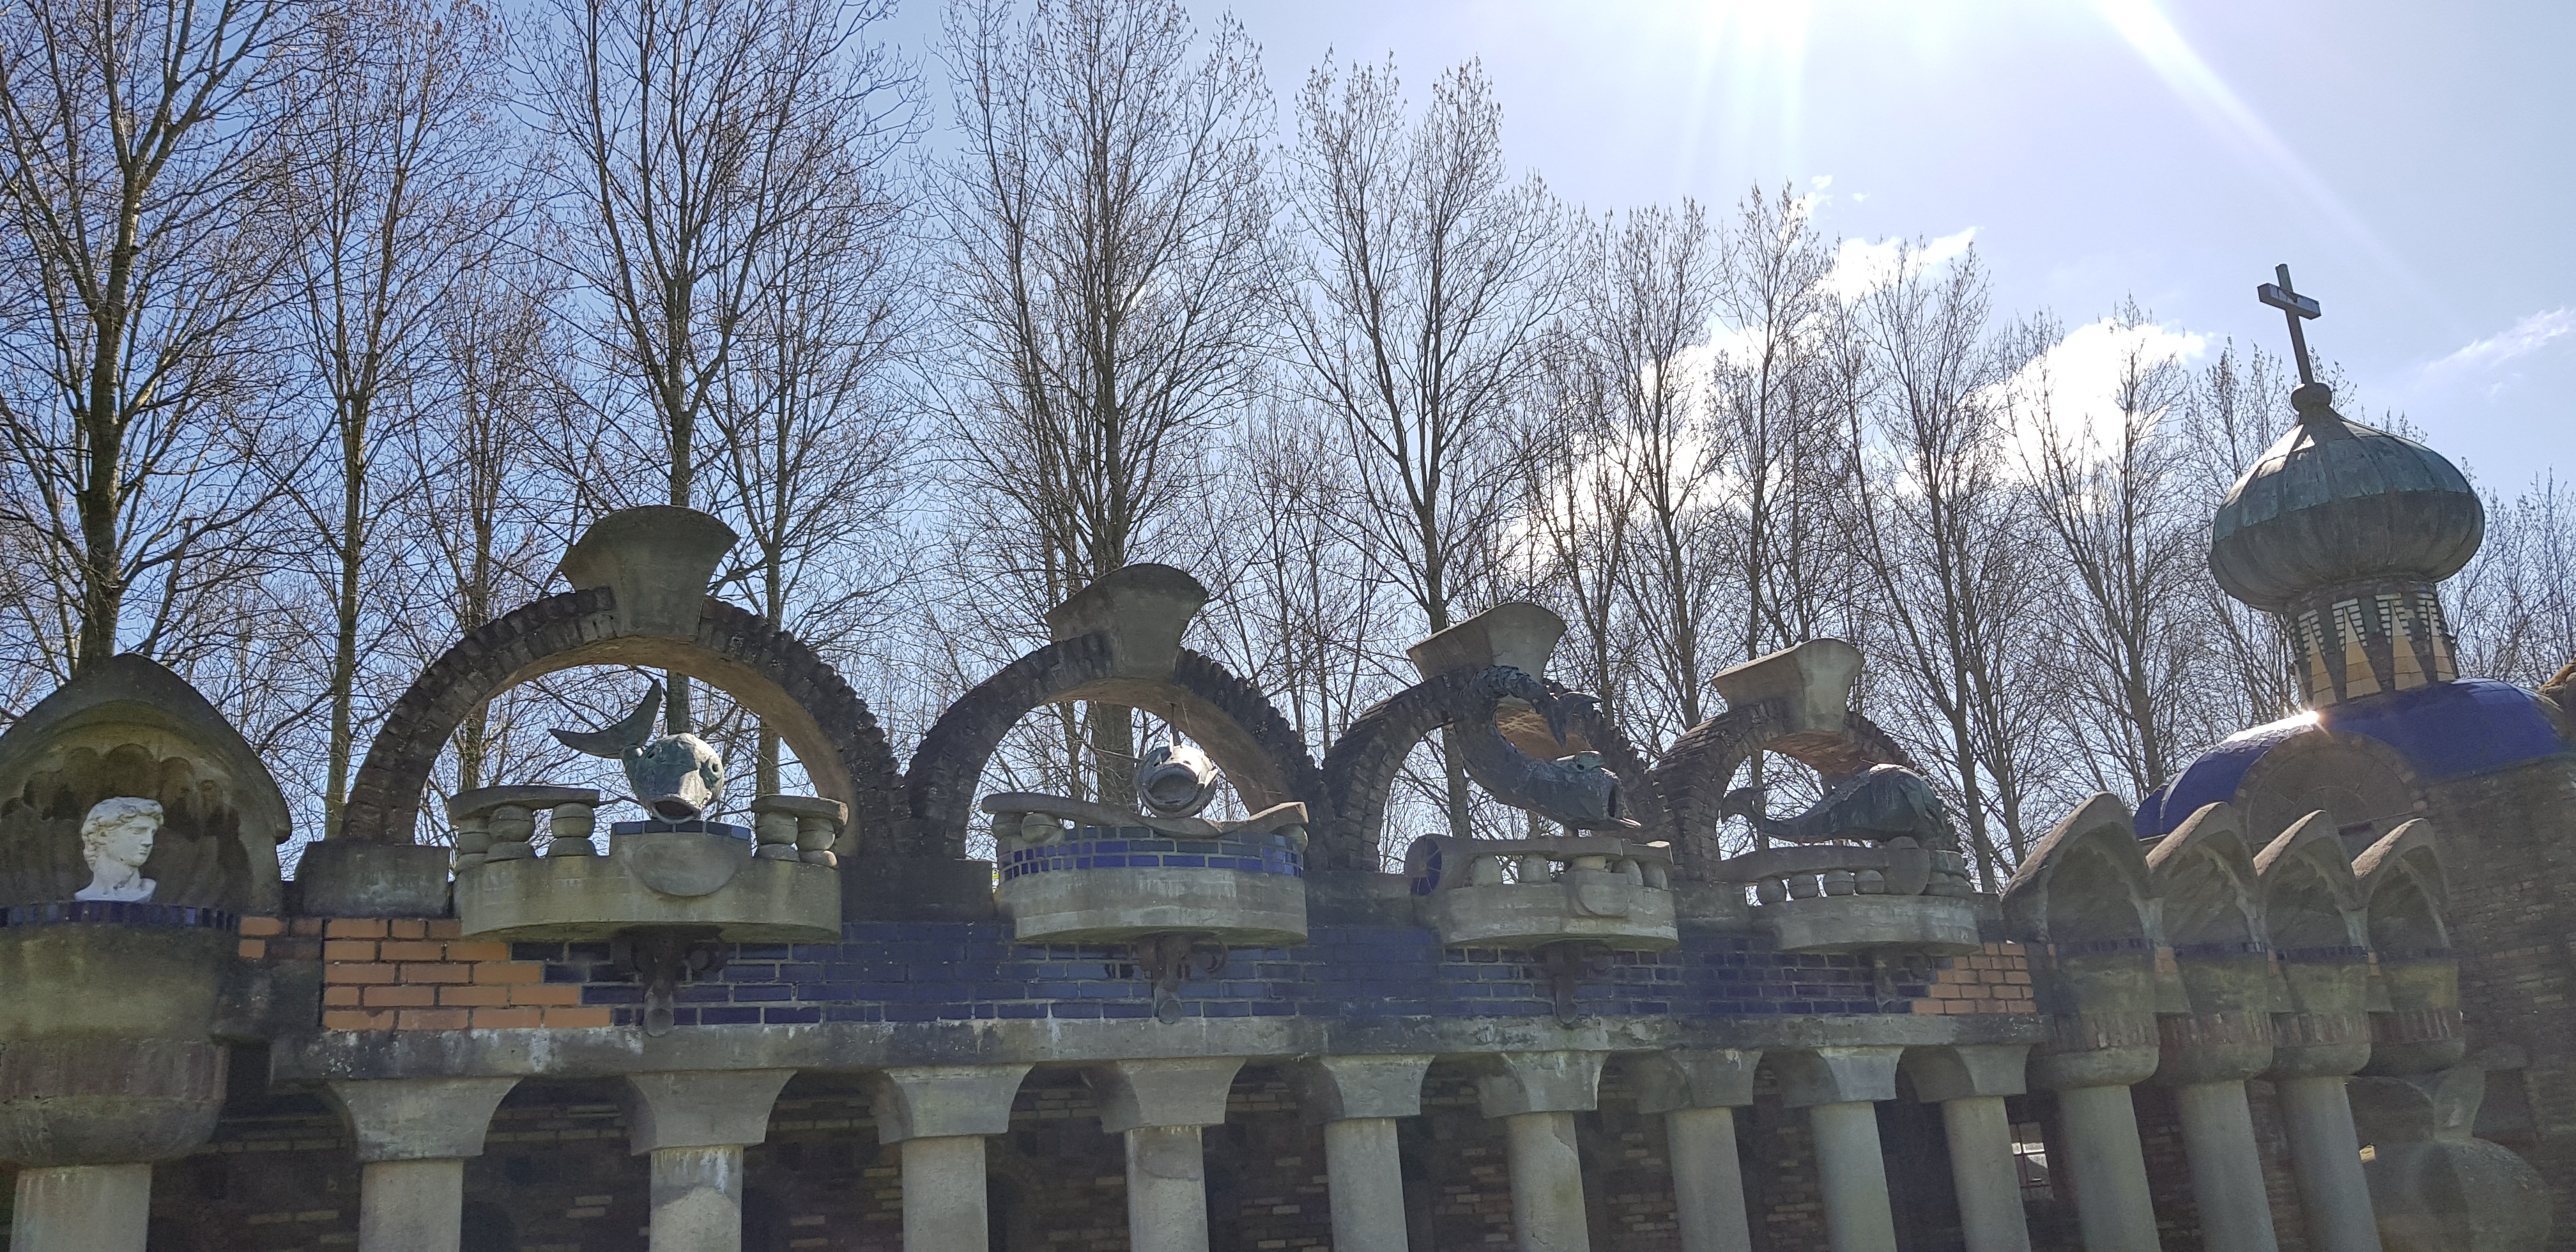
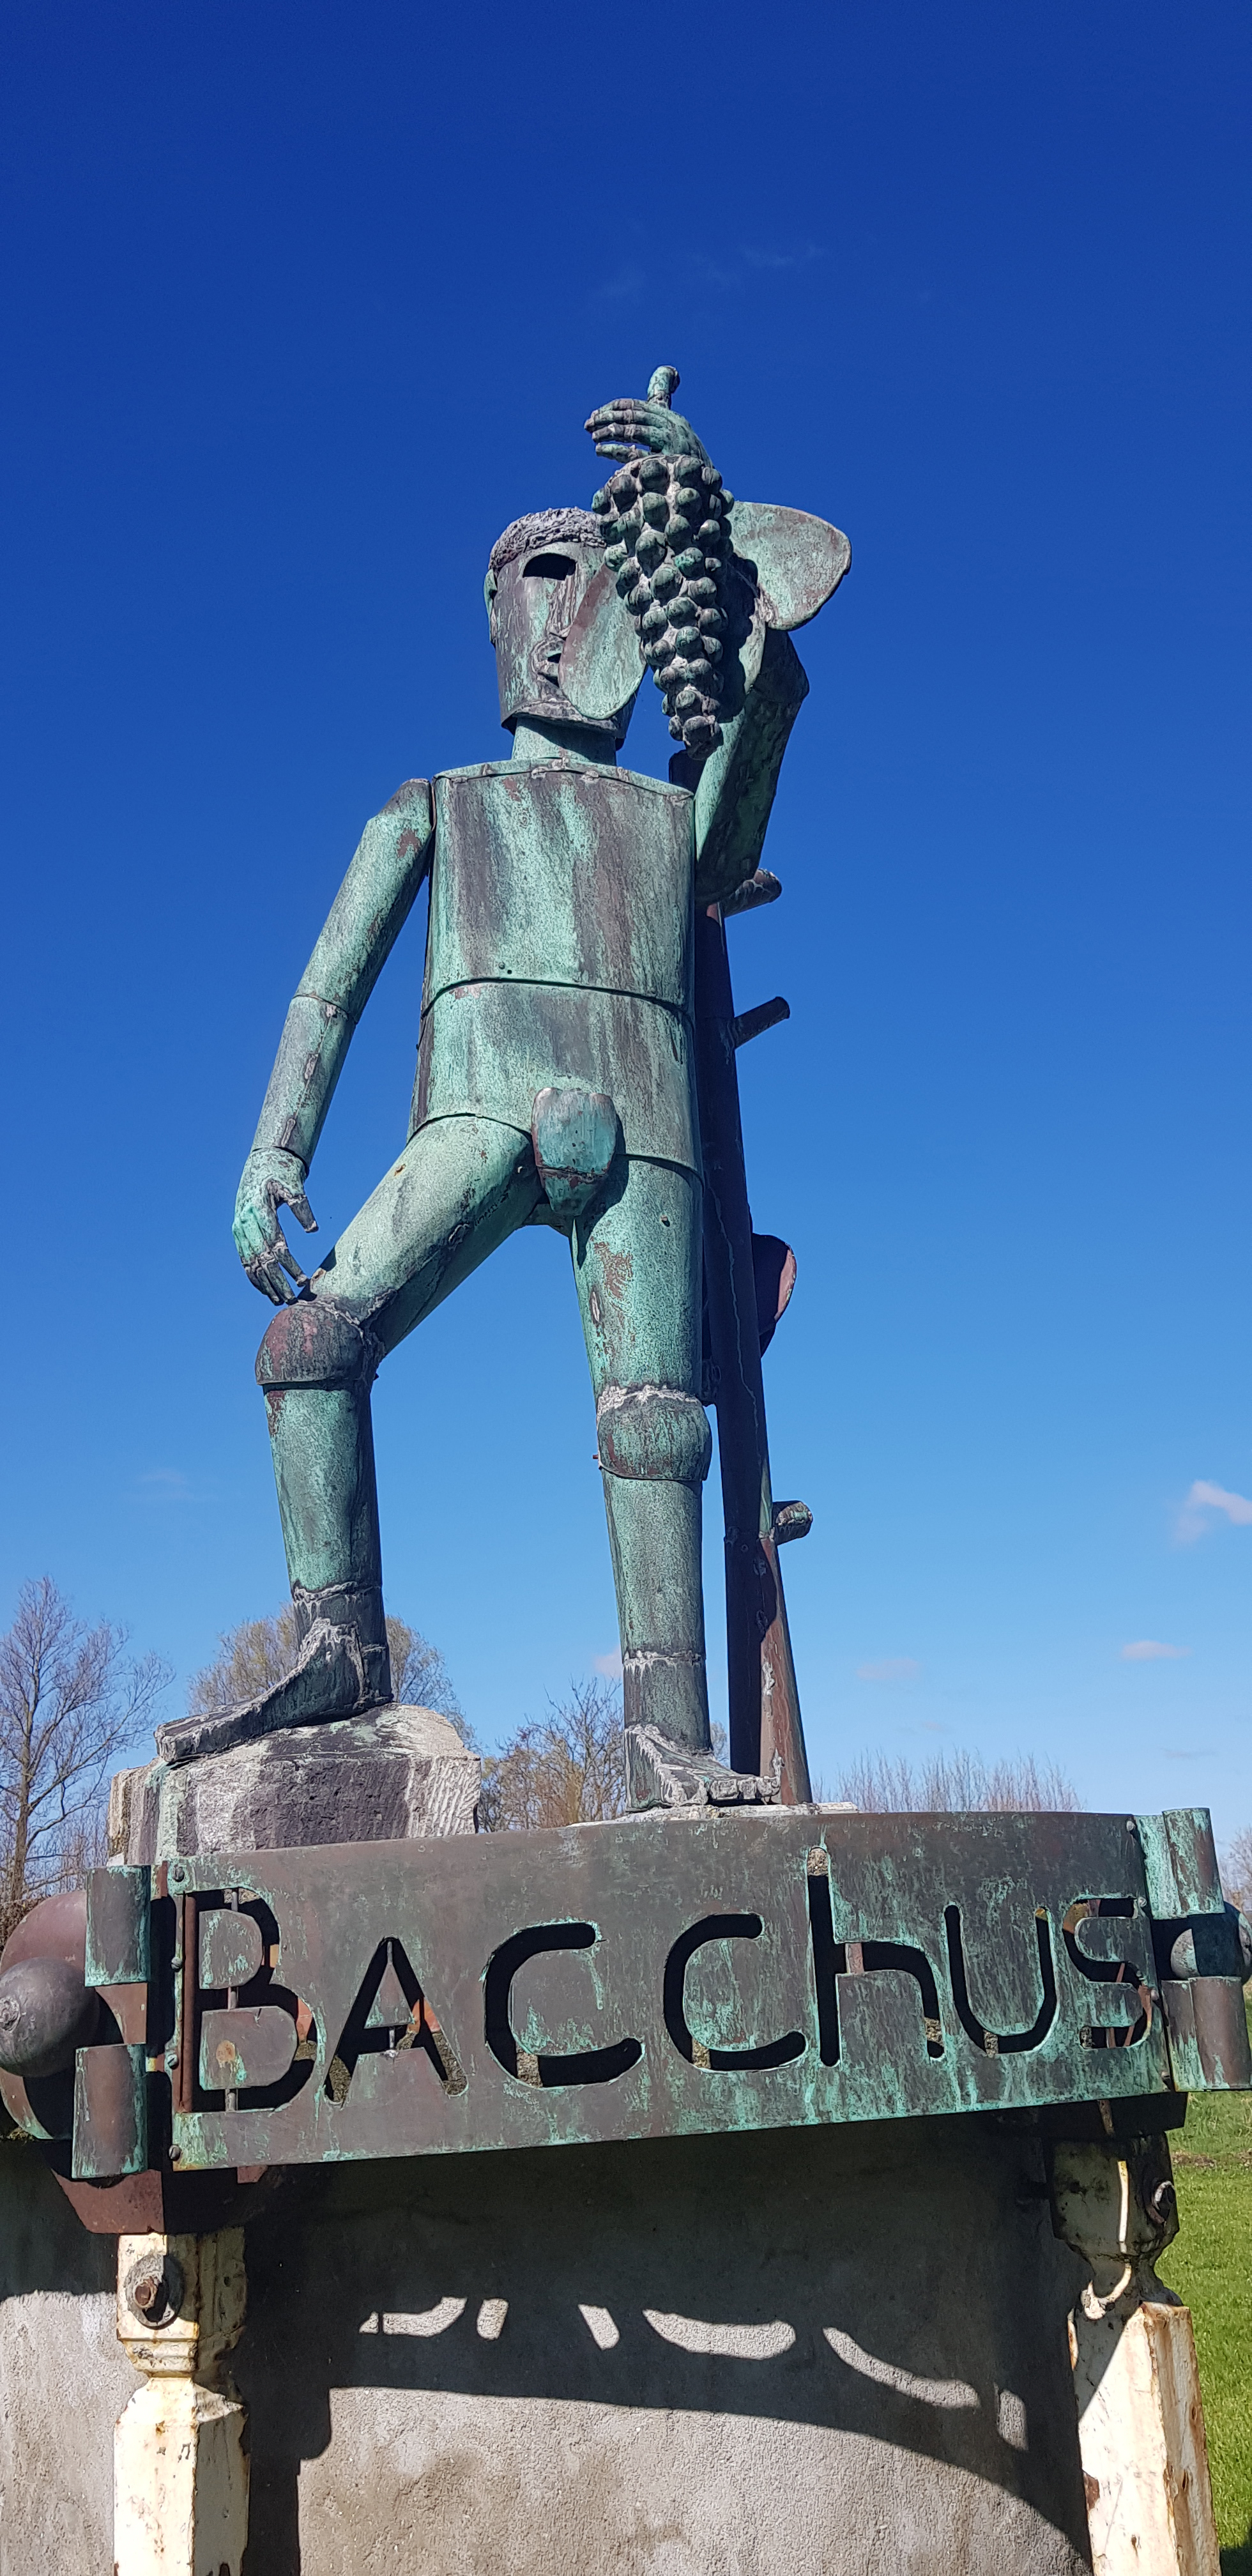
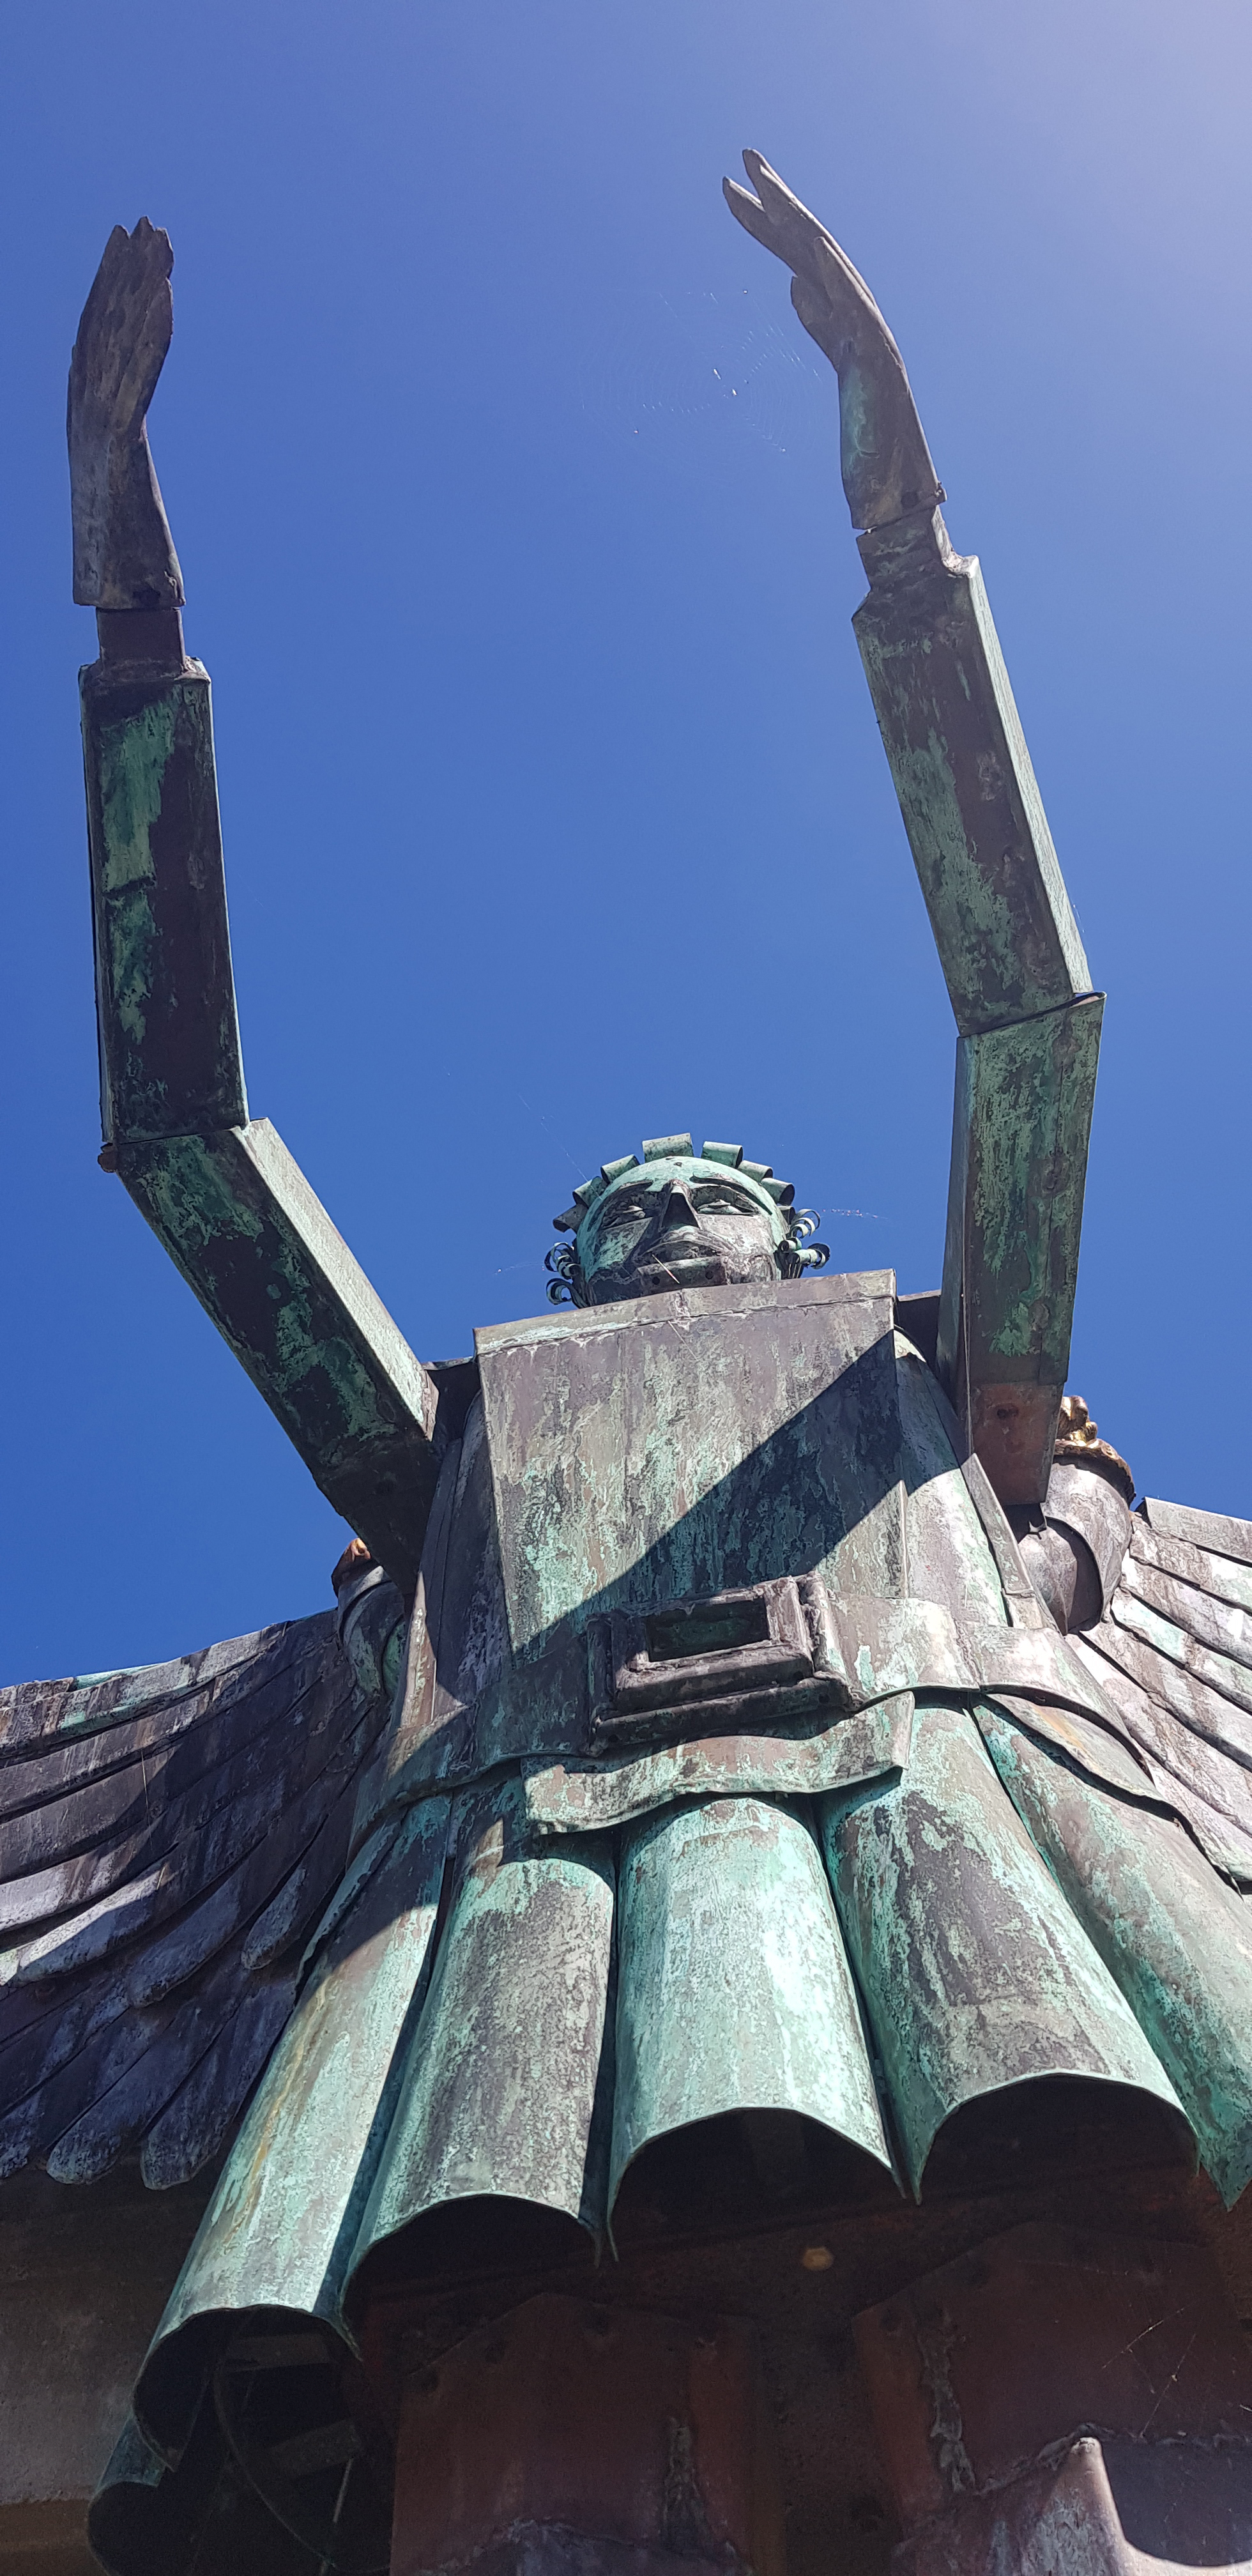
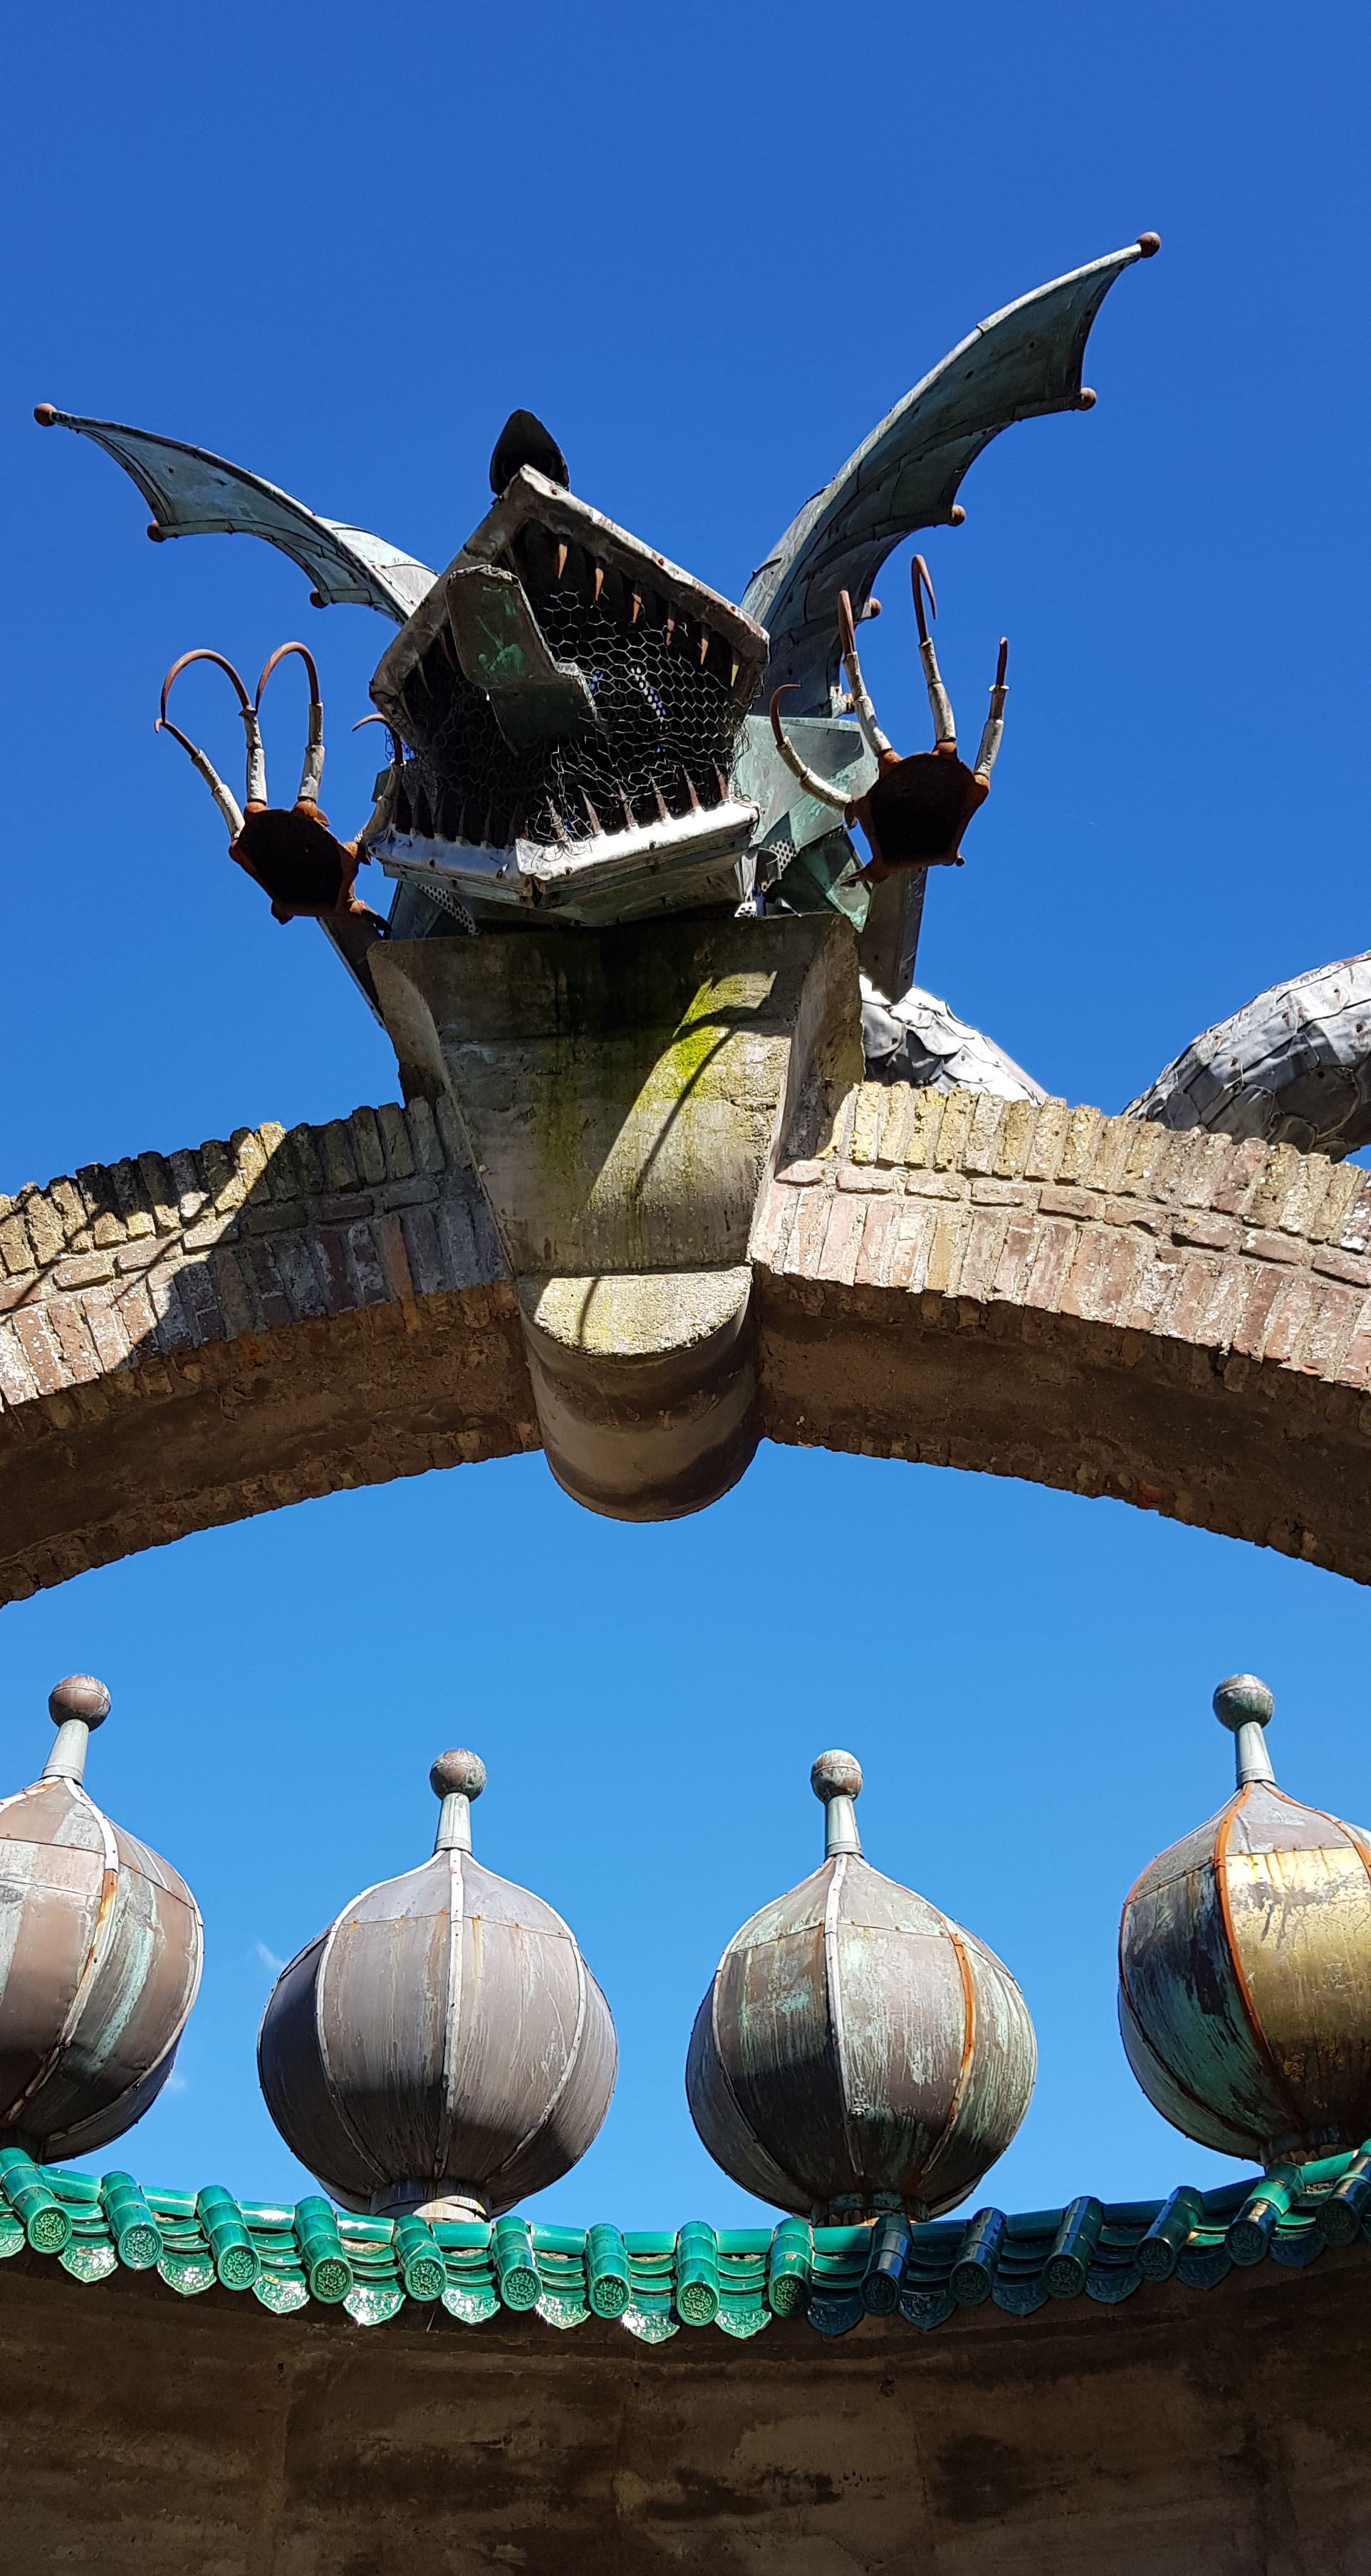
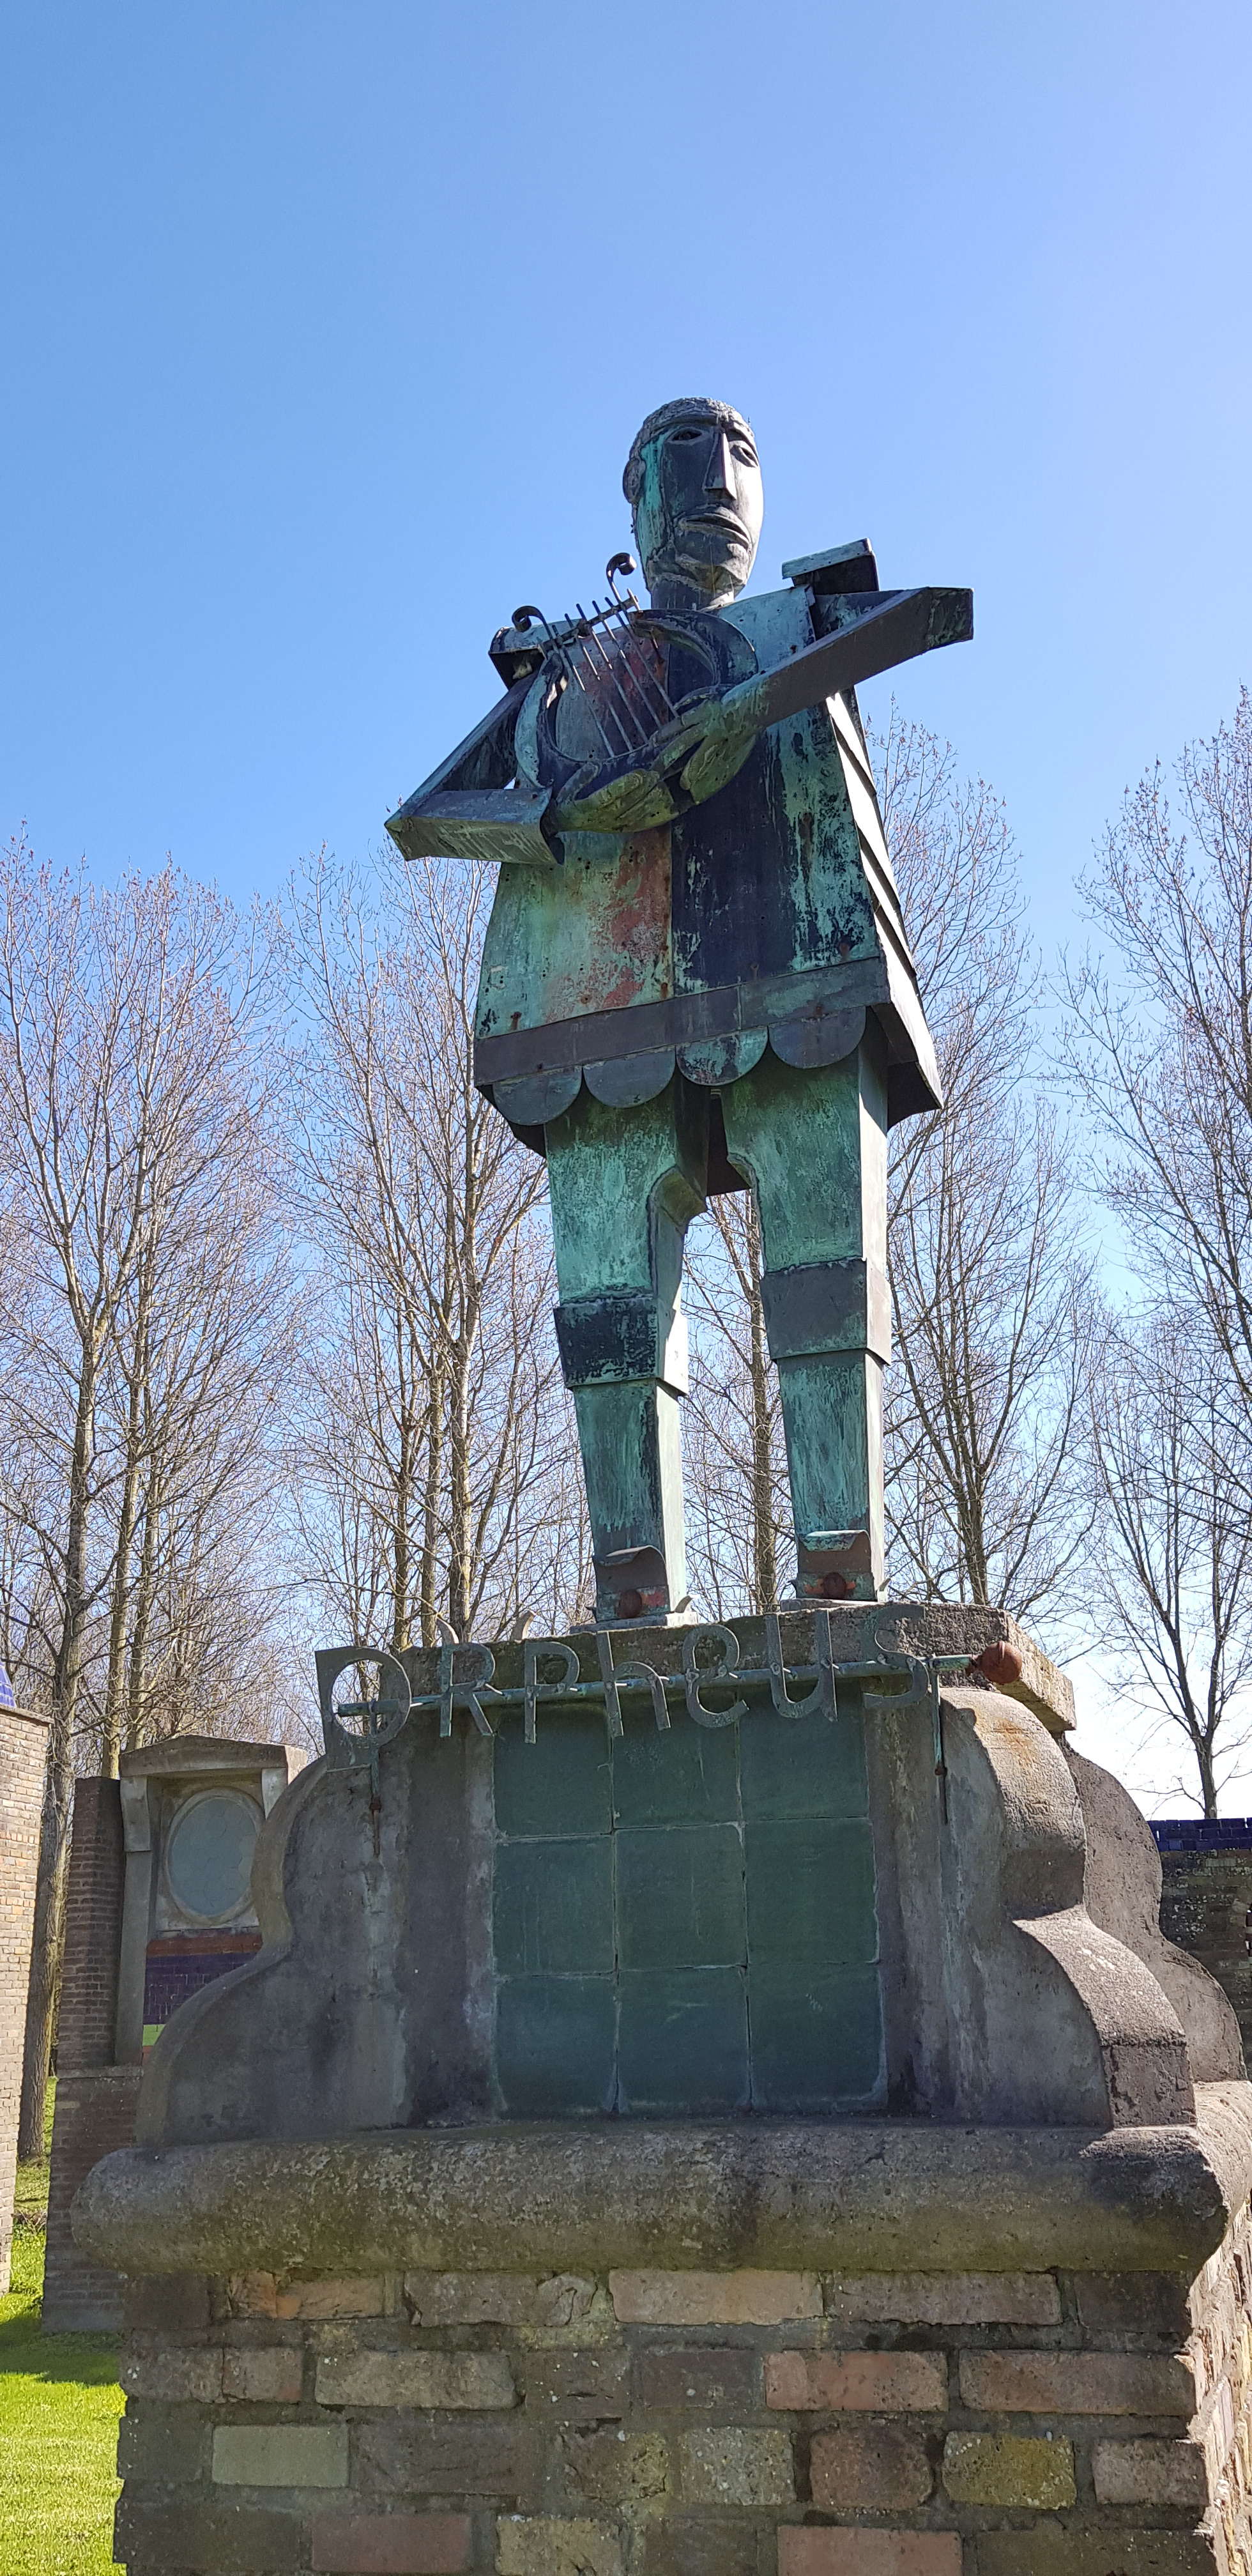
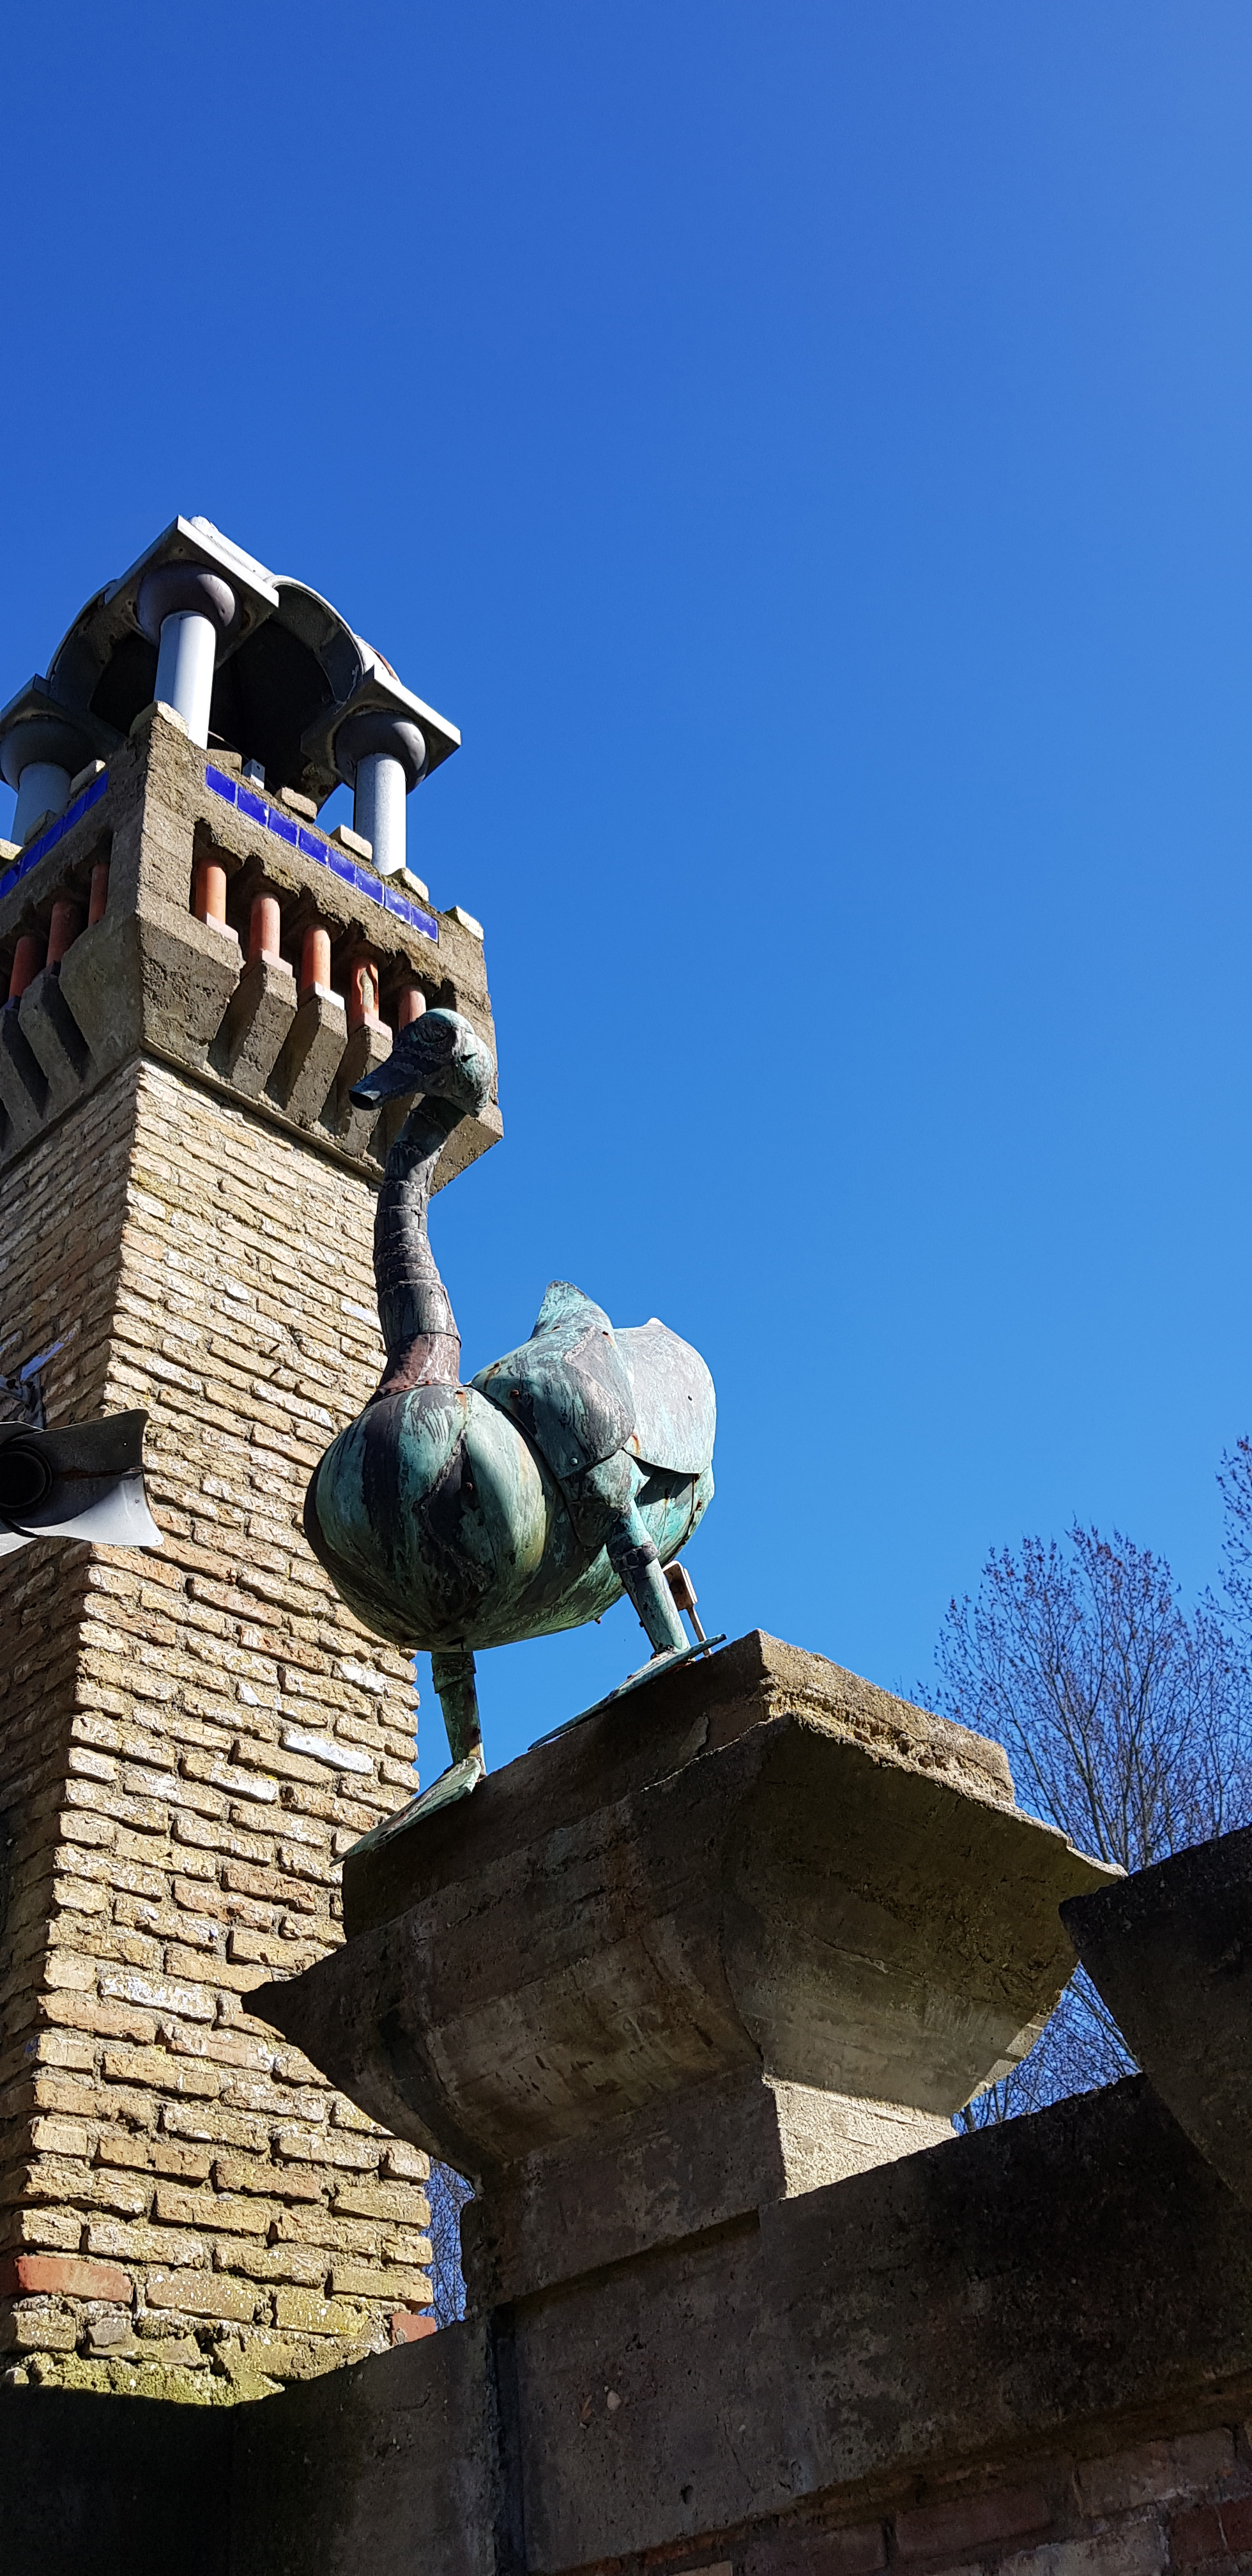
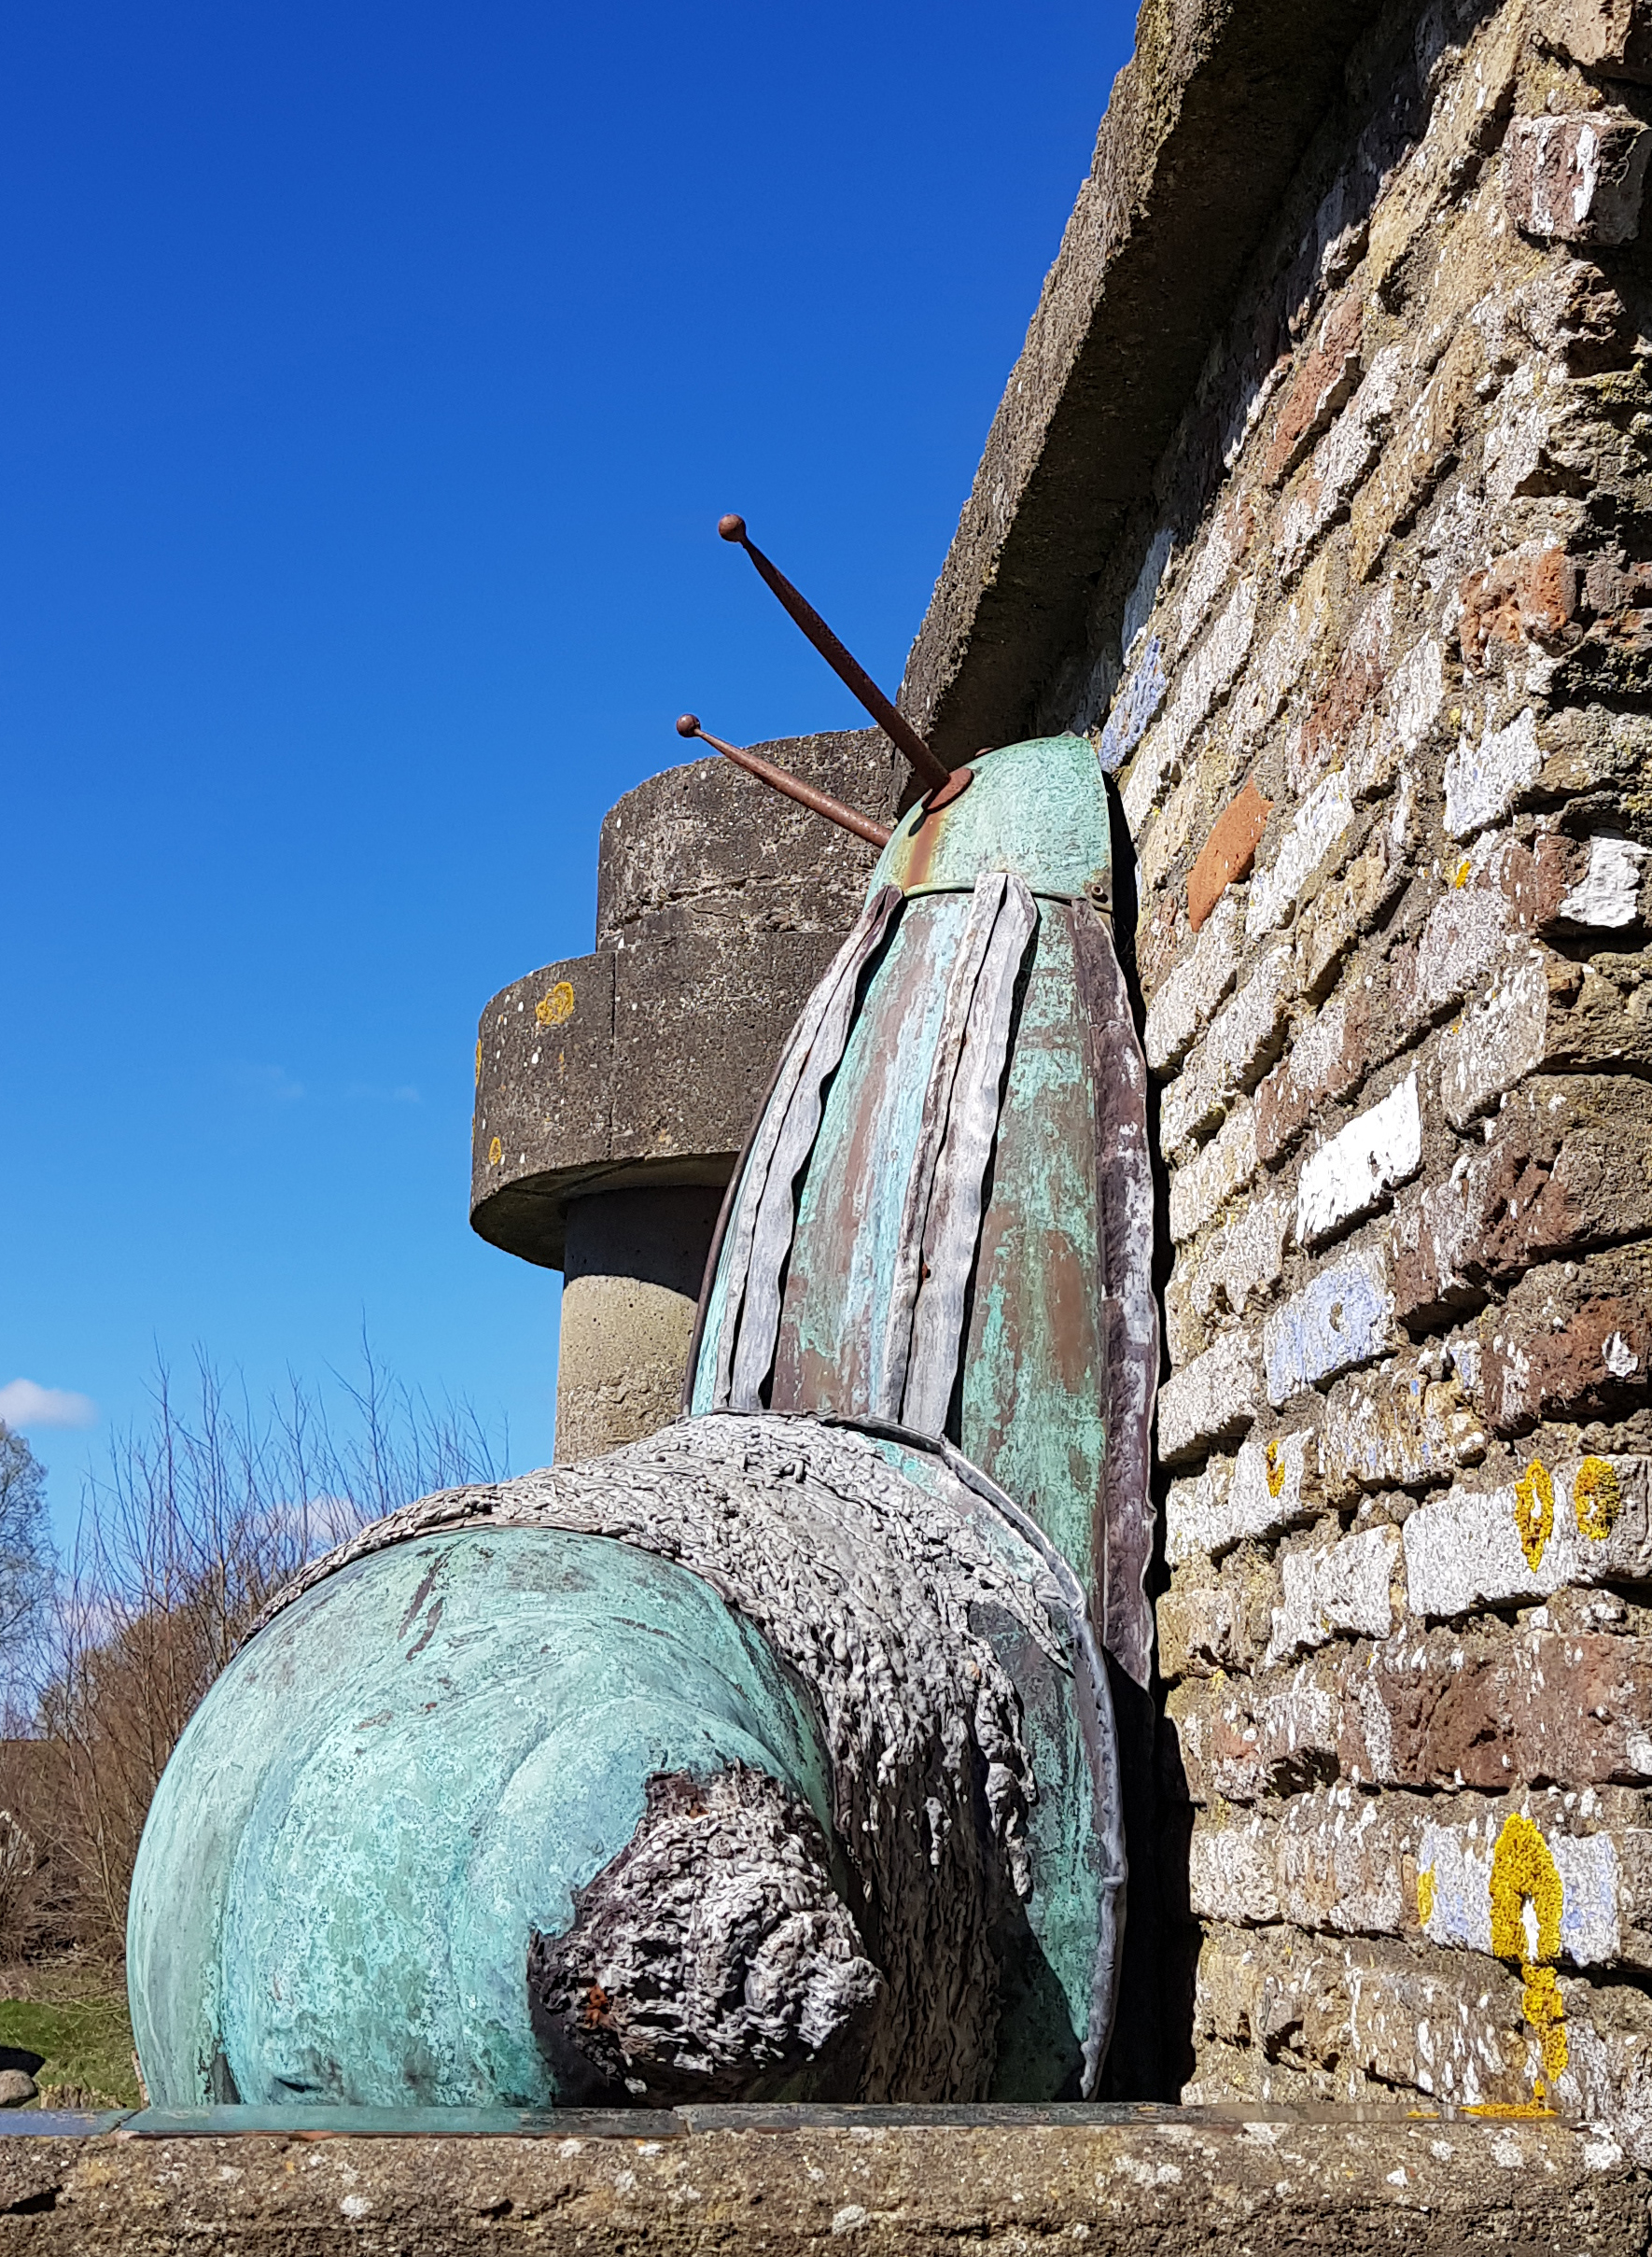
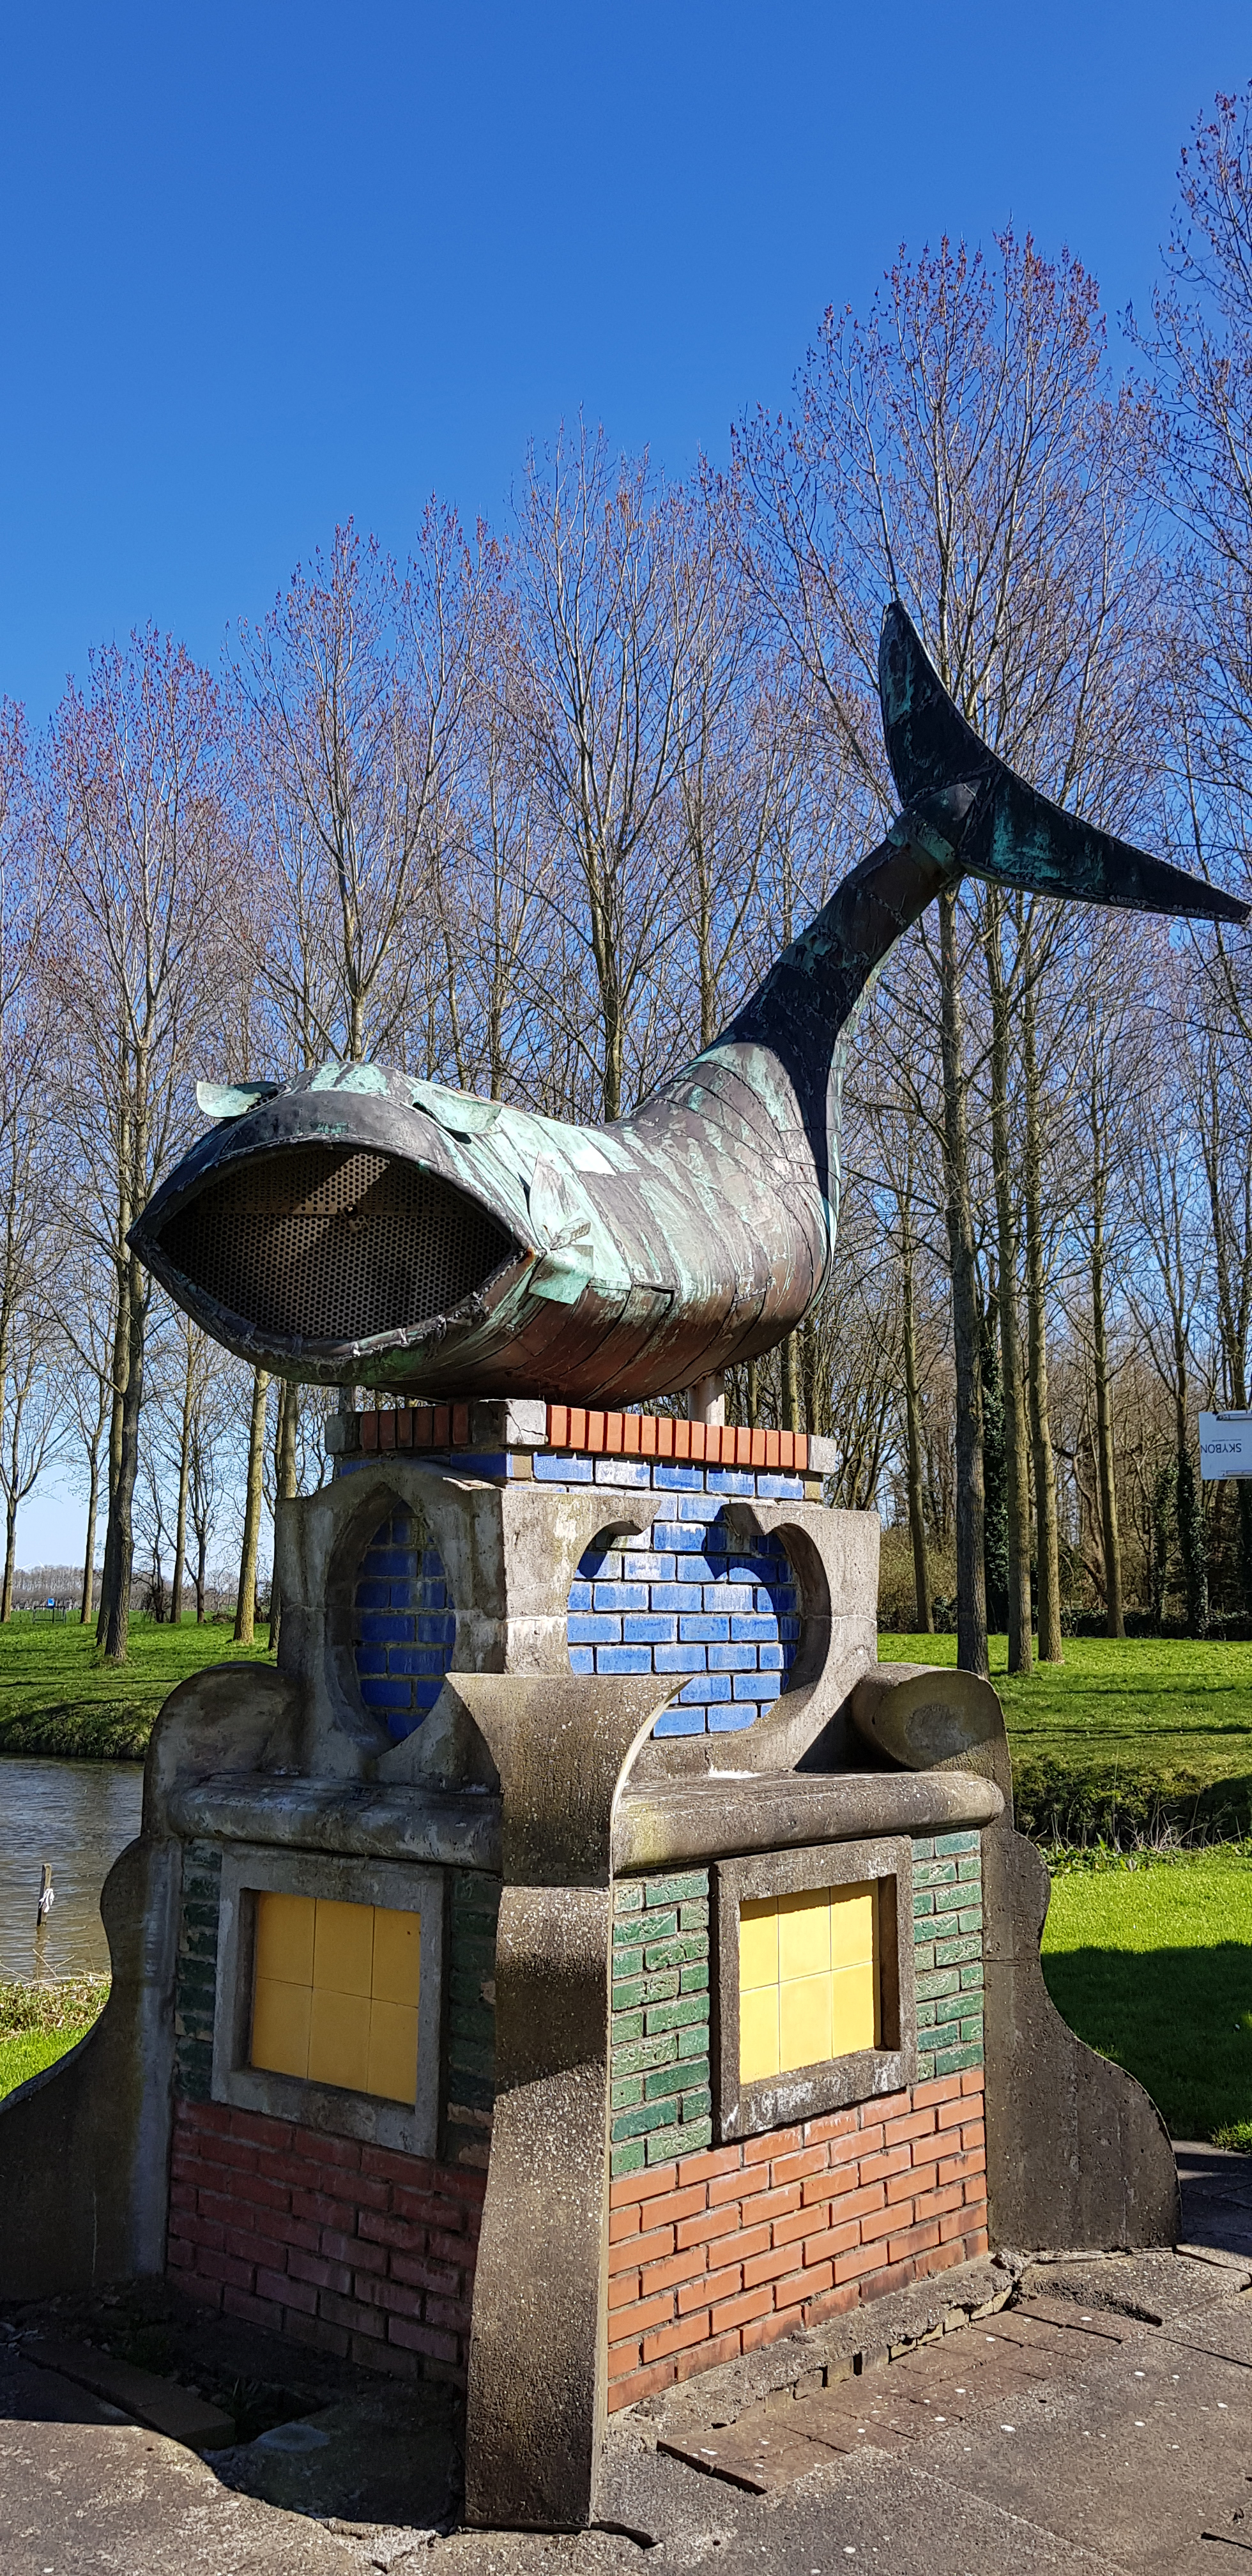
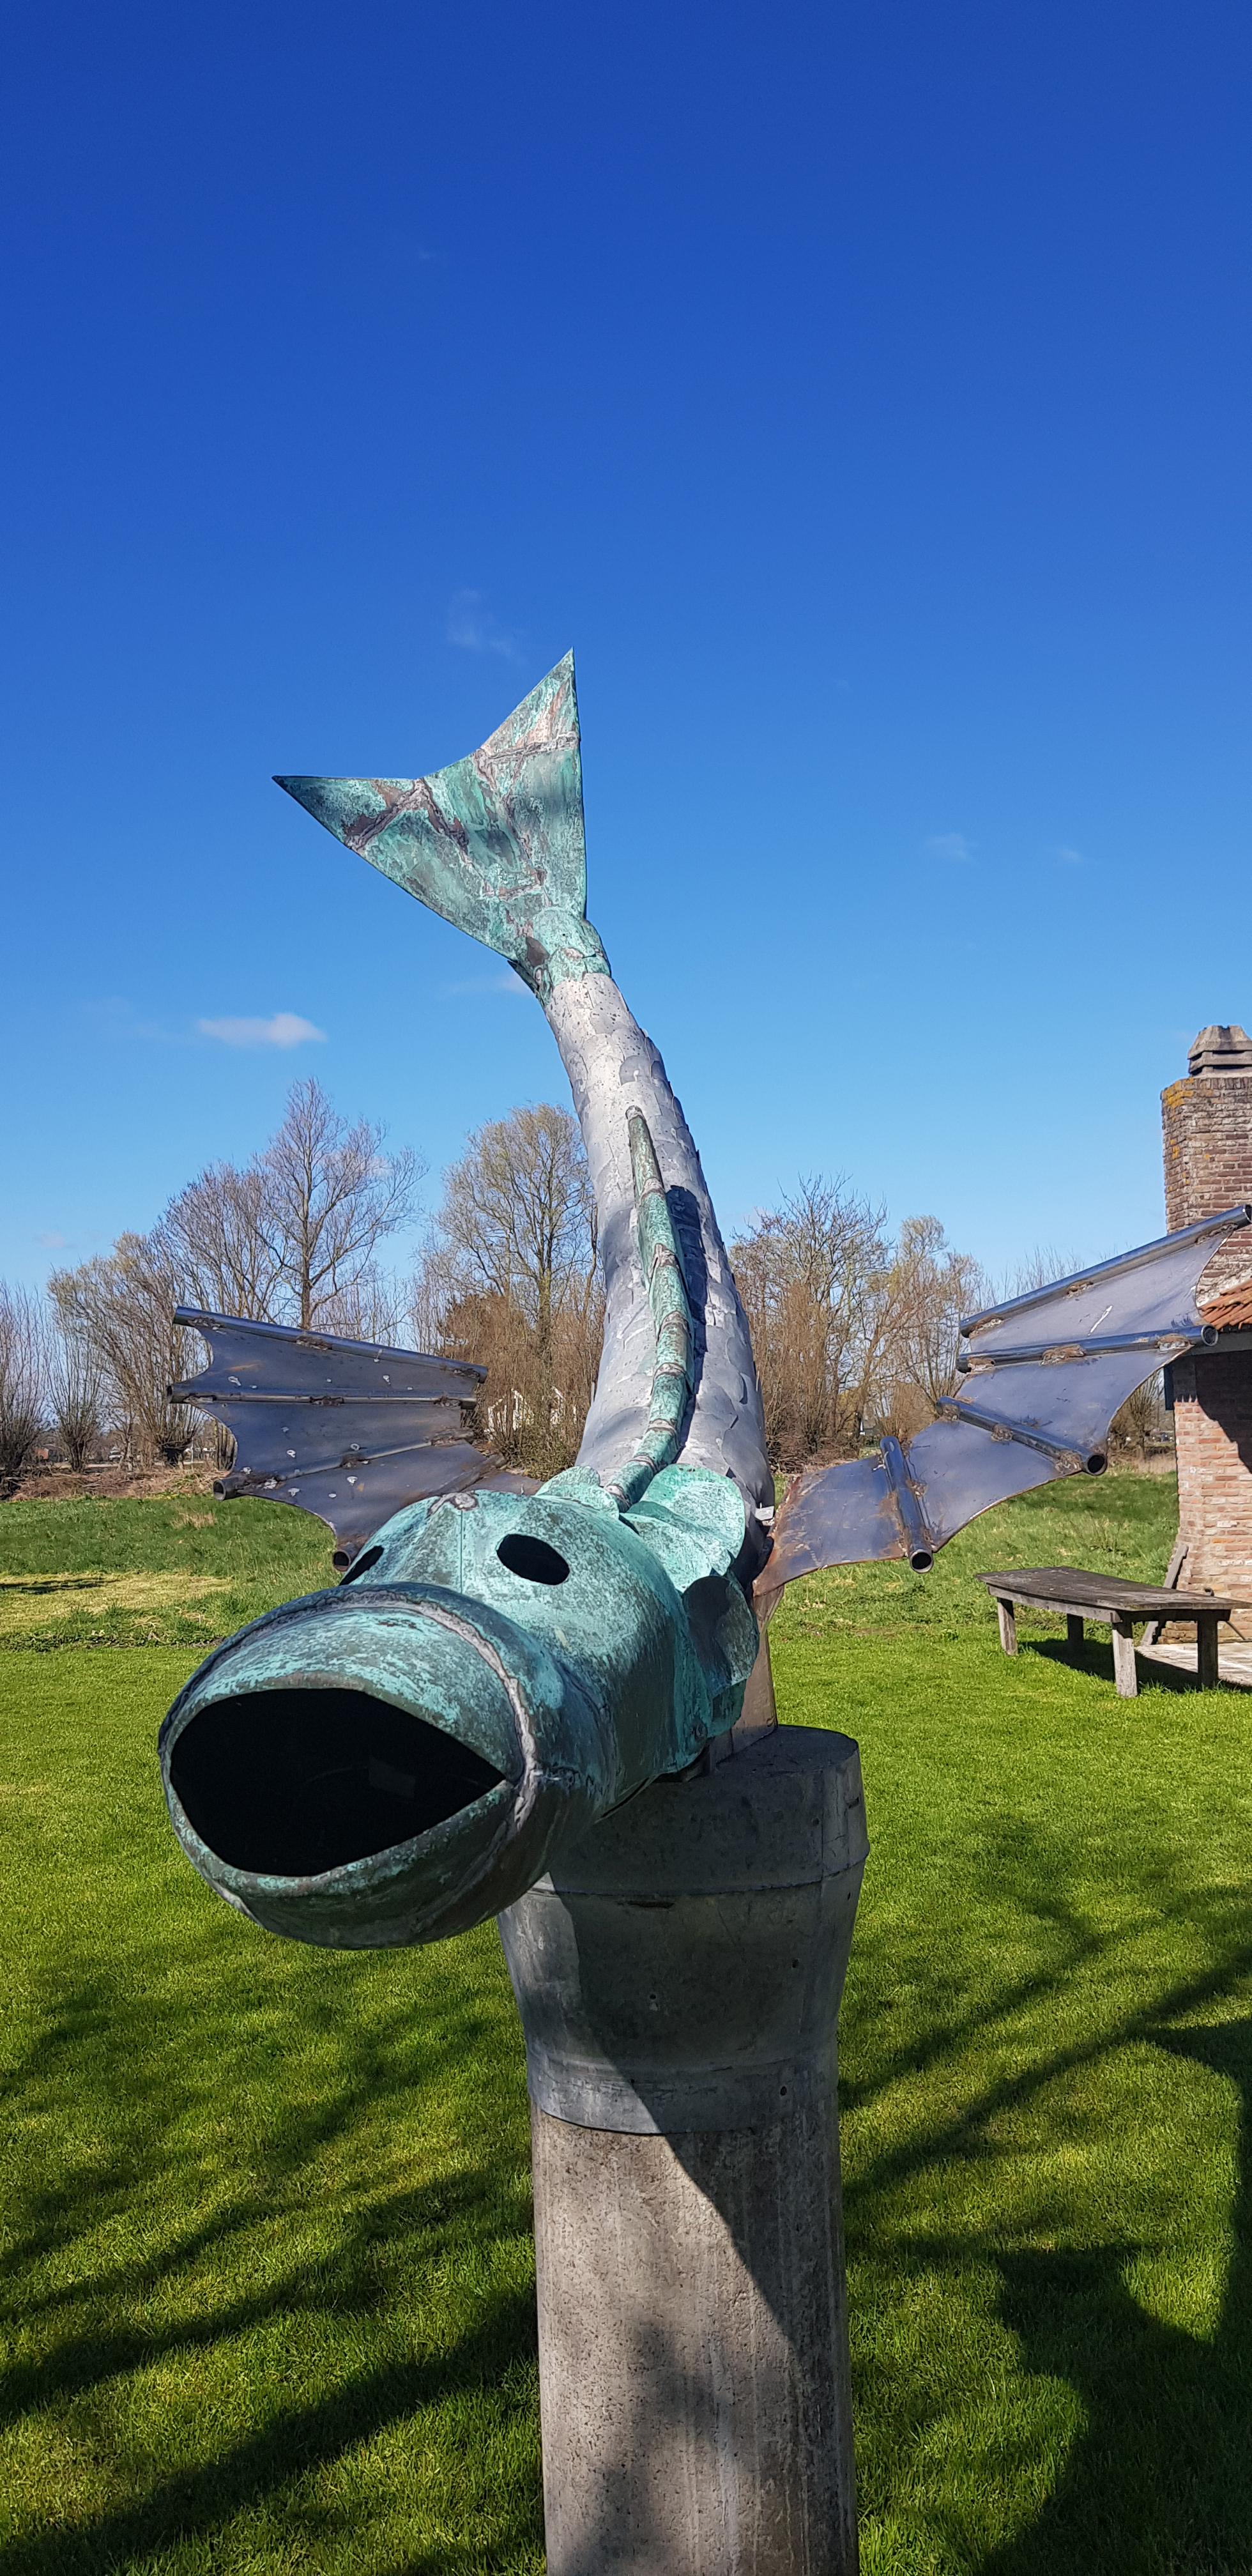
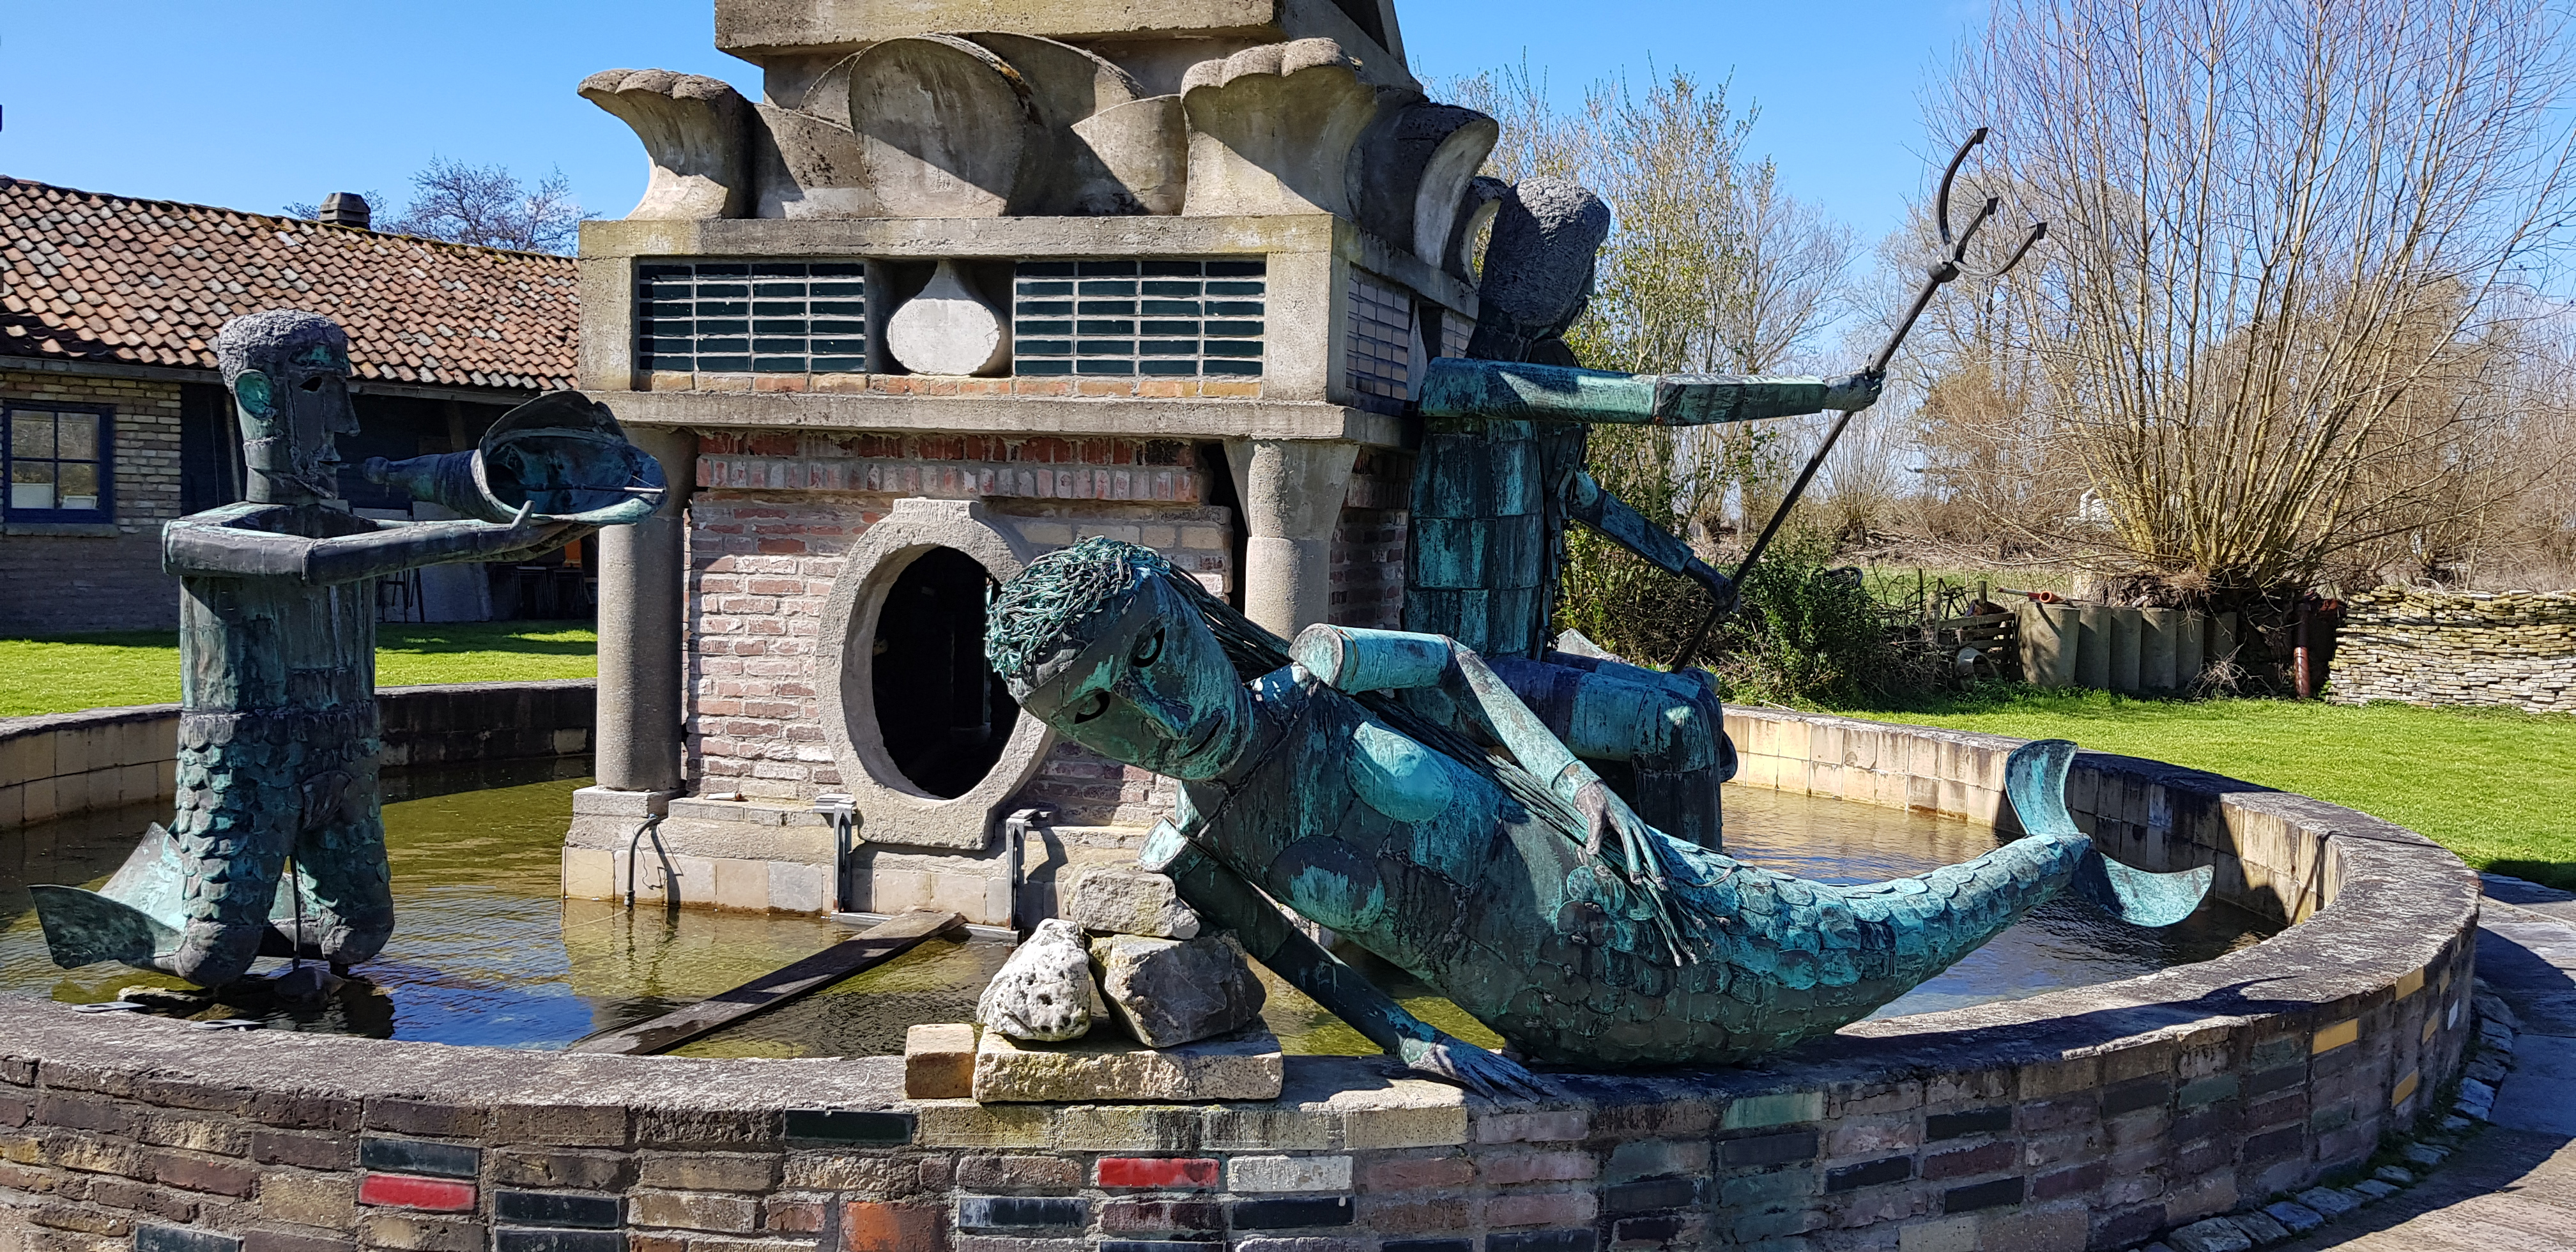
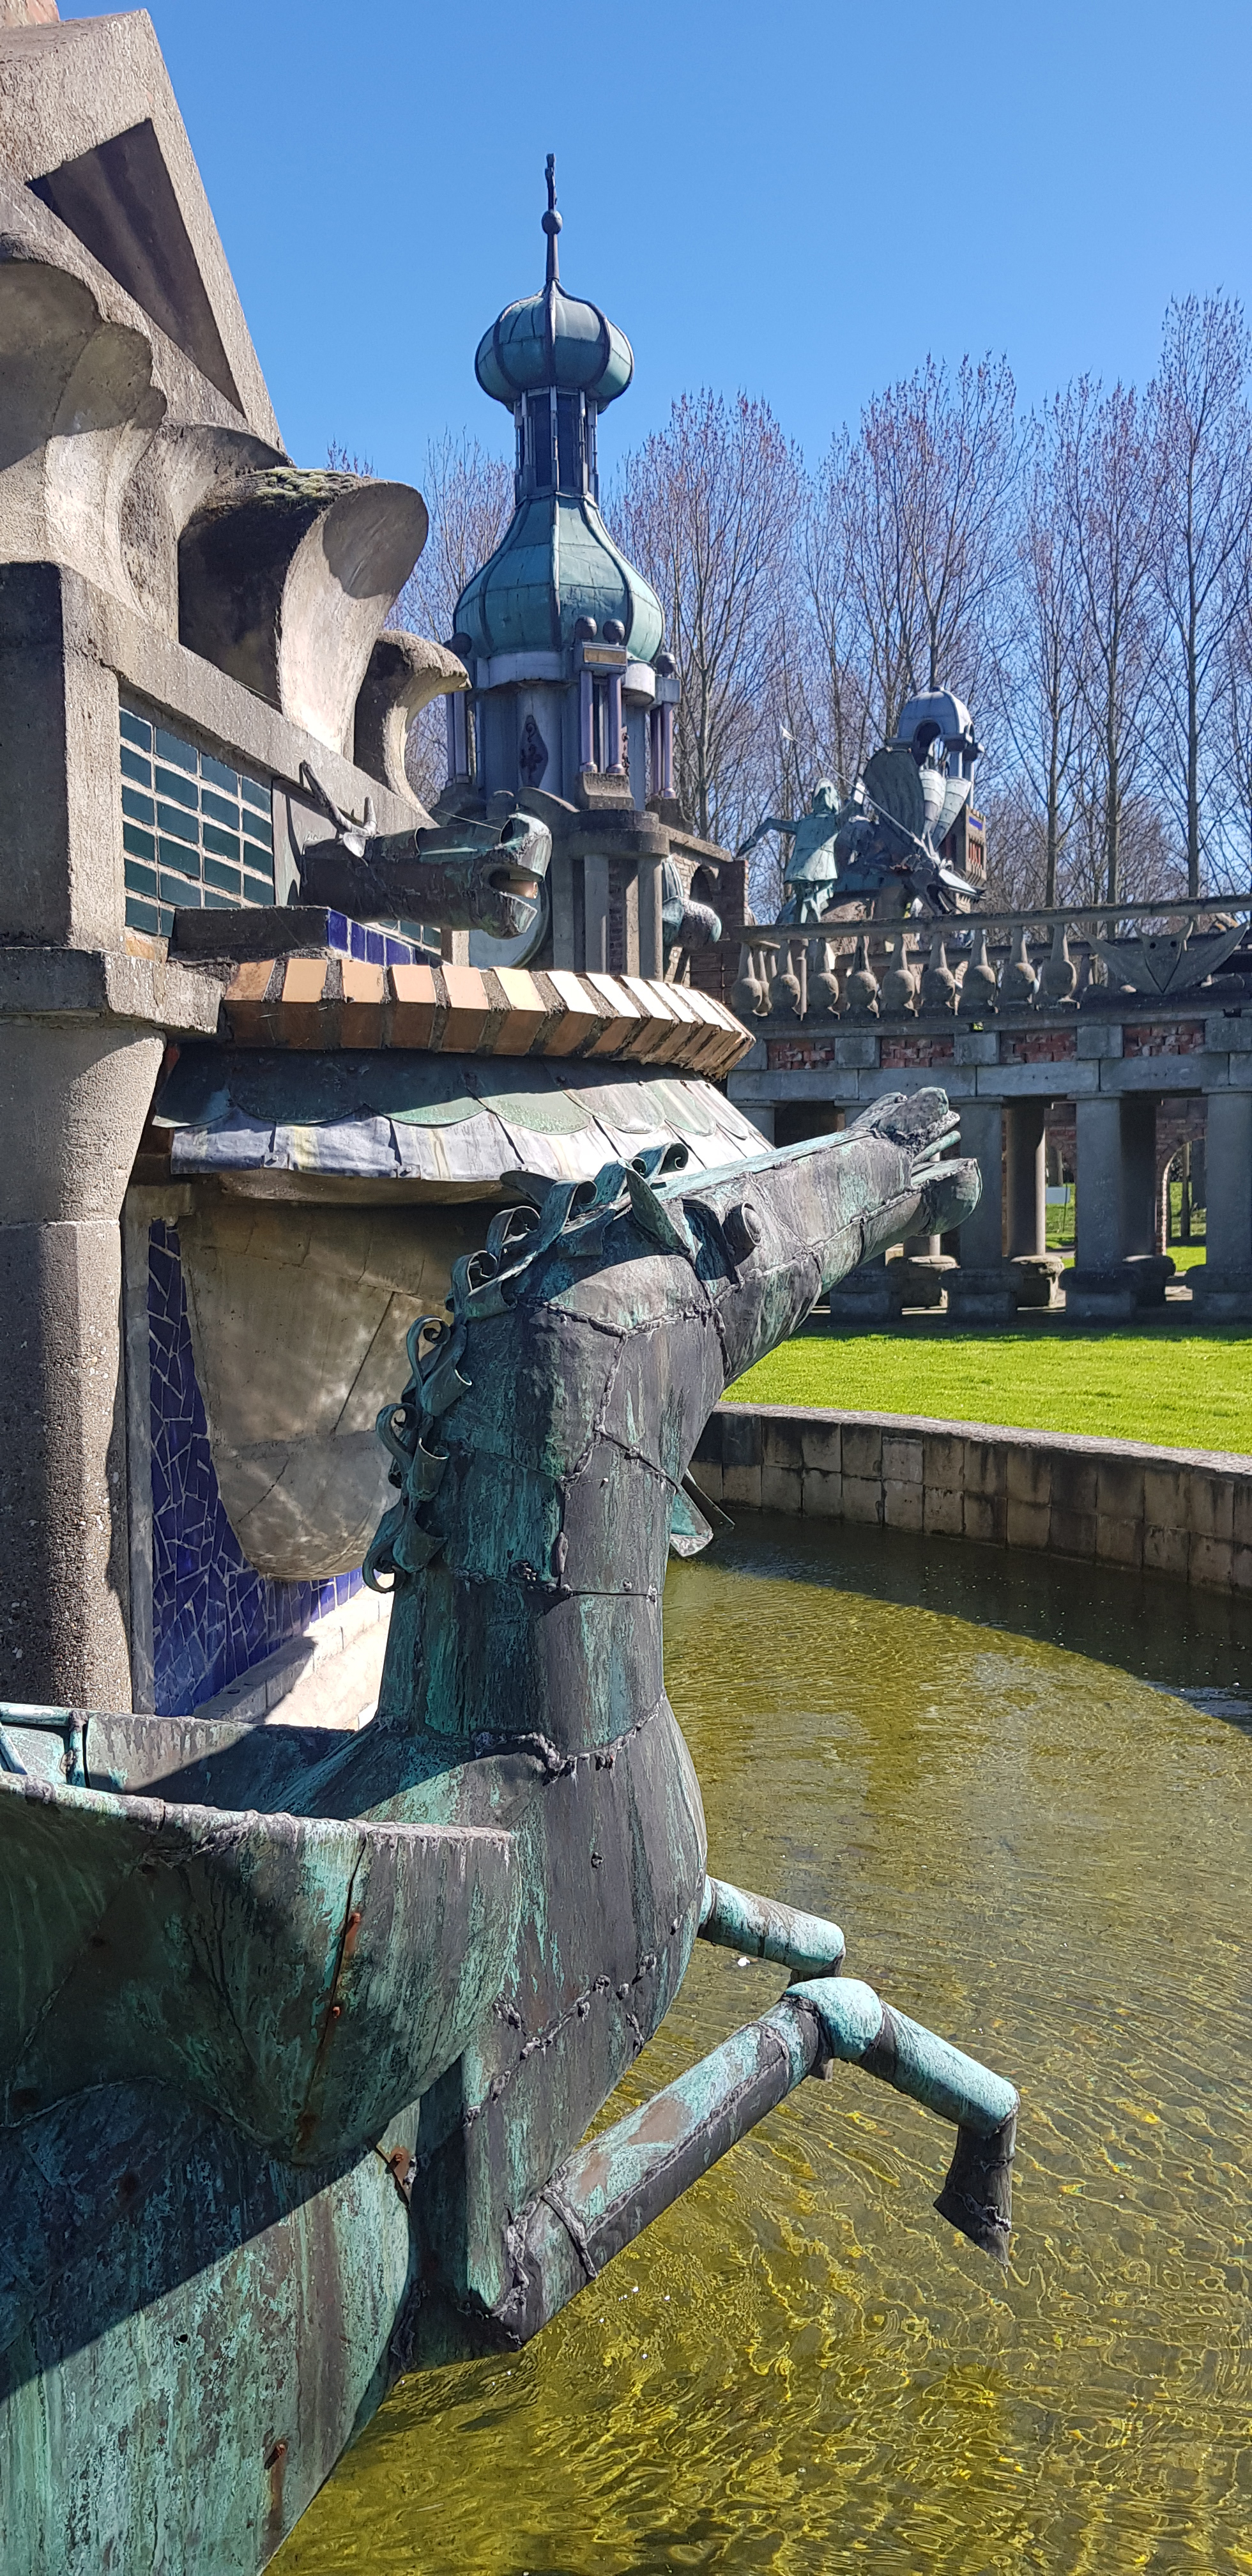
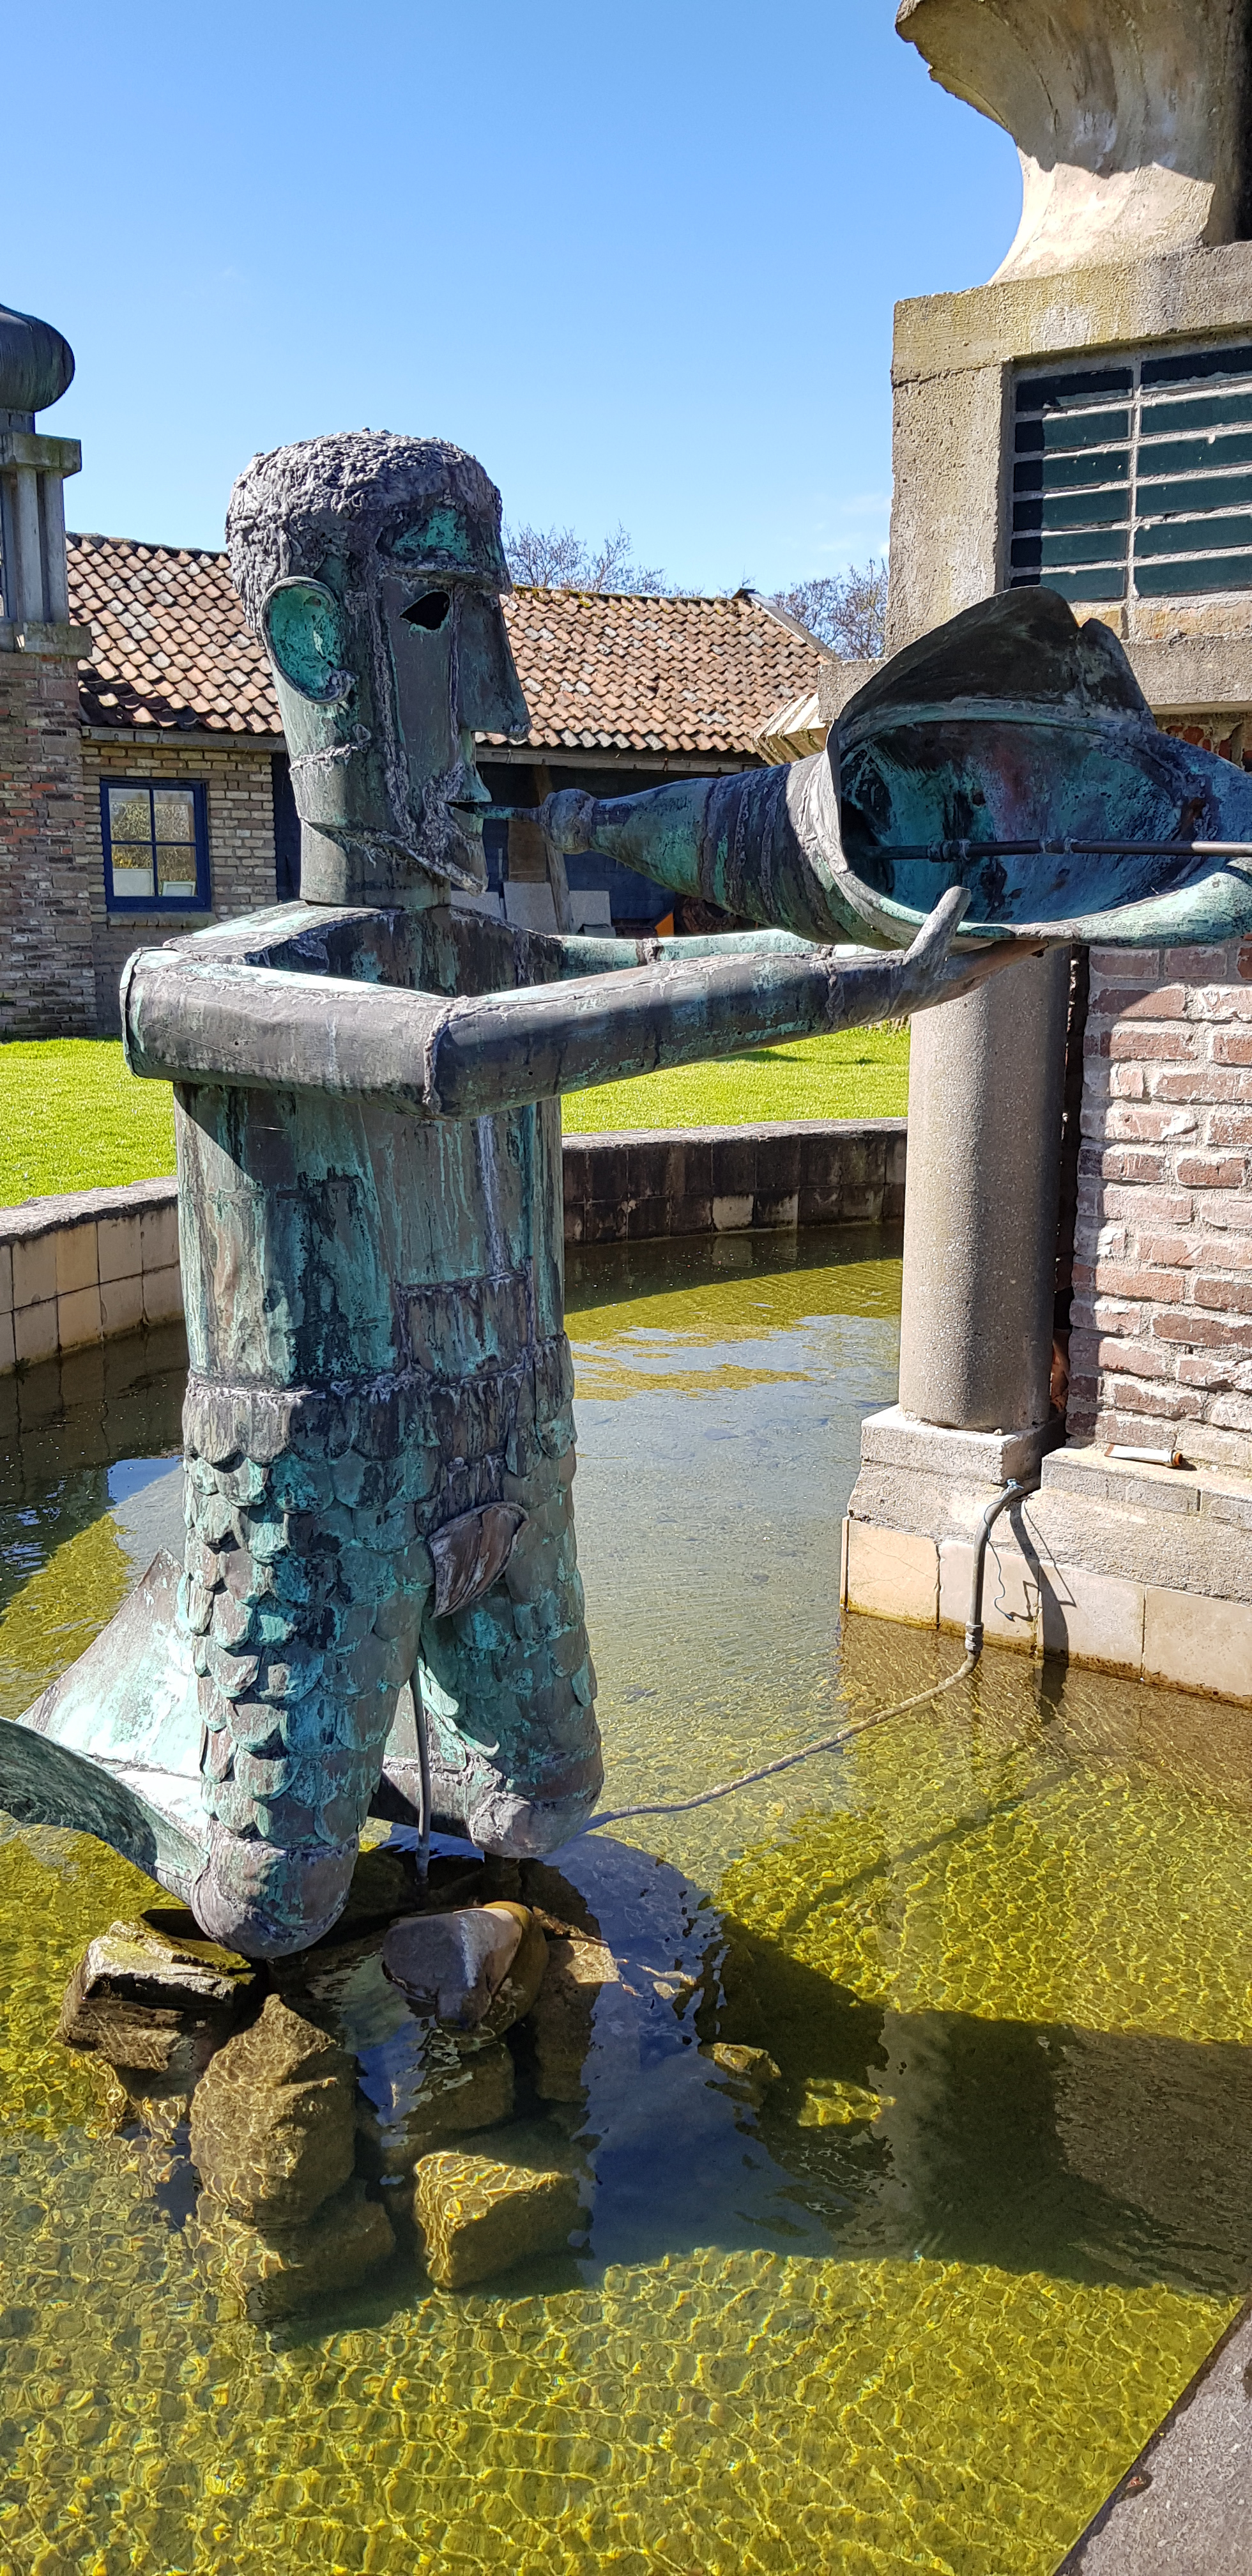
Just outside a small town in North Holland, called Winkel, you will find a ‘hutspot’ of architectural and creative wonder. From the N242 you have a glimpse of the Kremlin towers of a secret fantasy world.
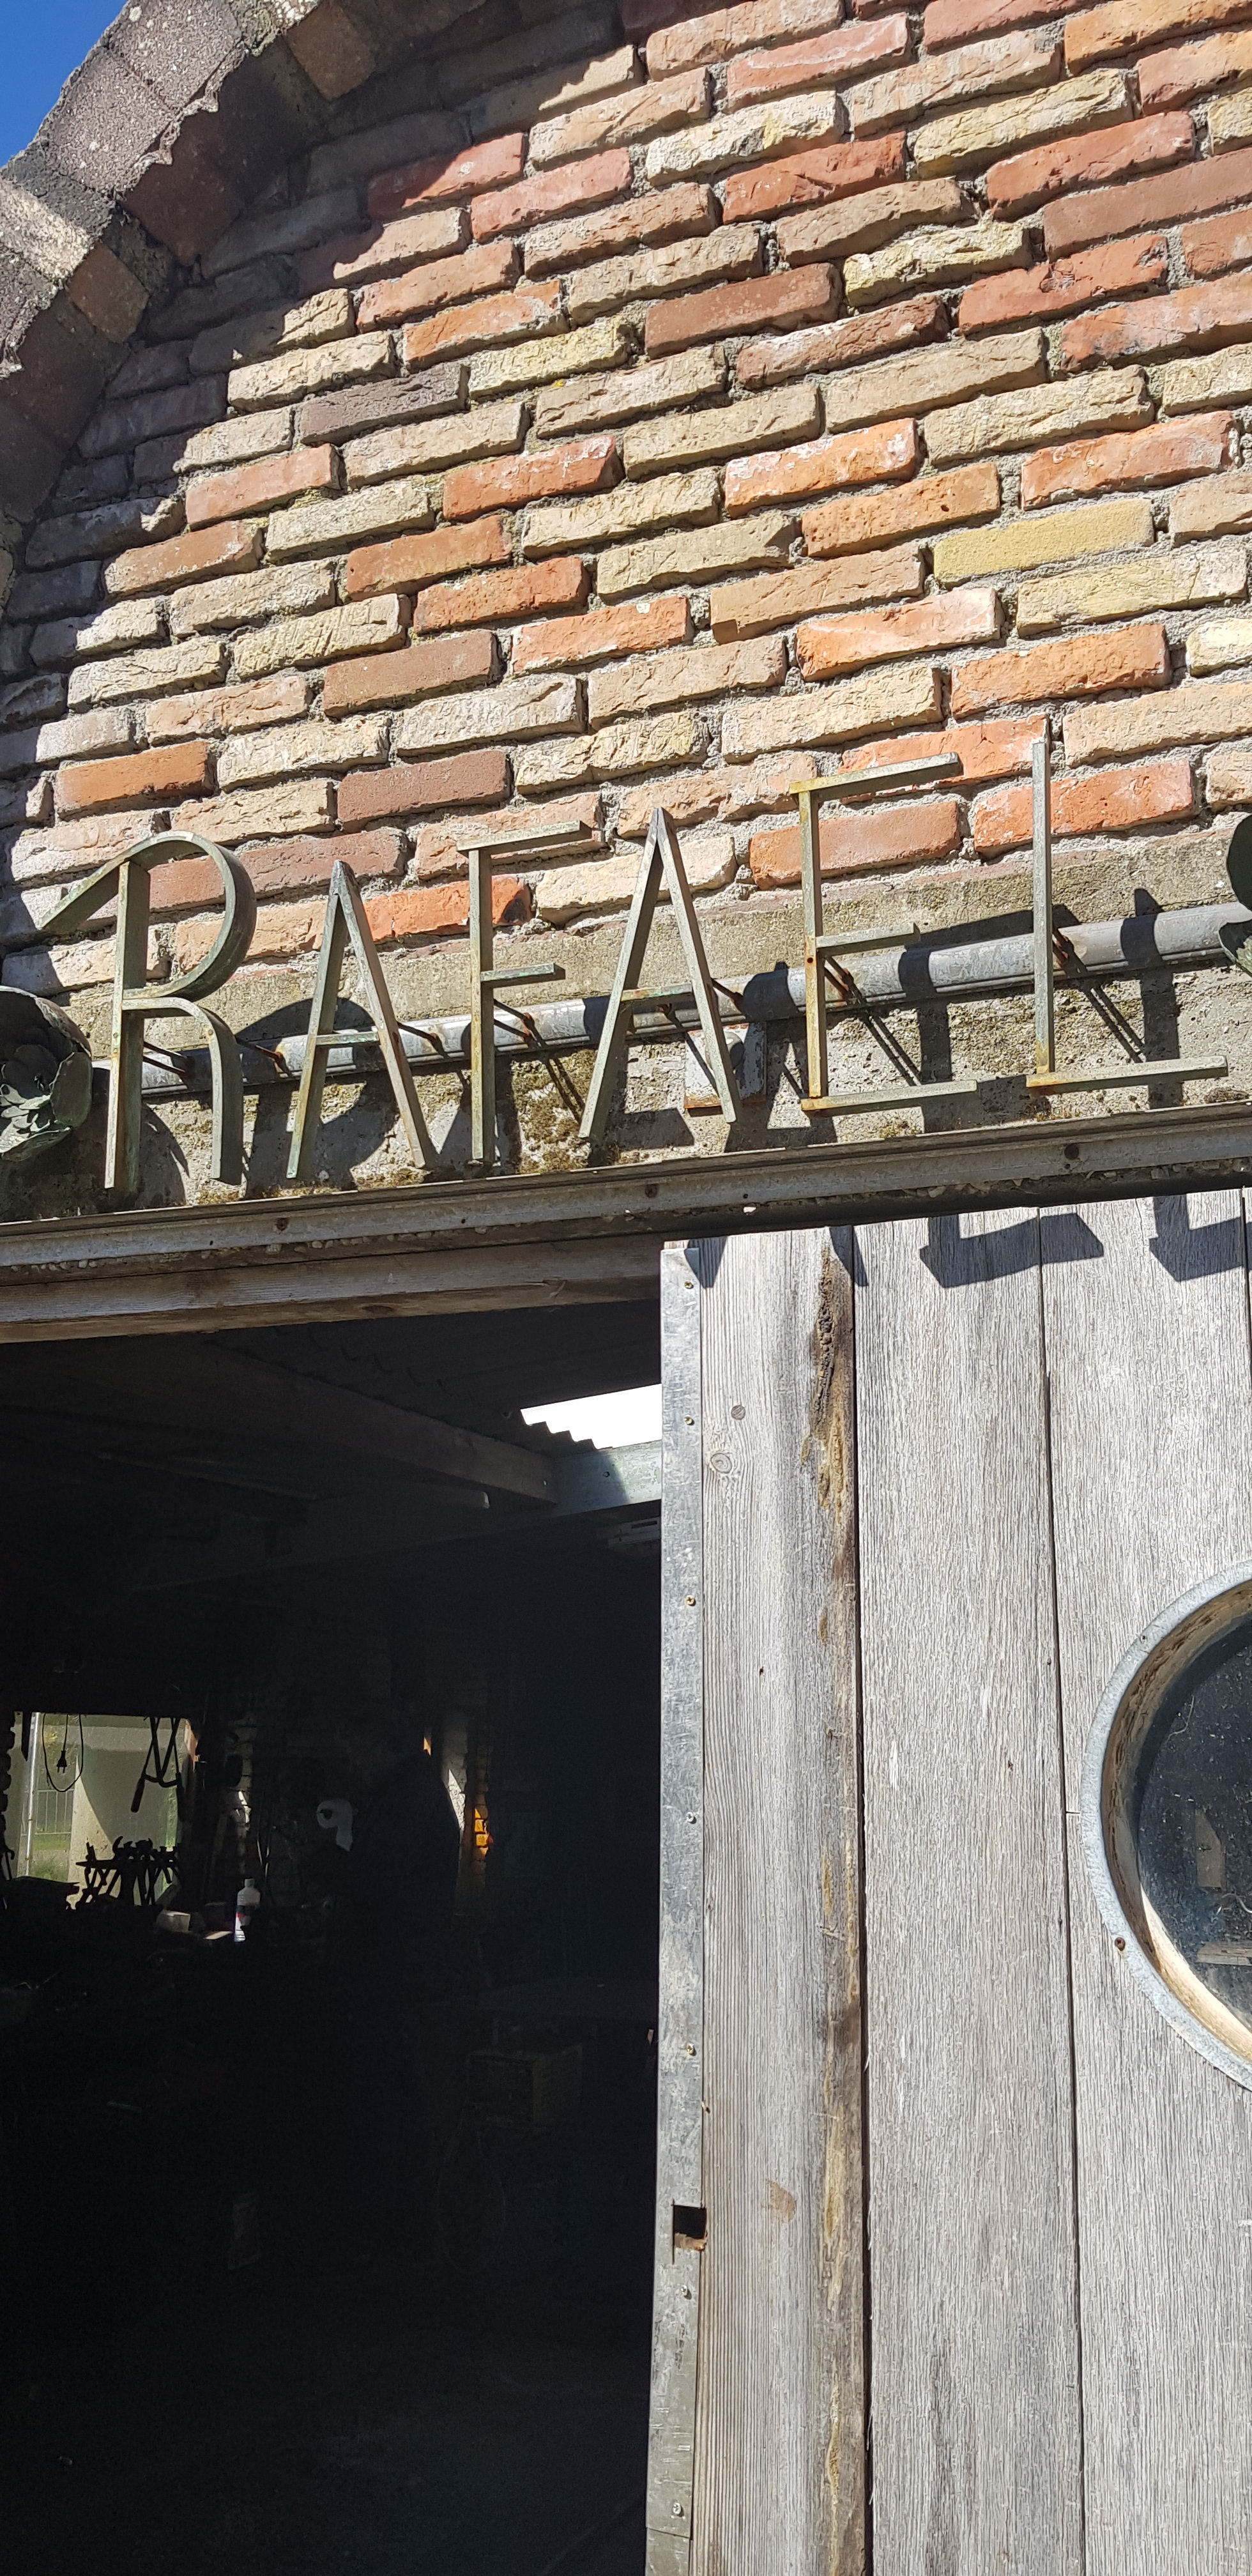
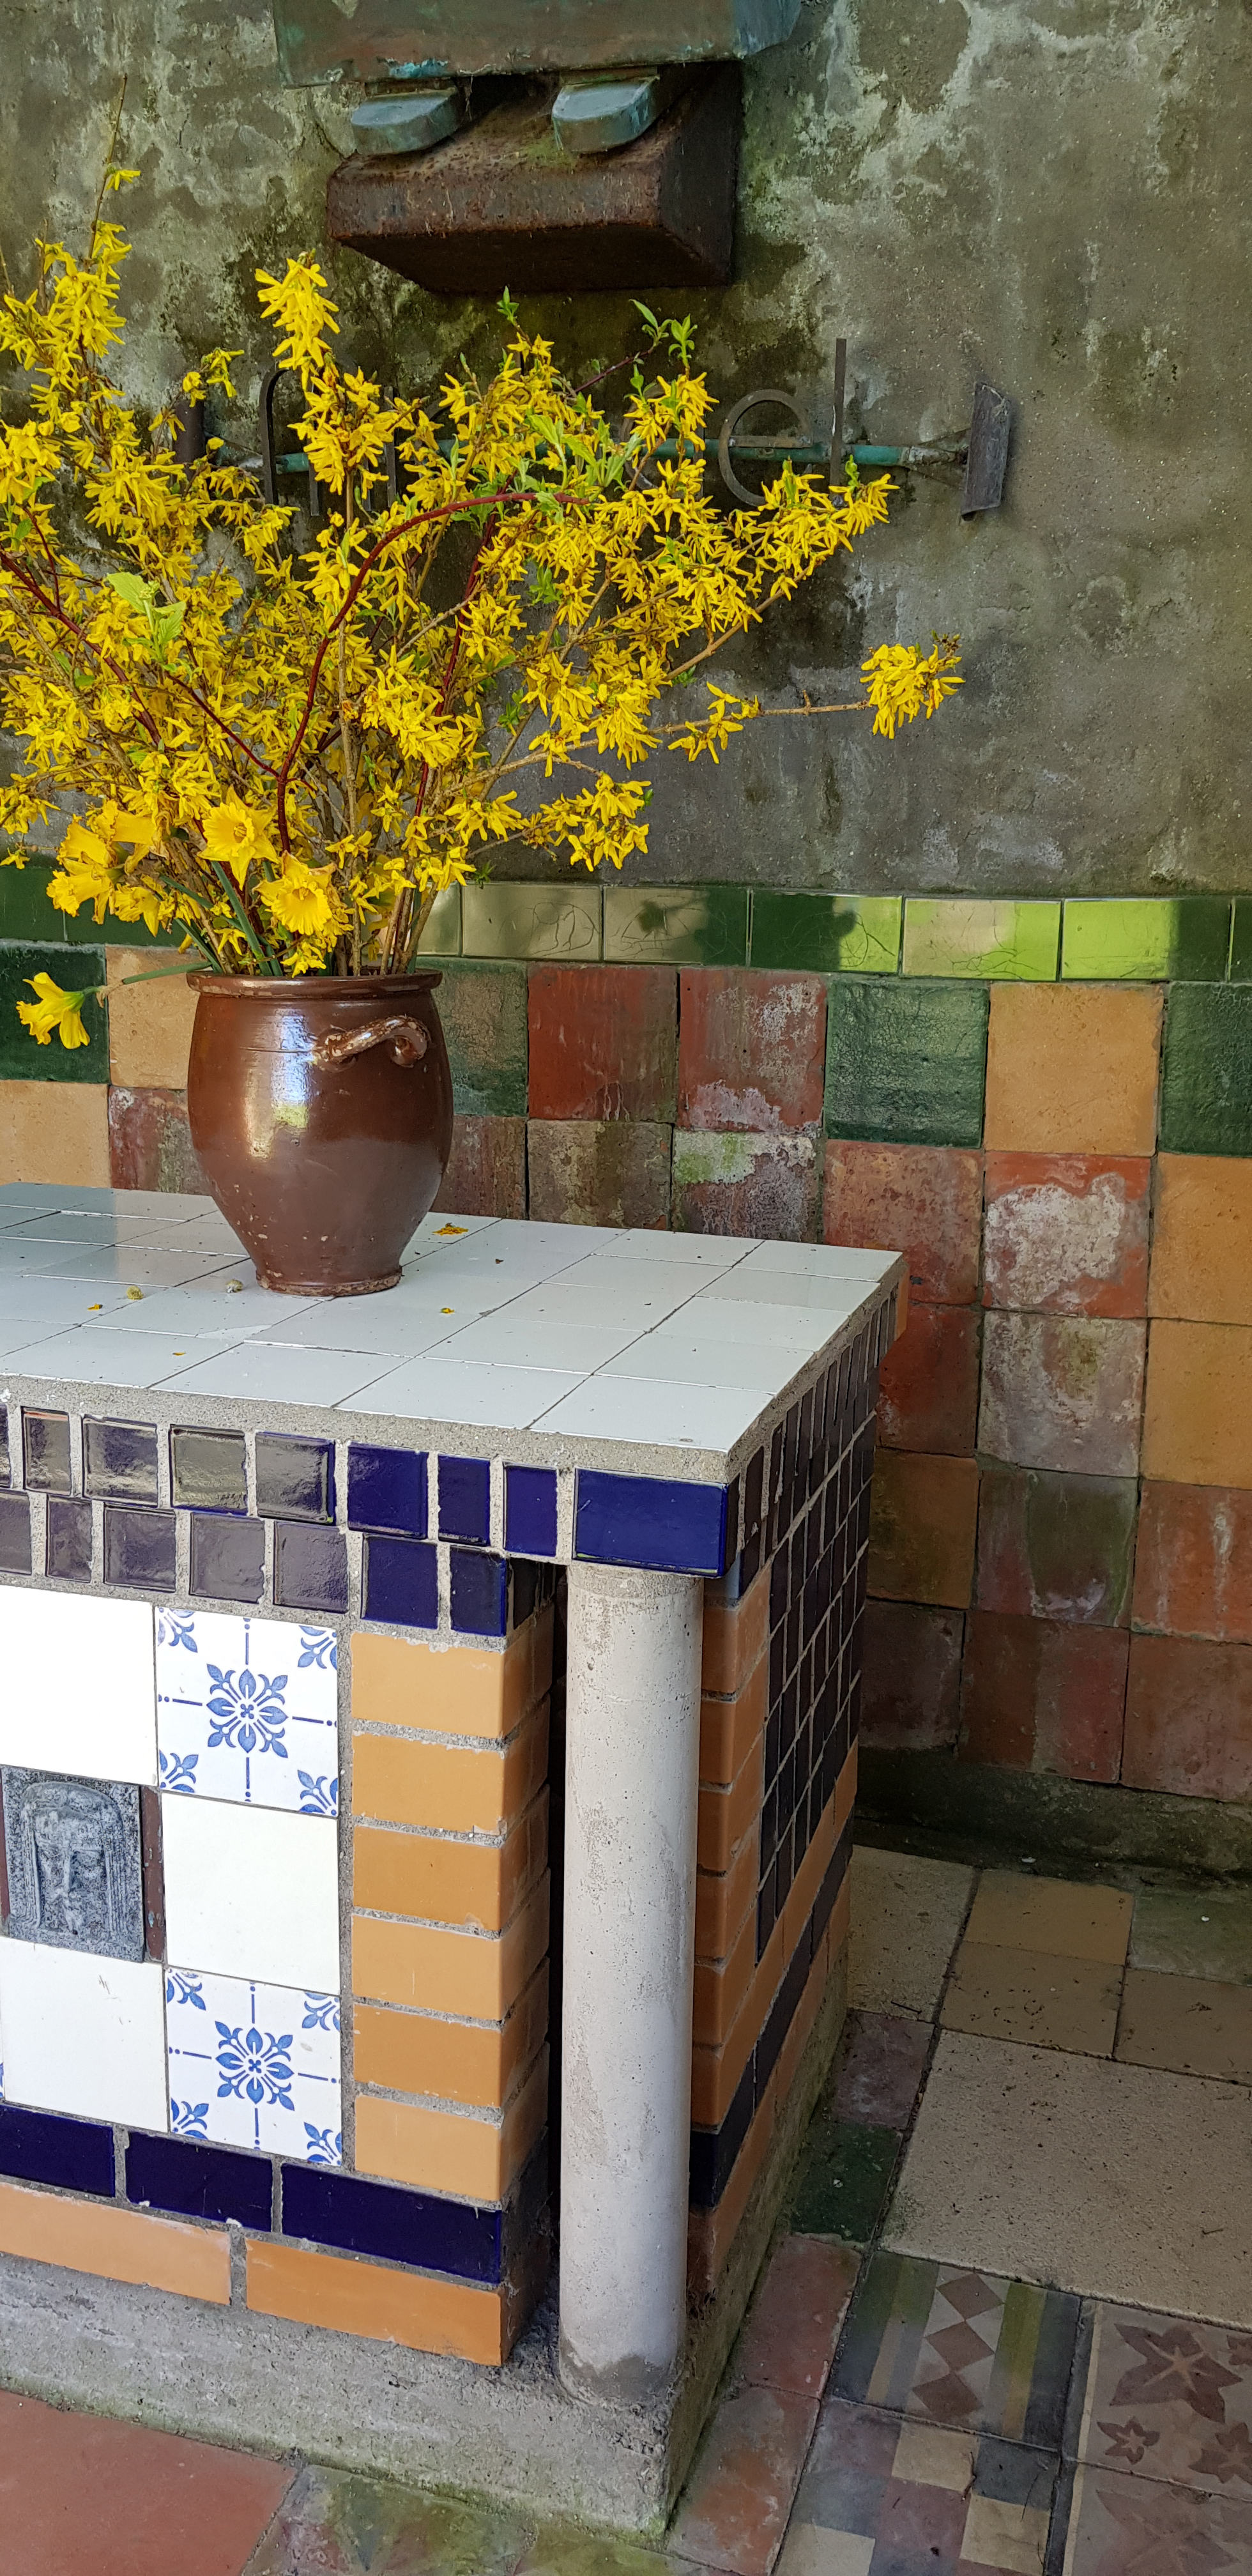
On this 1 hectare of land, Ger Leegwater (in his late 70’s), Mientje and a photogenic rescue rooster, called Gerrie, shares Ger’s love and passion for fantasy, mythology, history and unique craftmanship. Ger takes proud ownership of his knowledge of architecture and the endless creative possibilities of building materials, such as metals, antique Italian tiles and curbs.
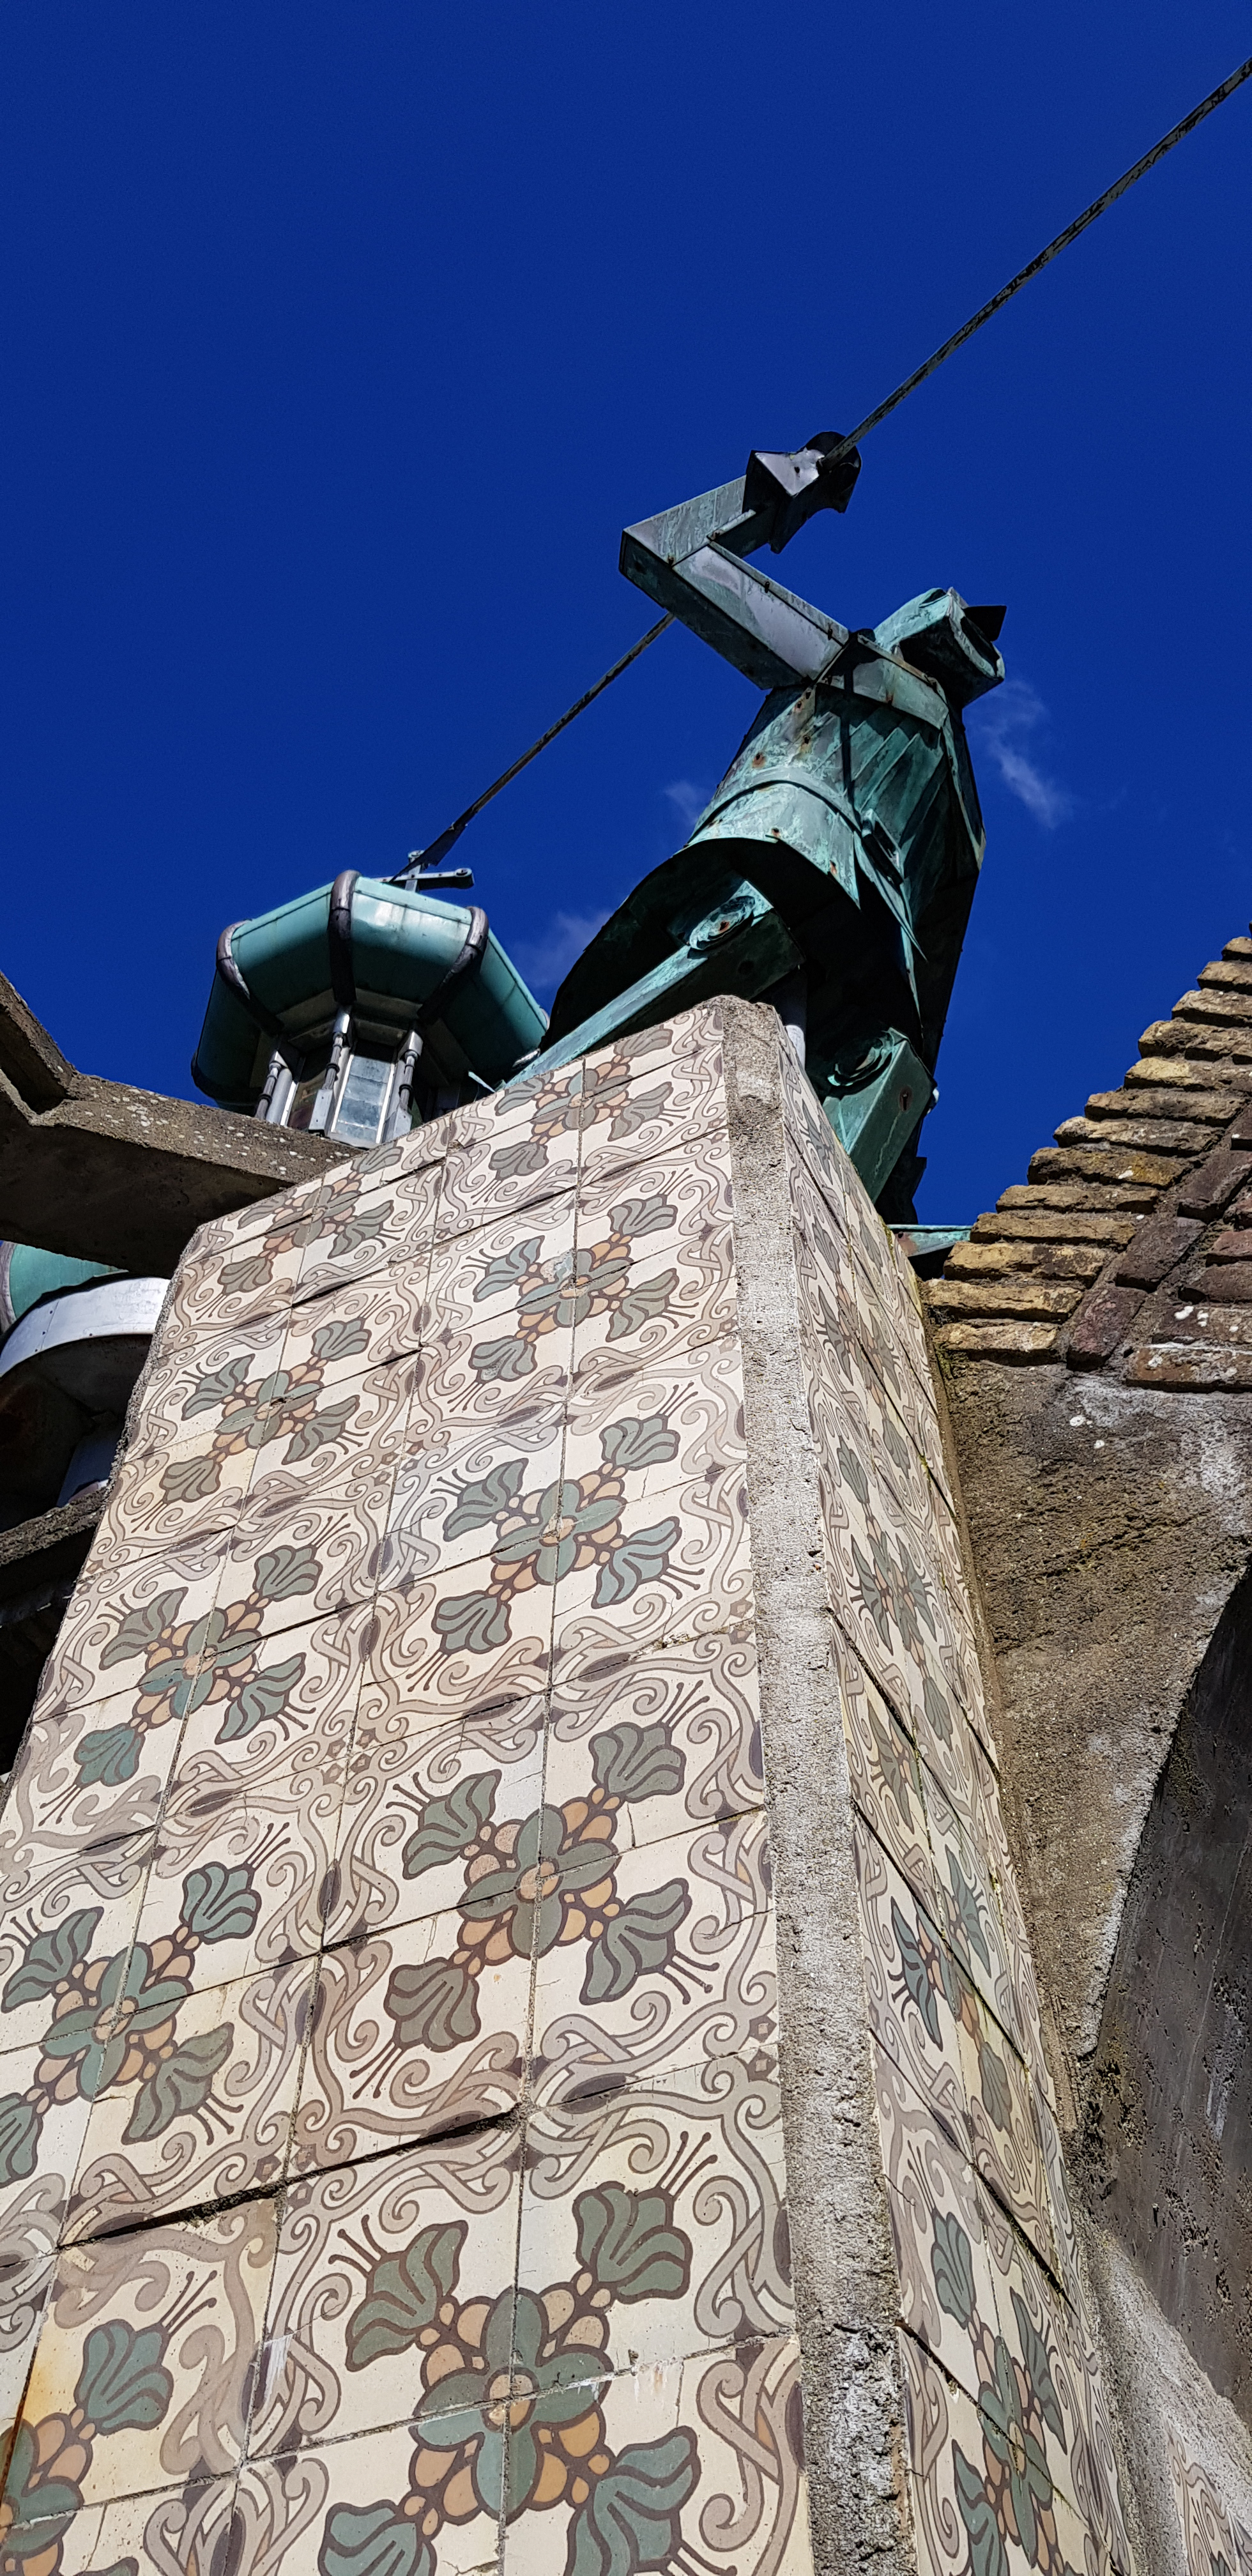
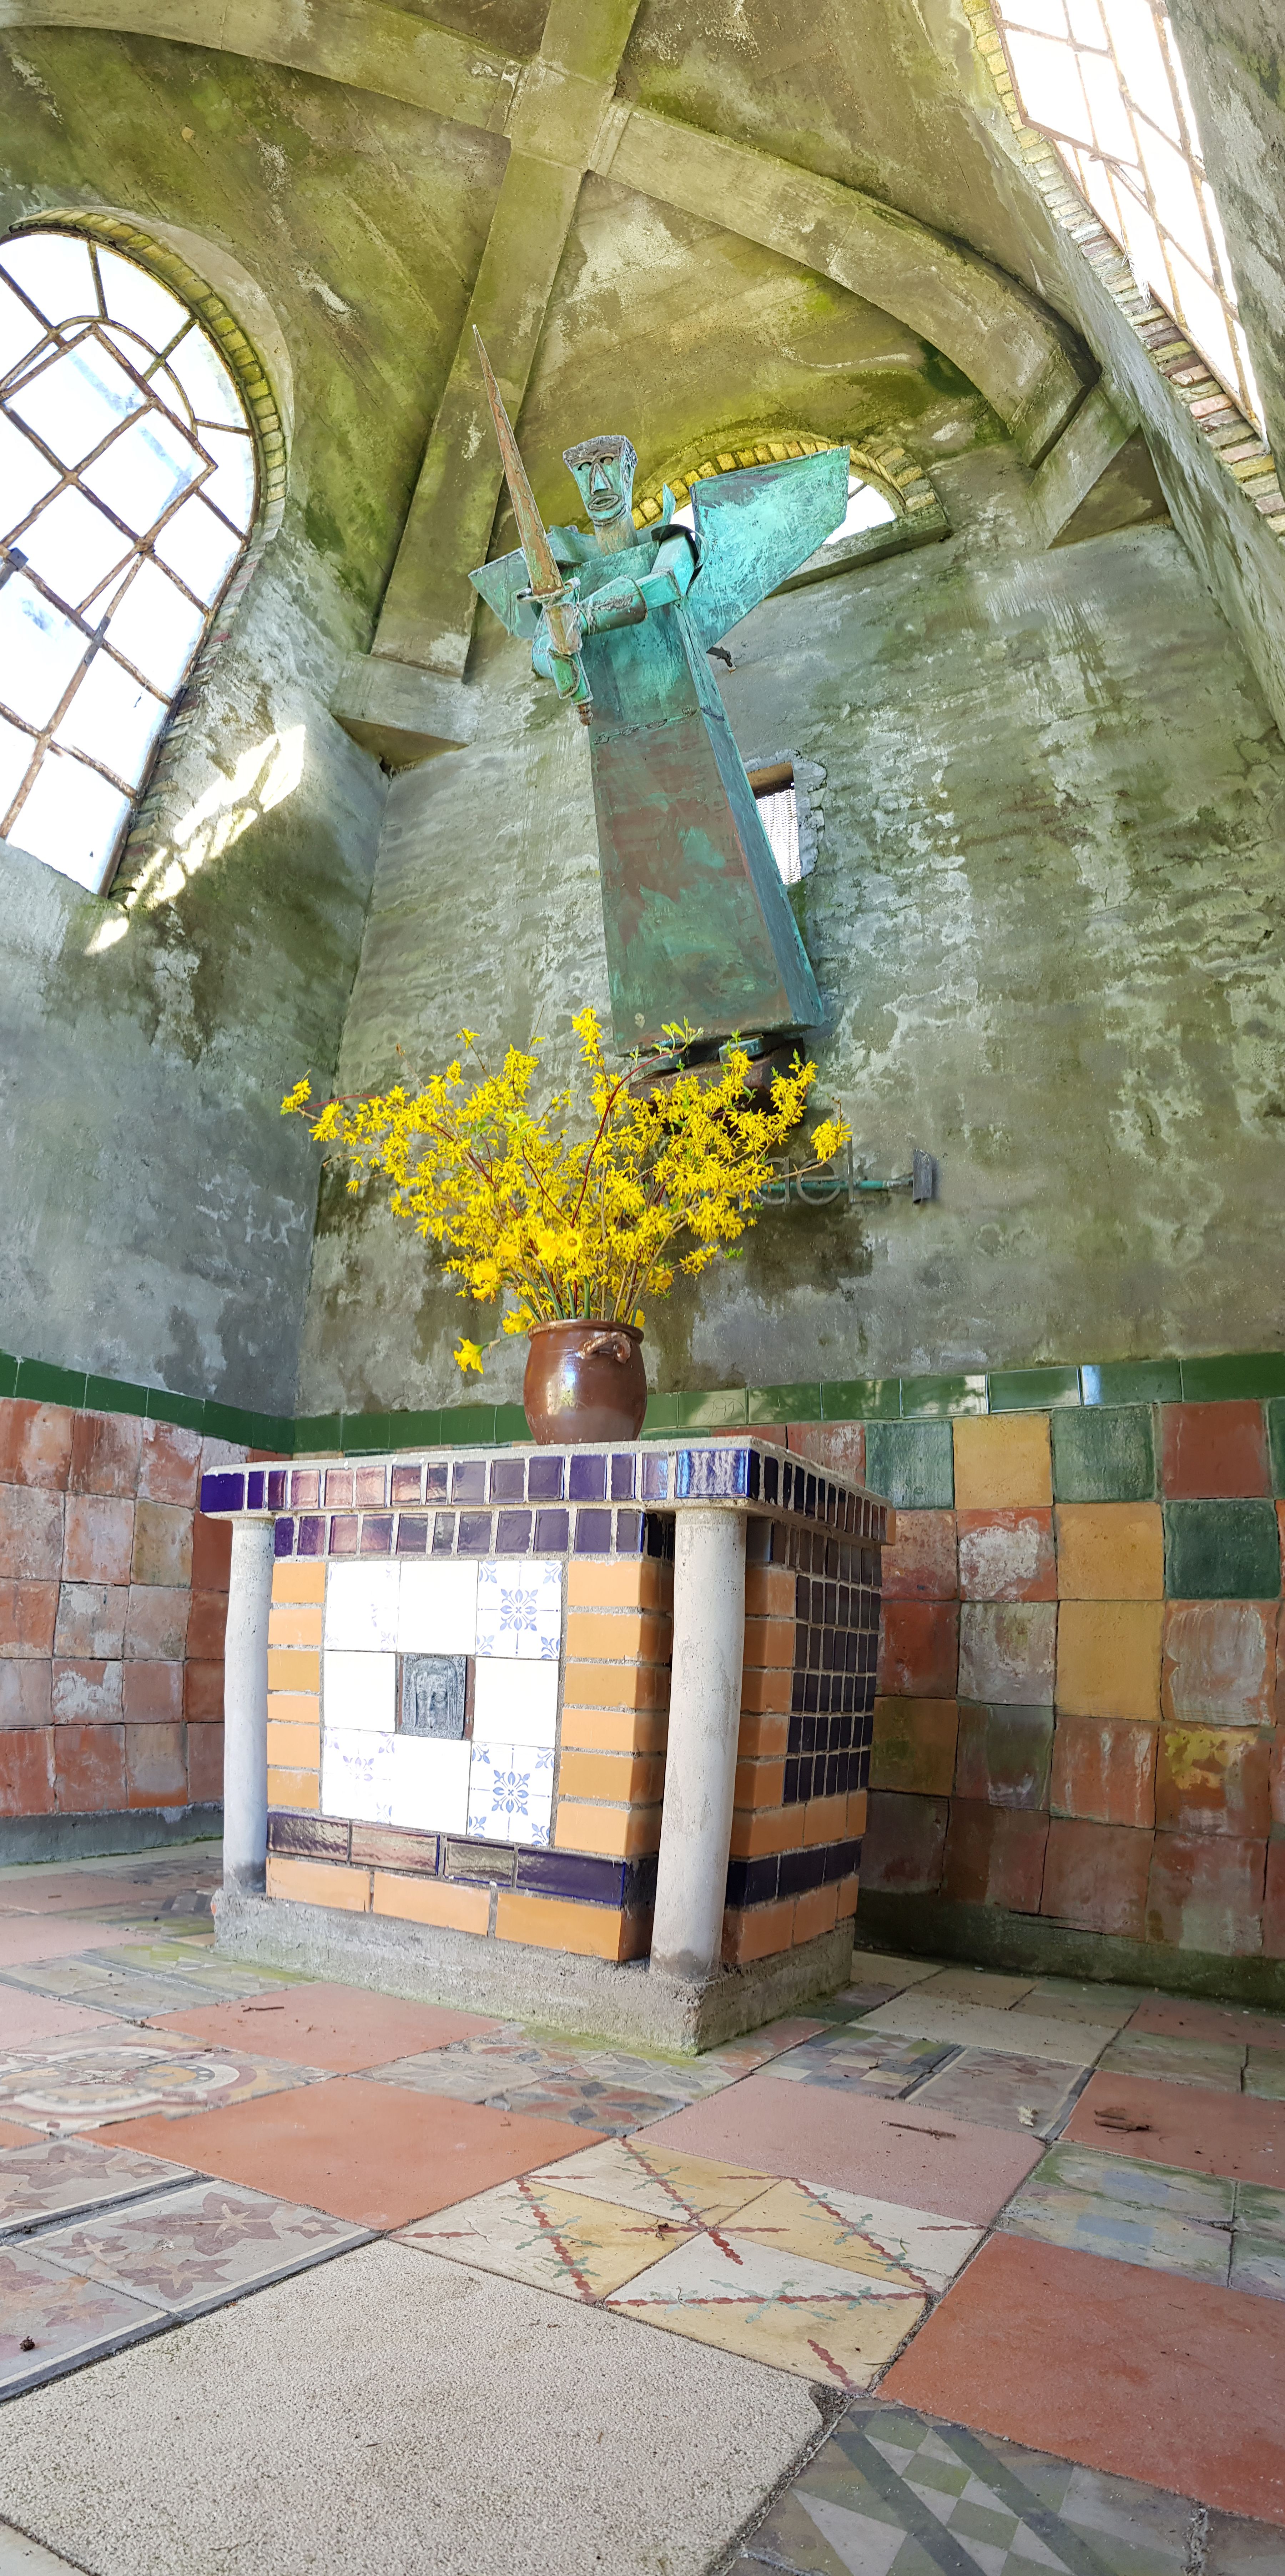
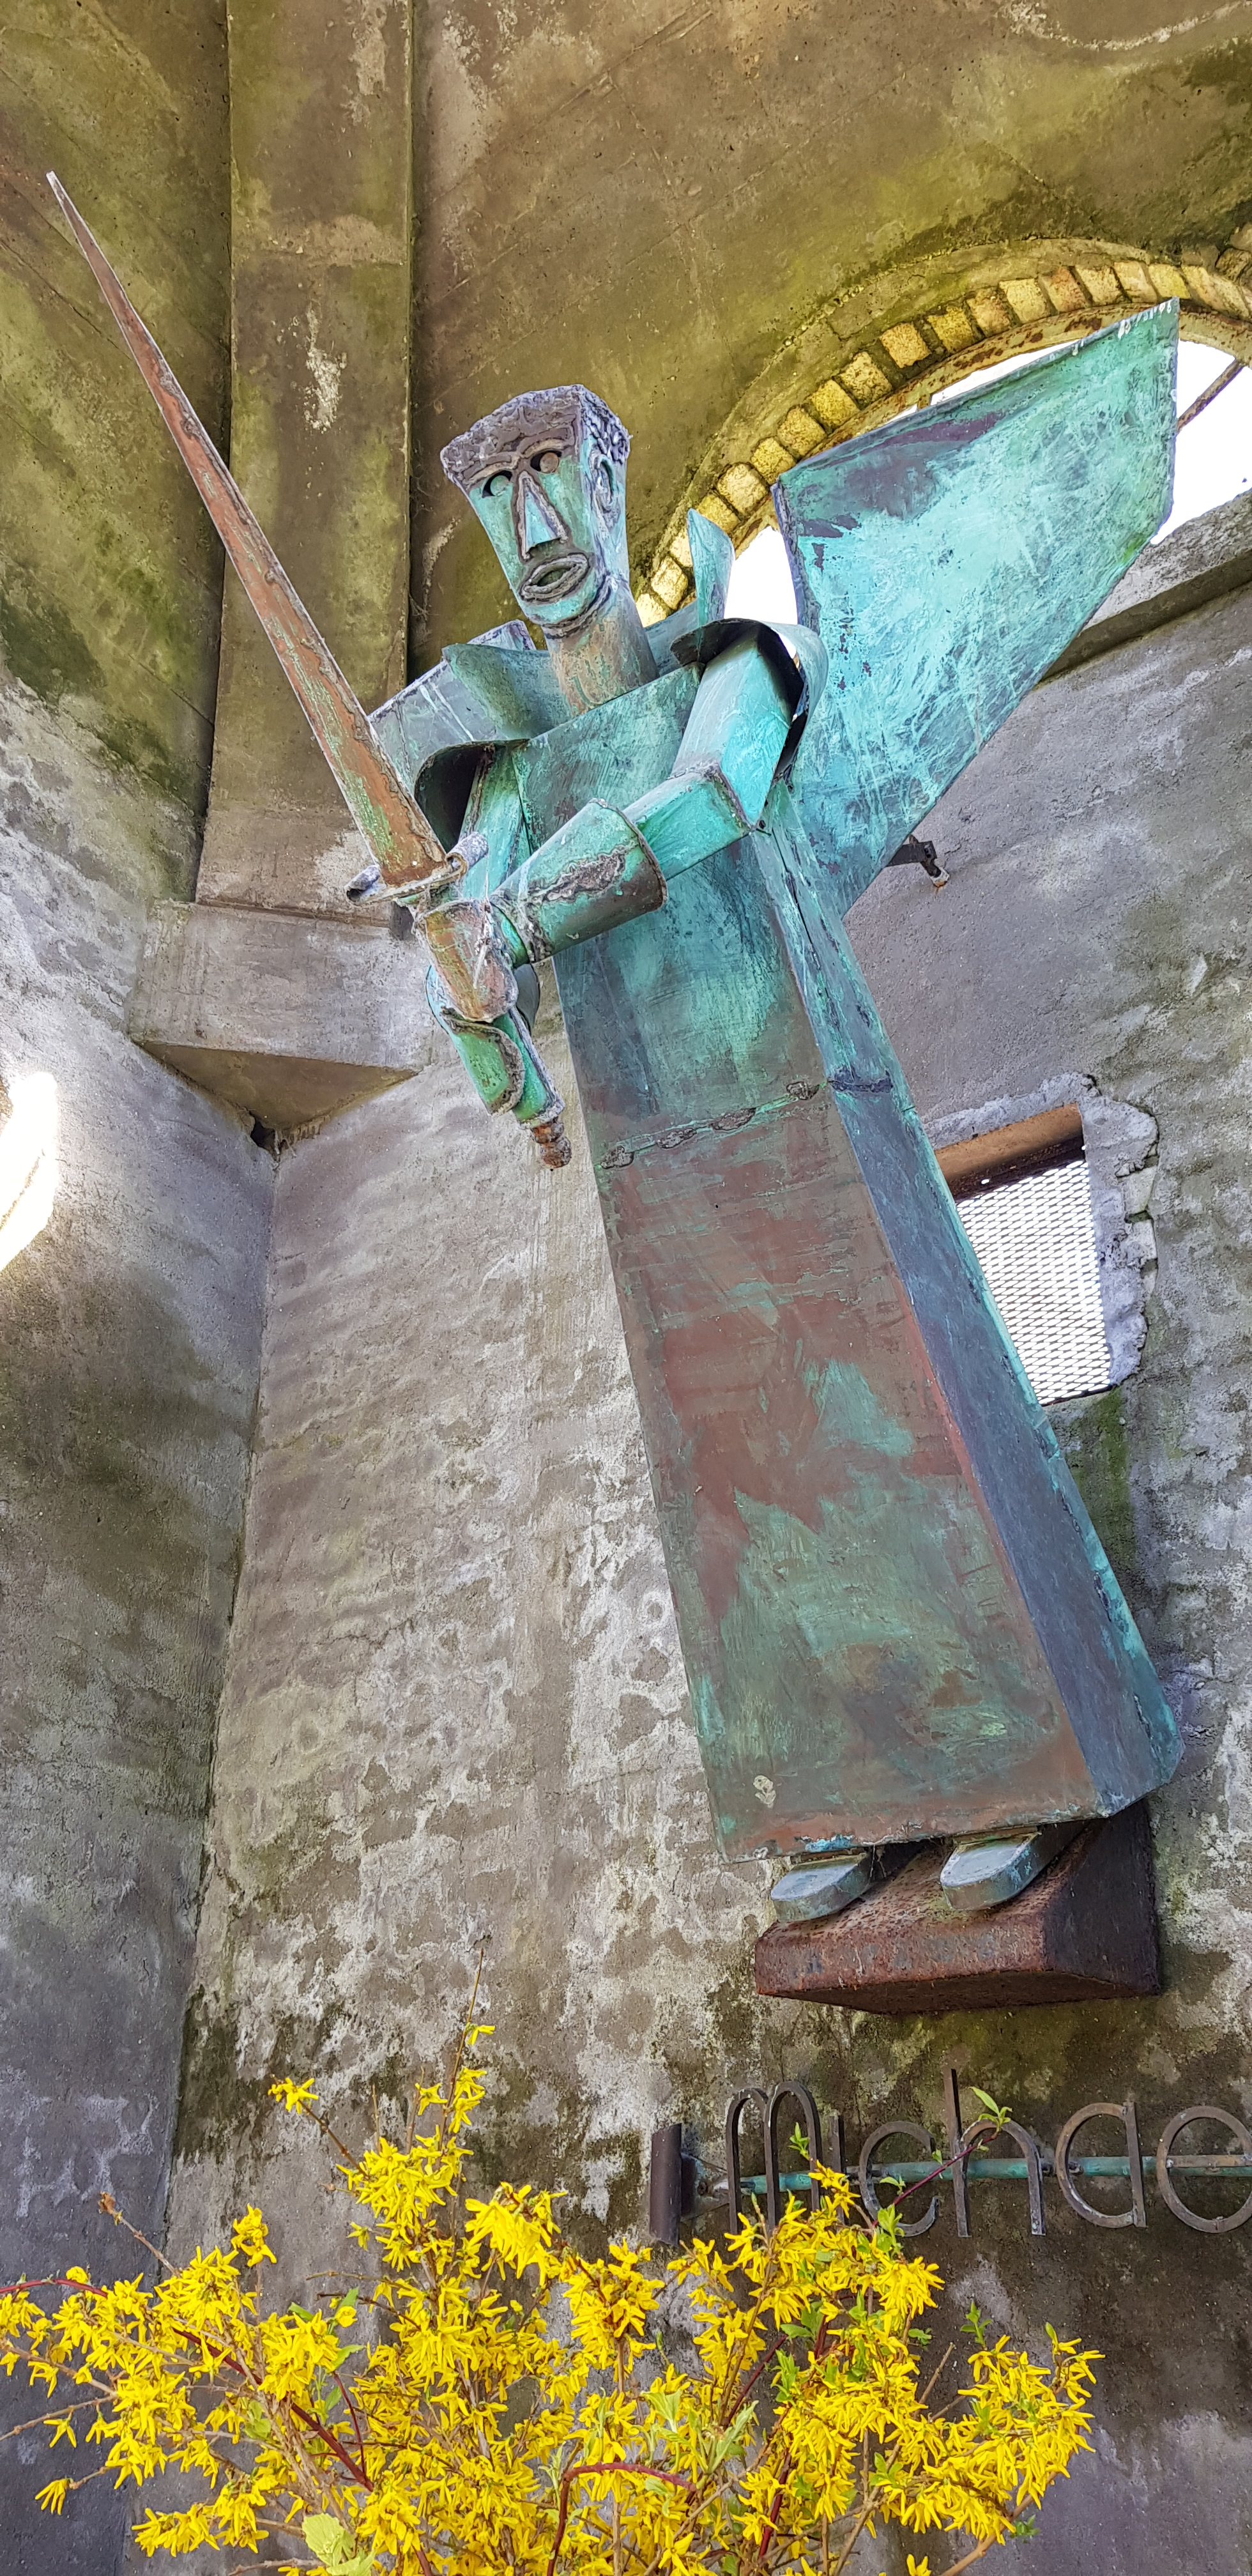
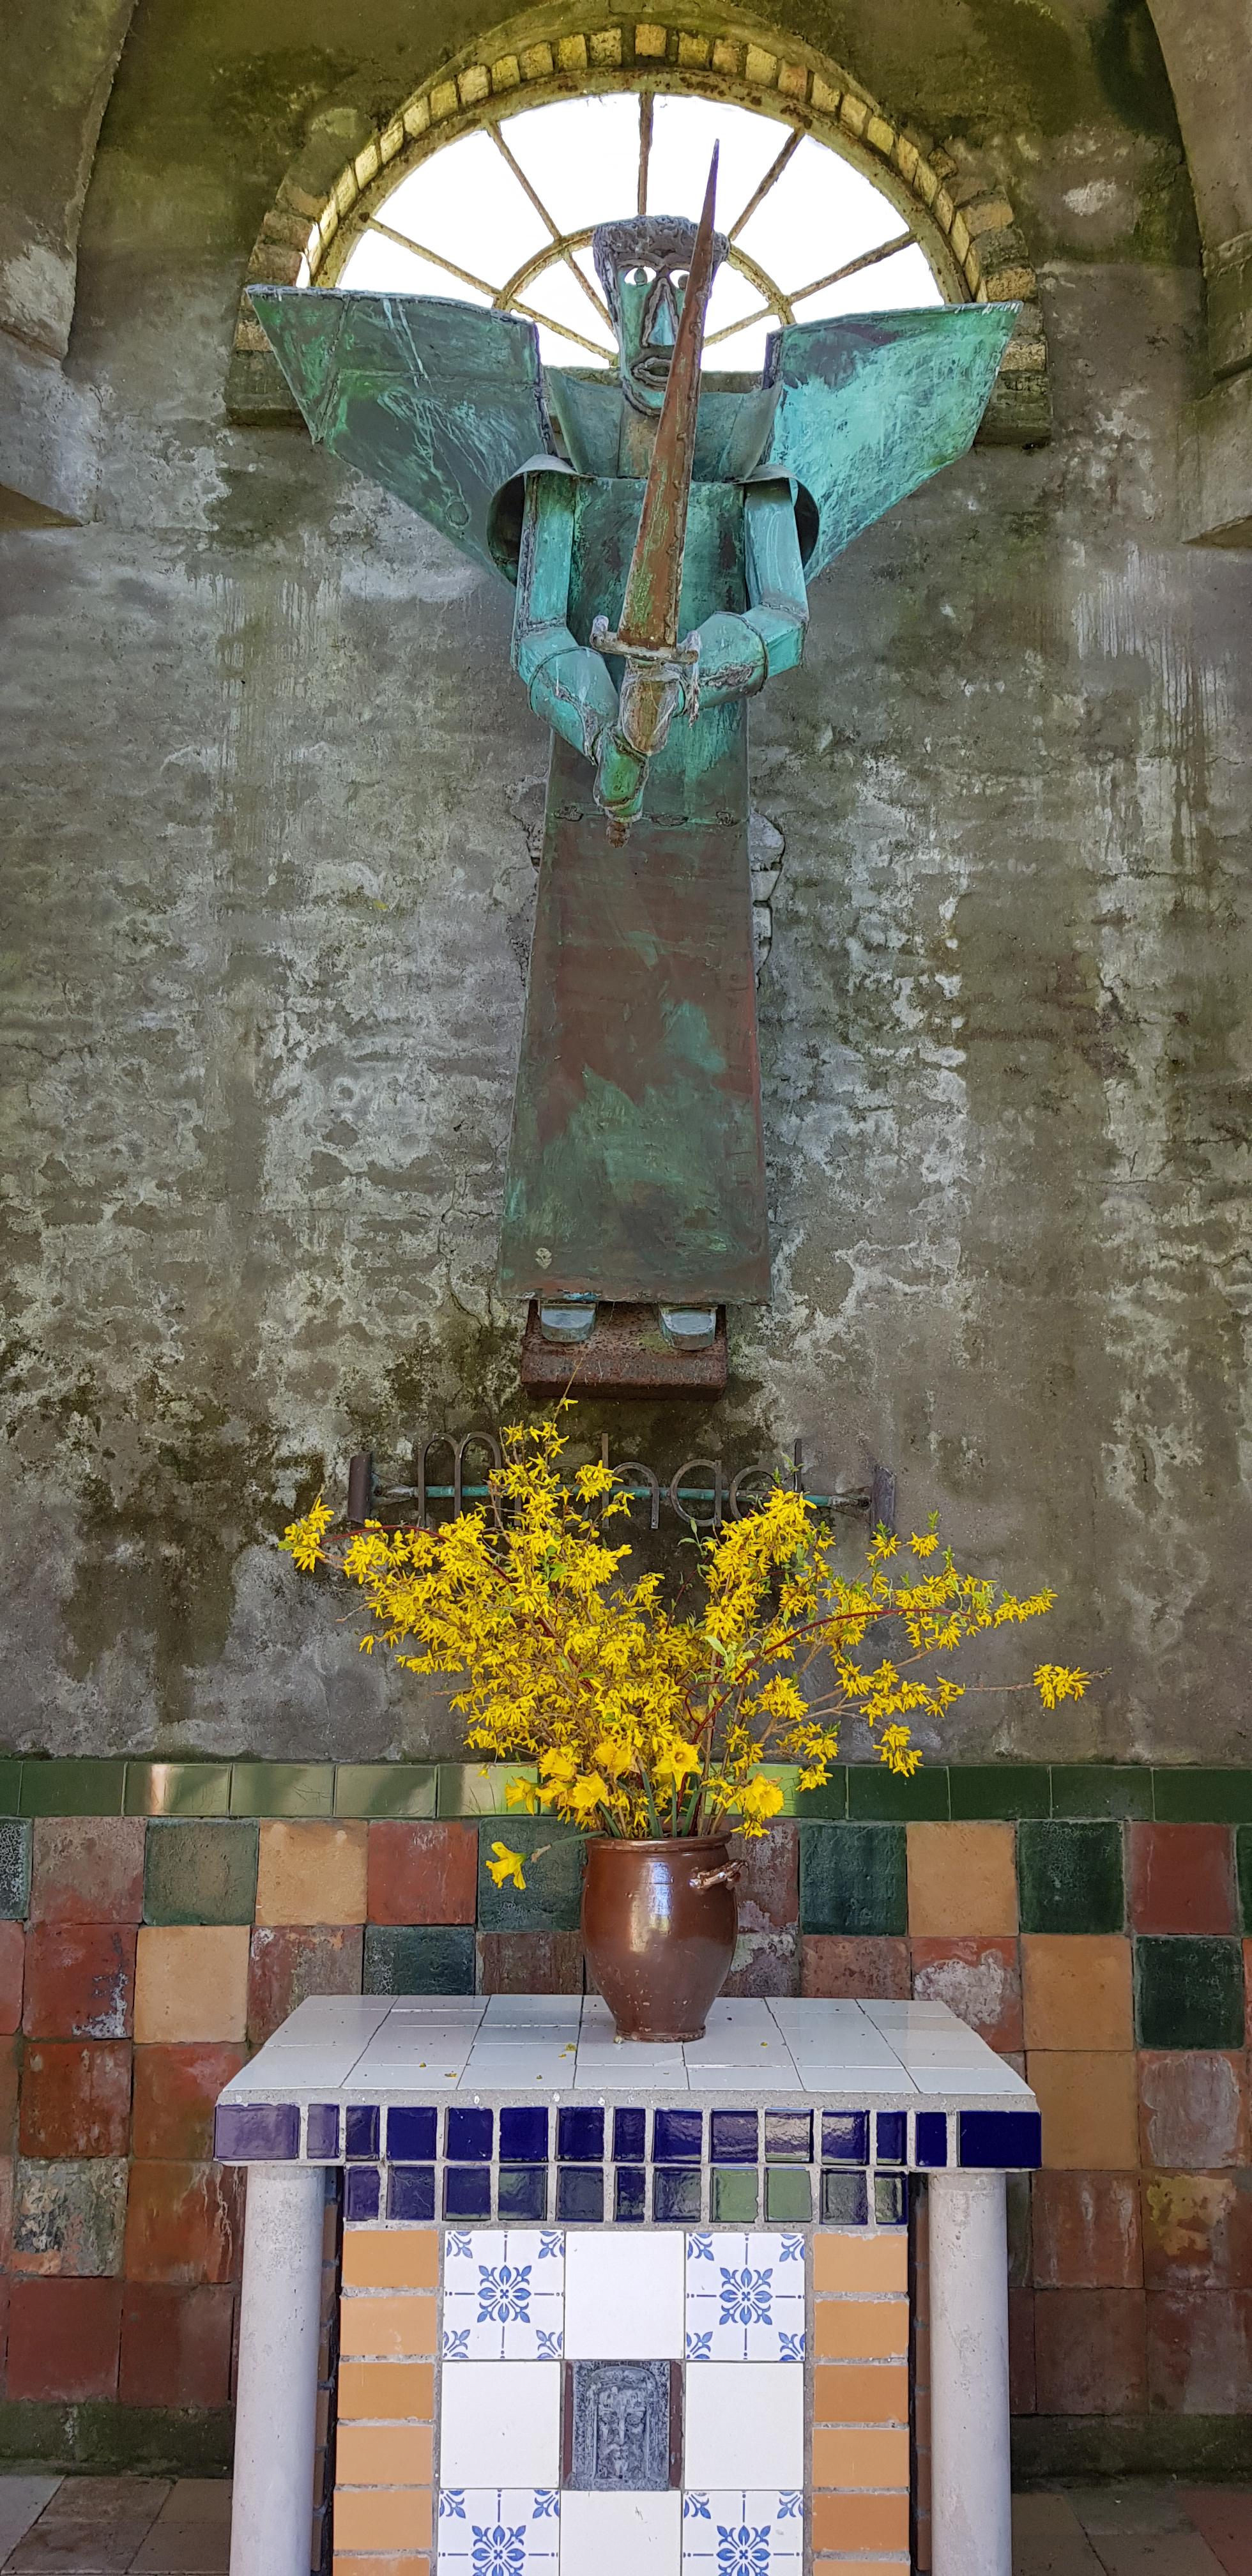
When entering this magical world, you immediately notice the Russian and Italian baroque influence of Bernini, Borromini and Rastrelli in the several buildings on this piece of land: The Michael chapel, Music room, Amphitheatre and the Winter Palace.
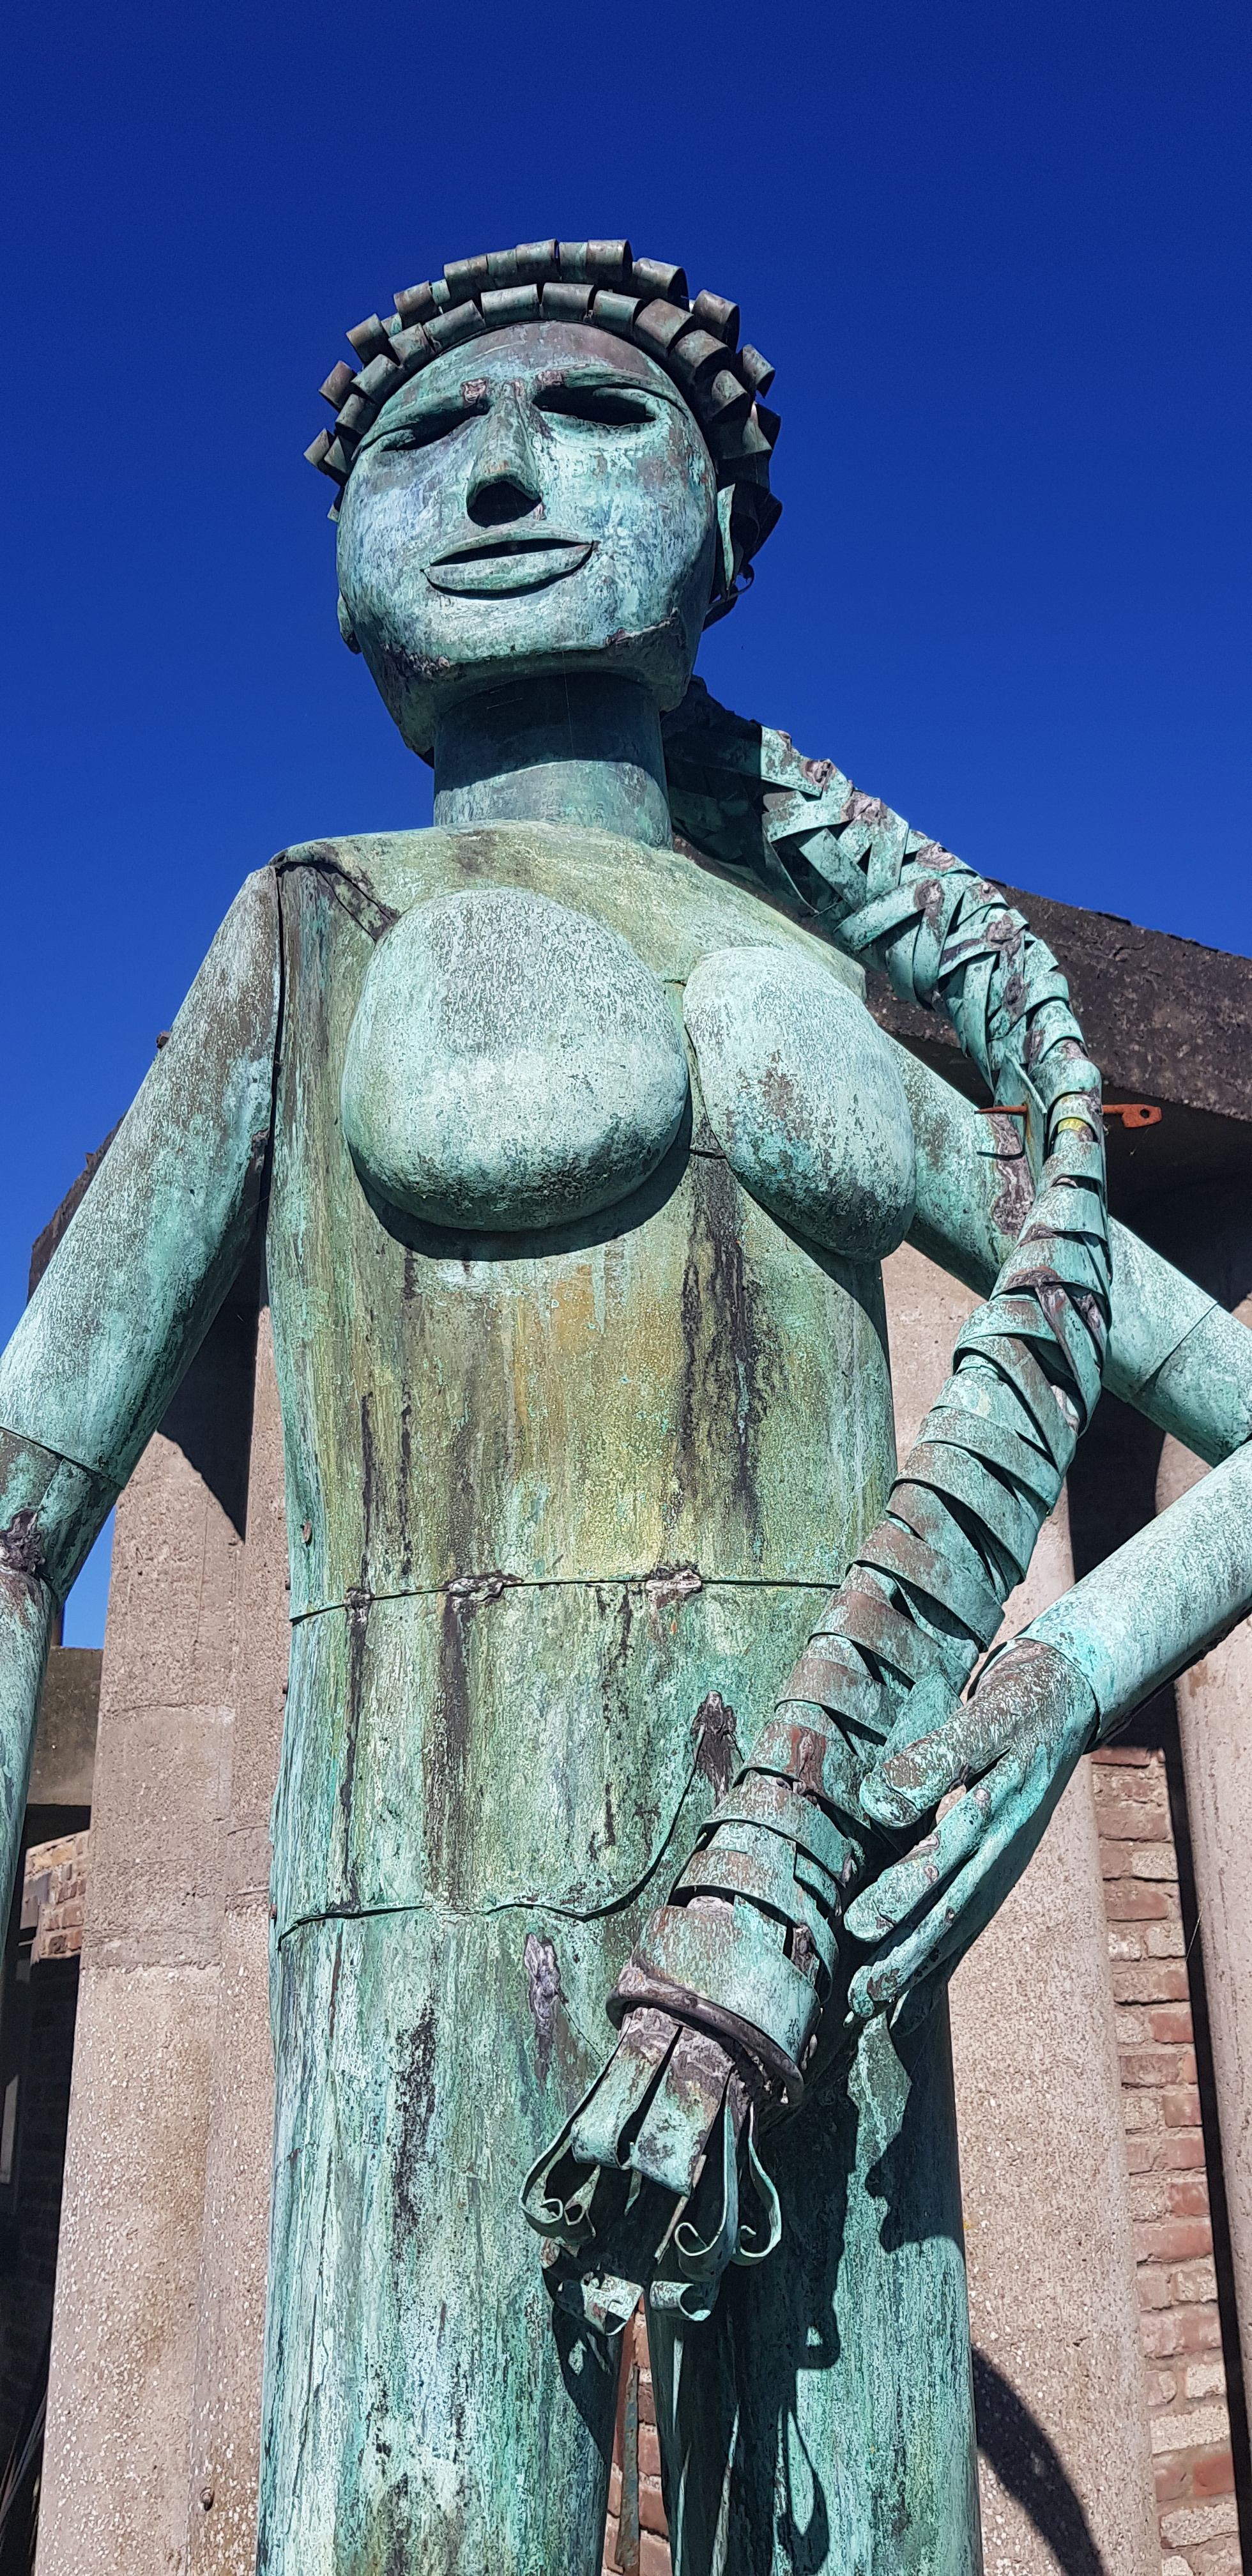
All of these structures are intertwined with mythological and biblical figures that majestically greets you while you wander through the garden.
Do not forget about the insects, fish and other beasts that lie beneath these giants like hidden treasures in the most unexpected places.
For me the most beautiful structures were the Chapel and the Neptunus fountain. The Neptunus fountain, including its obelisk, Triton and Pegasus was inspired by the Piazza Navona in Rome, Italy and this feature is a spectacular representation of Ger’s craftmanship when it come to the ability to ‘mould’ figures out of metal plates and objects.
The chapel with Archangel Michael is a breathtaking display of the warm colors of the tiles against the huge turquoise metal angel with its sword, fighting all evil and enemies to protect the people of God.
If you ever visit North-Holland, this hidden architectural and artistic treasure should be on your list.